Video: Adding fonts to the Korel program. Set the font in Corel Draw.
The collection contains 350 of the most popular RUSSIAN fonts for the program Coreldraw
In a few years, I had about 4,000 fonts. I bought them on disks, downloaded from the Internet, took from friends. I thought that the more fonts I had, the cooler my works would be.
In any piece of paper, I inserted a bunch of different fonts, creating torture for the eyes of readers, and rejoicing at the same time as my “creativity”. With experience, I realized that a lot of fonts in the text are bad.
Look, there is only one font on my site - Verdana. I bet that you are reading my articles because the texts are visually perceived. Your eyes and attention are not strained and you fully concentrate on the content of the text.
Remember! The font is needed in order to write the text. The text is written in order to read it. A well readable text that is written in a legible font. Want to read your text - write it in human font!
Leave the heaped and creative fonts for logos, labels, labels. In short, for those cases when you need to create a short label that attracts attention. I selected for you about 350 Russian fonts that are most often used.
Instruction
Download fonts to your computer that you want to add to the program Corel Draw. To do this, go to the site with fonts, for example, http://www.ph4.ru/fonts_fonts.ph4?ja=, select your favorite fonts, click on the "Download" link and download them to your computer. To include a font in Corel Draw, go to the folder where you downloaded the fonts, copy them. Then go to drive C, open the Windows folder, then the Fonts folder. In an empty space, call the context menu and select "Paste." Wait until the installation of fonts. Run the program Corel Draw, make sure that the selected fonts are added to the program.
Go to the site http://soft.zerk.ru/font/fontnavigator/, and download the program Font Navigator, this program will allow you to install fonts in Corel Draw. On the site, click the link "Free Font Navigator Download". Wait for the file to download, run it and install the program on your computer. When you first start the program, the Add Font Wizard will start. Select the folders in which the font files are stored to add fonts in Corel Draw. Click "Finish" and wait for the wizard to complete the scan. After that, the list of fonts in alphabetical order will be displayed in the left part of the window.
Select the desired font, in the right part of the window the sample text displayed in this font will be displayed. Call the context menu on any font and select the type of font you want to set, for example, artistic. You can also send sample text to print to see how the font will be displayed on paper. To enter a font in Corel Draw, select it, right-click and select Install Fonts. Wait for the operation to complete, exit the program, and run Corel Draw.
Corel Draw is a powerful vector graphics editor with which you can create any image, starting with the file icon and ending with complex graphic design of the rooms. To enhance the capabilities of this utility, you can use various design "buns", including packages of additional fonts.
You will need
- Corel Draw software.
Instruction
In the Windows operating systems, there is one rule - to install fonts for any program, it is enough to add them to the system folder. Therefore, it is impossible to install fonts specifically for the program Corel Draw, they will be displayed in all programs, which is a big plus.
First of all, select the fonts you want to add. If you have few new ones fonts, their collection can be replenished on one of the sites that are engaged in accommodation fonts. Click the following link http://www.azfonts.ru. On the page of the site you can see the information that you have about 70 thousand fontsthat can not but rejoice.
Initially select a category fonts or use the search form if you know the names fontsthat you need. For example, you need Cyrillic fonts. On the main page, go to the Categories section and click the Cyrillic link.
On the downloaded page, select the font and click on its image. You will automatically be transferred to the page viewing this font. If it suits you, go to the font download box (“To download the font”), enter the numbers and letters in the image in the empty field and press the Enter key. This way you can download large quantities fonts.
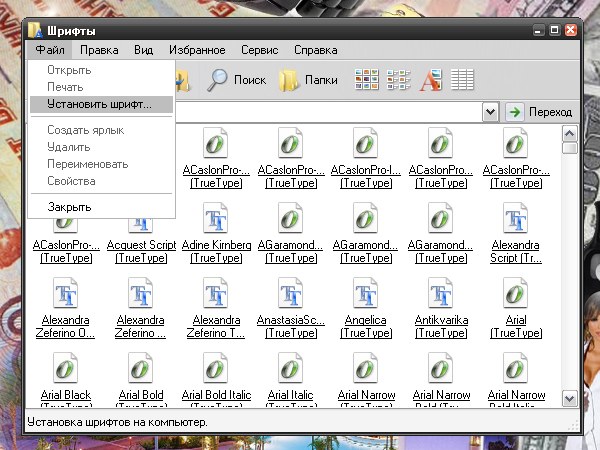
After the right amount fonts was copied, proceed to their installation. Click the Start menu and select Control Panel. In the window that opens, double-click on the Fonts icon.
Now click on the top menu "File" and select "Install Font". A window will appear in front of you, in the "Folders" section, you must specify the location of the directory in which the new fonts are located (using the "Explorer").
In the top block "List fontsAll fonts should be displayed. Highlight them by clicking the “Select All” button, then click the “OK” button.
Run Corel Draw to view the files you just installed. fonts.
The graphic editor CorelDRAW provides the ability to enter text. Fonts, made in different styles, help to make the document more attractive and thematic. New fonts can be found both in collections and as single samples. They can be burned to discs or offered in a wide variety on the Internet. Having found a suitable font, the user will need to load it into Corel.
Instruction
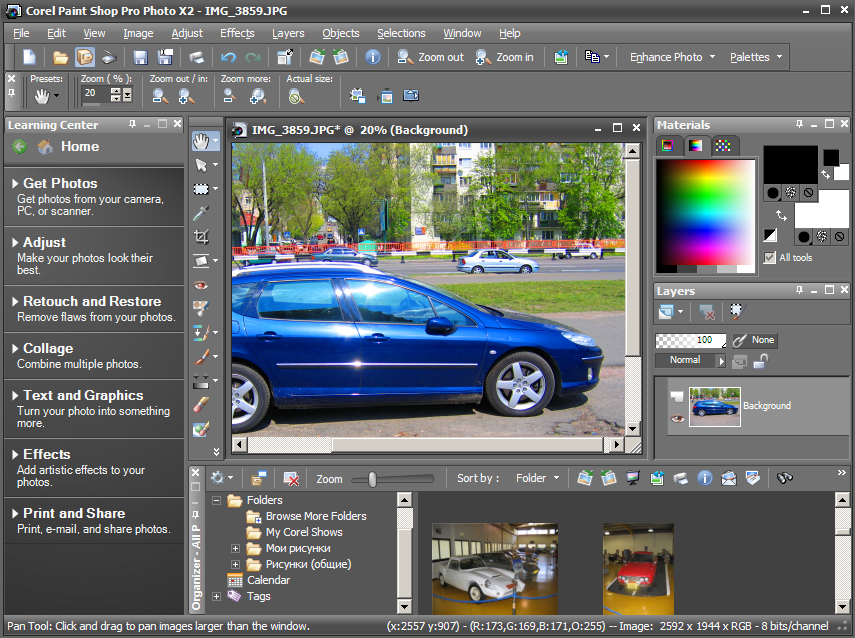
Fonts for text and image editors are loaded in the same way. The fact is that almost all programs that provide text input, when choosing a font style, access the same files on a computer. Therefore, it does not matter for which particular application you want to download fonts: CorelDRAW, Adobe Photoshop or Paint.net.
If you downloaded fonts from the Internet as an archive, unpack the files from it into a separate folder. Remember the directory where you saved them. The fonts in your folder should have the extension .ttf or .otf. On discs with collections, fonts, as a rule, are ready for installation and do not require additional preparatory actions from the user.
There are several ways to install fonts. The first way: go to the folder where your fonts are stored. Select the desired font with the left mouse button and copy it to the clipboard using any of the available methods (using the right mouse button, keyboard keys or commands in the top row of the folder menu).
Through the "Start" menu, call the "Control Panel". In the “Design and Themes” category on the left side of the window in the “See Also »right-click on the line-link" Fonts "- a new window will open. If the Control Panel has a classic look, select the Fonts icon right away. Click in any free space in the window with the right mouse button and paste the newly-copied fonts into the Fonts folder from the clipboard.
Another way: open the Fonts pack in the manner described in the fourth step. In the File menu, select Install Font. In the "Add Fonts" dialog box that opens, select the drive where your fonts are stored. In the "Folders" field, double-click the folder containing the fonts.
In the Font list box, select the font you want to add. If you want to add the entire collection of fonts available in the folder, click on the "Select All" button. Click on the OK button in the upper right corner of the window. Selected fonts will be added. Launch Corel and customize the text to your liking.
It is easy and convenient to work with small amounts of text. By default, there is a list of headsets embedded in the system, additional ones need to be purchased or downloaded for free, if there are such offers, and you can also create them yourself. Now let's talk about how to install the font in Corel Draw.
How to install the downloaded font
- Only one style is active, for example, Normal, and Italic and Bold are gray and unavailable. This means that either in the archive with the font there are none at all, or they are presented separately. How to add the necessary? Check whether these files are in the archive, and download them separately.
- Too big (small) double-letter spacing in the set font. Kerning can be fixed with the “Figure” tool: just click on the word and pull on the marker.
- Some letters are missing in the Cyrillic headset. If you convert the text into curves, you can replace some characters with Latin ones or draw the missing letter.
And finally, before adding a font to CorelDraw, make sure that you really need it: in the extensive list of headsets, it is more difficult to find the right one, and in addition, it may hang slightly.
Type 1 or TrueType fonts belong to a group of vector drawings. They vary in size without loss of quality. Each character describes the vectors stored in the font installation file. On the PS platform, the TrueType file has the .ttf extension, and Type 1 consists of two: pfb and pfm (it stores information and file history). On the MAC platform, the differences in the file structure are insignificant, the font creation process is the same, only the choice of compression is different.
To create a digital font:
- Draw vector objects.
- We export them to ttf or pfb + pfm.
Programs with which you can draw a font, a lot. The second part already requires special skills and programs.
On a positive note, CorelDraw has an export font filter. Simply put, the whole process of creating a font can be done from beginning to end, without leaving the program.
That is why we consider in more detail the tools CorelDraw, designed to create, edit various characters. More information can be found in the user manual - it describes more accessible drawing tools than in the highly specialized font creation program. However, some details, such as hinting, spacing, kerning, still require professional tools, which are only in specialized programs.
Hinting, or hinting, allows you to systematically distort the elements of characters when converting from a contour format to a raster, depending on the size and resolution of output devices. This operation is performed in order to remove sharp and irregular curvatures and to improve the visual perception of symbols on users' monitors, be it a smartphone or a computer.
Kerning, or kerning, sets the distance between a kerning pair (just two font elements) in a proportional font in order to improve perception.
Spacing - letter spacing, distance.
CorelDraw brushes

Not everyone knows that the creation of brushes is interrelated with the outline and the line. In fact, a brush stroke or sprayer is built along the line of the path.
Corel Draw allows you to create a variety of brush blanks, from strokes with a tip, to strokes filled with a rainbow pattern. Also when using brush strokes using blanks, you can customize some attributes yourself. For example, changing the width of the brush stroke and smoothing. You can create special brushstrokes using a vector object or a group of objects. Created smear can be saved in blanks.
For example. Choose the decoration from the toolbox. From above, on the property bar, click Brush. Try to draw something from the options that are proposed.
If none of the options offered by default suits you, you can create your own brush. Especially if you need to create a complex object, from several components - such as hair, grass, etc.
CorelDraw templates

In order to quickly create standard documents, you can use the template. Templates are included in the standard CorelDRAW software package. A considerable number of pretty beautiful patterns combined into groups. Finding a template that helps with certain tasks is quite easy.
For example, to create a CD cover, you need to select a suitable blank and label several lines. To create a new document based on a template, click on the File menu, select New from template. In the menu that appears, select the appropriate template - and get to work.
Several tabs dialog box contain a considerable number of useful blanks. By clicking on any of the templates, you can view it in the preview field in the center of the dialog box. After the desired template is found, click "open" and the dialog box automatically closes and a new document will be created. The drawings in the document will already be, you will only need to edit what you need.
Several templates contain more than one page, each of which has a separate image. All of them are decorated in the same style, based on them you can develop your own individual style. Later we will tell you more about how to work with a multi-page document.
Plugins and Macros
Tools and add-ons for more convenient processing of your data in CorelDRAW.
A tool for creating axonometric projections in CorelDRAW and Corel Designer! Allows you to create volumetric objects of various options. To do this, allows you to select the coordinate axes and planes. It completes objects by displacement, and also has many additional functions for creating axonometric objects of any type.
Some graphic professionals often work with clients and use CorelDRAW of various versions. ReSave allows you to save data from different versions of CorelDRAW, allowing you to remain with the data appropriate for your version. A very useful tool for users using Ventura Publisher.
Prepares images for plotting. Compactly places hundreds and thousands of objects on the surface. Saving user time and material consumption. Optimizes the placement of the nesting map for more convenient film separation. Creates a data calculation, sometimes necessary to calculate the cost of cutting. Optimizes the image. Allows you to scale the layout for placement on a page of a particular format.
Allows you to create objects by predefined parameters. This eliminates many inconveniences in the manufacture of simple objects. There is no more need to try to draw or adjust the object smoothly, you can set the parameters and get ready. It can be a real rectangle and its various shapes, circles, ovals, and so on. Even polygons will be created to your size.
In CorelDRAW, there are already some alignment elements, but sometimes they are not enough. For collocation, for placement according to specified parameters relative to the page, alignment of a single object per page, all these possibilities will be realized by the Aligner.
When you use any tool to change the shape of an object, including gluing, cutting, intersecting, merging, grouping, etc. CorelDRAW uses different calculation rules for the z-coordinate of the form. With SmartJoiner, one rule applies. The z-coordinates of the form that was selected last before activating the transformation are used.
Corel Draw is a graphics editor designed to work with vector graphics. It gives you the opportunity to work with a variety of projects, from logos and web graphics, to brochures and signs.
You will need
- - computer with Internet access;
- - Corel Draw program.
Instruction
Download fonts to your computer that you want to add to the program Corel Draw. To do this, go to a website with fonts, for example, http://ph4.ru/fonts_fonts.ph4?ja=, select the fonts you like, click on the “Download” link and download them to your computer. To include a font in Corel Draw, go to the folder where you downloaded the fonts, copy them. Then go to drive C, open the Windows folder, then the Fonts folder. In an empty space, call the context menu and select "Paste." Wait until the installation of fonts. Run the program Corel Draw, make sure that the selected fonts are added to the program.
Go to http://soft.zerk.ru/font/fontnavigator/, and download the program Font Navigator, this program will allow you to install fonts in Corel Draw. On the site, click the link "Free Font Navigator Download". Wait for the file to download, run it and install the program on your computer. When you first start the program, the Add Font Wizard will start. Select the folders in which the font files are stored to add fonts in Corel Draw. Click "Finish" and wait for the wizard to complete the scan. After that, the list of fonts in alphabetical order will be displayed in the left part of the window.
Select the desired font, in the right part of the window the sample text displayed in this font will be displayed. Call the context menu on any font and select the type of font you want to set, for example, artistic. You can also send sample text to print to see how the font will be displayed on paper. To enter a font in Corel Draw, select it, right-click and select Install Fonts. Wait for the operation to complete, exit the program, and run Corel Draw.
note
How to add a font? This question arises in the process of working with a computer for many users. So that new fonts become available in applications, they need to be added to Windows. In Windows XP, fonts are stored in the Fonts folder, which can be accessed like this: Start - Control Panel - Fonts.
Helpful advice
How to add a new font. The solution is very simple. Fonts are not installed in a single text or graphic editor. They are installed in Windows through the control panel. How to add a new font. We find on the Internet and download the necessary fonts that support Cyrillic. If in the archive, then unpack. Open the file with the font.


