Blog on the joomla home page. Creating a blog on Joomla! A modern blog for everyone
Creating a blog yourself is a very interesting thing. You are immersed in a new world of useful knowledge. Now web skills are progressing so much that new things appear in web programming and design every day. Someone will tell you how to make a beautiful drop-down menu, someone will recommend how to buy links. All this is wonderful! It is possible to create a blog at home. Today I would like to make a contribution to help novice bloggers and web mastering enthusiasts. We will discuss the topic of creating a blog using cms Joomla.
Probably many will say that WordPress exists for such purposes. Of course, you can also develop blogs using this engine. Fits perfectly. If you choose the path of an avid blogger, turn to WordPress. I have quite a lot of useful posts regarding this engine on my website. And for those who have slightly different goals, let's talk about Joomla. What goals are we talking about? You see, many businessmen on the Internet started their business from a regular blog. They programmed a blog, wrote articles in a certain niche, and over time their blog turned into a popular online store or a huge news portal.
Imagine that you have several thousand visitors and you are struck by the idea of turning these visitors into buyers. The idea of redesigning the site arises. It’s better to create an online store on Joomla. It is highly expandable and there are already a lot of ready-made add-ons for it. Why write a new component or plugin for months if everything is already ready. And this content management system can withstand the load well.
So let’s roll up our sleeves and start getting things done. To start developing your future business, let's create blogs on Joomla.
Algorithm of actions for creating a blog
It is assumed that our content management system is already installed and working correctly. We go to the administrative part and in the top menu, approximately in the middle, go to the category manager and select the “Create” item. We create several basic categories.
An editor and various fields for settings appear in the window that opens. In the "Title" field, enter the name of the category/section. Opposite it is written “Alias” - here, if desired, we write the name url in Latin. If the field is empty, the engine generates everything automatically.

For topics with large and varied requests, it is recommended to create multi-level sections. That is, several main sections are created, and then groups are added to them. For example, the main section “Domestic cars”, “Foreign cars”. Then categories of different car brands are created for these sections.

So, there are:
- — single-level categories (sections) that do not have a parent
- - multi-level, when there is a link to the main parent

An auxiliary functionality for searching for materials is “Tags”. Bloggers call them tags. Let's create a set of target labels.

Go through the menu item "Components" to "Tags". A similar area appears as in the previous case. Fill in the “Title” and “Description”.

Please note that tags are basically keywords. They are written in a maximum of three words and are not repeated. By clicking on the tag link, the system will offer the user all posts that are associated with the tag.
We have made the basic structure. Now it's time to create articles. Always pay close attention to the content. Post only useful things. Remember hosting is not rubber. For extra you have to pay money. Our task is to attract a large number of readers through a minimum of articles.
To create an article, go to the material manager and select “Create material”. Fill in the familiar fields. Select a category from the drop-down list on the right. Linking is only possible to one category. Plus we link to suitable tags.

At first it may seem that everything is the same everywhere. In fact, there are other tabs as well.
Please note that the title of the article must be unique and convey the main idea of the article in short phrases. The content of an article is always broken up into several additional paragraphs and headings. Take care of your creativity. Add pictures. Various underlining and color blocks to create semantic accents. Of course, don't overdo it. As a result, the correct design of an article always attracts attention and the words are easy to read.

Each blog post has an introductory part, which is displayed in the section. At the bottom of the text editor, click the “More details” button. The text will be divided into two parts by a dotted line. The small upper part is the introductory text. Aim for 100-200 characters.
Open a new “Publish” tab. Look a little to the right. Everything is in place here. Cms provides the ability to generate meta tags for keywords and snippets for Google search results. The only drawback is that there is no title tag. He's the most important. Therefore, additionally install the SEO Boss component to manage titles. By the way, there are other useful things for optimizing content.


The last step is to display posts on the main page. In a blog, it is customary to display all articles on the main page, with pagination at the bottom.
Go to the menu manager. Select the main menu and the usual “Create” button. Now we are creating a new menu item. Although you can edit existing items.

A pop-up window will show several types of menus. Select the “Materials” type and then the “Category Blog” layout. To display all posts in full, you need to select a basic general section for all categories. In the "Title" field, come up with a name for the menu item.

The "Blog Layout Options" tab contains settings for the appearance of the blog.

Even without programming knowledge, it is easy to display content in one or two columns, and display a different number of articles. Let's get acquainted with the main fields:
- Full Width – adjusts the amount of materials that are displayed from the top of the columns, if they are present in the materials.
- Introductions only - amount of materials for
- Number of columns - indicates how many columns to display article announcements.
- Number of links - refers to the links under all announcements.
- Include subcategories—the option asks whether material from subcategories should be displayed.
As you can see, there are other tabs with settings. These tools are used for flexible configuration of content output. For example, we wanted posts to show the date of creation, a link to a section, etc.
Congratulations! We created a blog. Click "Save". A new item has been created. Let's assign it as the main page. Click on the star. Noticed the star turned yellow. So the point has become the main one. Look, it’s a great blog structure. To improve usability, we will display categories in the menu on the right.

This completes the lesson on creating a blog on Joomla. We have covered the very basics and key points. They are enough for basic setup. In the following lessons we will talk about choosing a template and customizing it.
If previously almost every girl kept a diary of personal experiences in her desk, now the entire Internet community is interested in various thematic blogs.
Joomla blog templates are the perfect way created to manage your content. Today, almost every famous person has their own blog. It is very interesting to learn news about the life of your favorite singer or artist, but this does not mean that it is not at all interesting to look through the pages of ordinary people. After all, it is always productive to read useful tips, interesting experiments, as well as the latest news from the fashion industry.
Now there are no difficulties with organizing personal space on the Internet. You can simply scroll through the news and purchase your favorite blog categories for joomla.
Blog templates that are published and accessible to everyone are ideal both for creating an interesting personal portfolio and for a magazine dedicated to fashion trends. There are even special developments designed for music lovers who decided to start their own blog to unite like-minded people. In this case, you will be able to select both a design and a directly informative series with the main emphasis on the presentation of various video clips and, accordingly, audio tracks. If you wish, you can even create a personal social network without any problems, which will be intended for especially sociable fans of various musical genres.
Have you decided to create your blog on joomla and combine it with online sales? Then you need to pay attention to joomla 3 blog templates, which provide the ability to implement online sales.
Each of the presented Joomla templates is distinguished by its beauty, style, and at the same time you can easily customize it for your own needs.
Hello, dear readers of the blog site. Today we will continue, which we have already raised once before, and also learned. Today we will try to look at various options for displaying articles on website pages using various menu items.
The menu is one of the fundamental parts and usually acts as navigation elements. But in addition to navigation, they determine what exactly will be displayed on the dynamic page after following a link. In fact, they determine what will be displayed on a particular page.
What are they for and how to work with Joomla menu items
This is not so easy to understand, especially for those users who have dealt with static sites in which the role of the menu was reduced only to providing navigation. In general, the issue of organizing content and methods of displaying content is one of the most difficult for beginner Joomlovians.
At first, it is very difficult to grasp the entire relationship between the menu, its items, the content of web pages and the modules in which they are displayed. But let's talk about everything in order. Firstly, they, as in any other website, can be located either horizontally (most often in the upper part of the window, but it is also possible to create a lower one) or vertically (either in the left or right column of the template).
What’s noteworthy is that the navigation menu item in Joomla can lead to either a page with one single article or a blog or a list of materials contained in a category or section. Moreover, the same publication can be accessed through different links from the menu.
Some links will open them all alone on a web page, while others will display them as a list or as a blog of the category or section to which it belongs. You probably still don’t quite understand what we’re talking about, but I hope that this understanding will come when you finish reading this guide.
So, you can see all this wealth in one place - in the menu manager. It can be accessed from the admin panel by selecting “All menu” - “Menu” from its top line. For each of them, you can create items that will form web pages with one or another.
Their appearance is set from the settings of these same menu items. This is very important to understand, because knowing where to look for certain settings will make your task much easier. , as well as setting up modules for them.
Having entered the menu manager, you can click on the icon in the column opposite the one you need, which will open a list of all the items that are already there. This page can also be accessed by simply selecting in the admin panel from its top line “All menu” - “Name of what you need”:

As a result, a window with a list will open:

Creating a Menu Item
At the top of it you will see buttons, among them there will be a “Create” button, clicking on which will open the wizard for creating a new navigation element:

In this window you will see a tree structure of the types of menu links that you can create in Joomla. This tree contains nested elements that will open after clicking on the selected parent branch. Everything is quite simple and clear.
It serves so that we can select the option of presenting the page to which we will go after clicking on the created menu link. In other words, you will have to choose one of the Joomla page templates. Different templates allow you to combine one or more articles based on the sections and categories to which they belong.
Please note that in the tree above there are quite a lot of options and they are divided by type of component (this is), on the basis of which the content will be displayed on the site. We are primarily interested in options that suggest creating a Content component built into the engine by default, which is responsible for working with materials.
But besides the main component for working with articles, there are others, which, in turn, will also add their own options to this tree, allowing you to link to web pages with content generated by our Content.
But for now we will focus on considering the output of materials, and everything else will be considered as best we can. So, a menu element in Joomla can link to three main types of pages: with a single article, an entire category or a section.
In addition, a menu element can indicate either an individual component or a category of this component. For example, you can create a link that leads both to a page with a list of all the categories of the gallery you created, and to a page with the content (photos) of just one.
This mess might look like this:

At the same time, the following options were selected in the tree from those that were added after installing the Phoca Gallery component:

The main task when creating a website on Joomla is to correctly organize the information content (content, content). I mean the structure of sections and categories, both for articles and, for example, for the photo gallery component. Well, there are quite a lot of methods for displaying well-structured content.
True, it is often the variety of withdrawal methods that causes difficulties for novice users. But I hope that by the end of reading this publication, the confusion caused by the confusing system will decrease a little, and clarity will appear on at least some issues.
If you want to achieve the most convenient navigation, then you should start with the correct formation of sections and categories and the distribution of available articles between them. And to create on this basis an extensive system of menus and their elements for convenient and understandable output for users will be a matter of technology.
Menu elements that allow you to display articles on the site
To display content that includes articles on your site, you will need to add new elements to the menu from the tree branch called “Materials”. Quite logical, I suppose. By clicking on this branch of the tree, you will see a list of all possible options that you can use to display materials on the web pages of your site:

There are not so many of them, but they will allow you to display article content in a wide variety of forms - from individual publications to a blog of an entire section on one page of the website.
Now we just have to understand what this or that option in this branch of the tree serves, and then figure out their settings, which allow us to display blogs or lists of articles in Joomla. Using these settings, you can set the appearance and display order of materials. But first things first.
We will consider the option of outputting one single article at the end of the publication, and there is nothing complicated or requiring attention there. And now I want to dwell in detail on two main output patterns:
- Blog (category or section) template - so called because the way articles are displayed in this case is reminiscent of standard blogs. In this case, a web page generated in Joomla will generally be a series of announcements (introductory parts) of articles that will end with a “More details” link. They will all belong to either one section or one category, which you select during setup.
- A standard template for a section or category list, which is essentially the same thing. A web page generated in Joomla will be a table that lists either category headings from a specific section or article headings from a specific category.
Of course, the blog template has much more flexibility than the standard one, which displays the contents of the page in a table only in the form of headings, which are links to the full versions of the articles.
The blog format of a category or section allows you to display not only the titles of articles, but also add a small announcement, which allows you to arouse additional interest among visitors to this page to continue reading and clicking on the “Read More” link.
At the same time, you can quite flexibly customize the appearance of articles. It will be possible to set how many announcements will be displayed across the entire width of the page, how many will be divided into columns, set the number of columns and determine the number of materials displayed below in the form of links.
How to create a blog in Joomla based on category articles
Let's first try to create a menu element in Joomla based on a category (or section) blog template and look at all the settings that we can change. They will be almost identical for them. Therefore, we will consider only the option based on the category template, and you can figure out the section yourself by analogy.
So, go to the Joomla admin panel, select their top line items “All menus” - “Name of what you need”. On the page that opens, click the “Create” button located at the top. In the tree that opens, click on the option “Materials” - “Category” - “List Template”. As a result of these actions, a window will open with menu item settings based on the template you selected:

In the “Title” field, as usual, enter the name for this menu element, which will be displayed on the site. The “Nickname” field should only be filled in if . Then you will need.
If you use third-party components to organize the SEF, you will not need to fill it out. I already wrote.
The “Link” field displays a hyperlink to the page generated based on this menu item. You can copy it and use it to create web links from the text of other articles on your site. In the “Show in” field, you will have to select the menu in which the item we are creating will be located.
In the “Parent Element” column, you can select a parent for the element being created, when you click on it, our nested item will be displayed in the menu. If you do not want to make it nested, you should leave the default option “Top”.
In the “Access” area, you can set which visitors will see this item. Either everyone (used most often), or only registered ones, or only Joomla administrators (the “Special” option).
In the “Open in” field, choose whether the page will be opened in the same window, or in a new window, or in a new browser tab.
Setting up a blog on Joomla
We go to the right side of the settings, where tabs with parameters responsible for presenting the web page that will be opened as a result of clicking on this link are concentrated. Let's start our consideration with the main parameters located on the tab of the same name:

In the “Category” field, you must select the one whose content will be displayed as a blog. In the “Description” column, you can hide or show the display of the description for this category, which will be displayed at the top of the blog page. The same applies to “Picture Description”.
In the “Full width” field, you can set the number of articles (most often only their introductory parts - announcements) that will be displayed in the entire width of the web page, without breaking into columns. In the “Introduction” column you specify the number of materials that will be divided into columns, and in the “Columns” field you specify their number. They will be displayed behind those articles that are displayed in full width.
Thus, you can, for example, enter the numbers in these four fields: 1 6 2 4, as a result of which the generated page with the blog will look like this: at the very top one announcement of the article will be displayed, followed by six more announcements from this category, well, at the very bottom there will be a list of four more links.
It's clear? No? Then try experimenting with the numbers in these settings yourself and everything will become clear and understandable to you. It is currently not possible to implement in Joomla the display of articles in a category or section blog, first in columns and then across the entire width of the page. Therefore, you will have to be content with what you have.
Oh, by the way, a zero in any of these four fields except “column” will mean that none of the materials in that category will use this display feature. We have looked at the main parameters that can be changed when creating a menu item in Joomla. Now let's go to the advanced tab:

Here are the settings that are responsible for the order of articles. There are a lot of options - by date, alphabetically, in the order of display that you set in the content manager (of this category).
You will need the Order field if you are creating a menu item for a section that contains more than one category. In this case, you can choose the method you want to sort the categories in the section, according to which a list of them will be displayed on the page, generated on the basis of the section’s blog template.
The “Sorting” field determines the order of the articles themselves when they are displayed. By the way, when creating a menu item codenamed “Section Blog Template”, you can sort all articles without taking into account their belonging to a particular category, but to do this you need to select the “Default” option in the previous “Order” field.
If you select the “Display Order” option, then articles from the Joomla category you have selected will be displayed on the page in the order that you set in the content manager, setting a filter only for it.
There are two ways to sort articles in the content manager that belong to the category you need. You can place the numbers you need in the “Sorting” column and click on the diskette located next to the name of this column. You can also use the green arrows in the same column, but with a large number of articles this will probably be inconvenient.

In the “Pagination” column and the next few columns of advanced menu item settings based on a category or section blog template, you can hide and show pagination. Let’s say that if there are more materials in the displayed category than you specified in the settings described above, then Joomla will add numbering (pagination) at the bottom of the generated web page with a blog, unless you disable this in the “Paging” field.
Do not forget that articles intended to be displayed as part of a blog in Joomla must be prepared accordingly, namely, you will need to open it in a visual editor for editing, place the mouse cursor after several paragraphs of text and click on the “ More details", located at the bottom of the editor window.
As a result, at the cursor position, a line will appear separating the text of the announcement. Only the announcement located above this line will be displayed on the blog.

Displaying a separate material, a list of categories or articles
Let's now go over the settings you can set when creating or editing a menu item based on a standard section template. First, go to the admin panel, select from the top line “All menu” - “Name of what you need”. In the window that opens, click the “Create” button located at the top.
In the tree of items that you can create that opens, click on the option “Materials” - “Category” - “Standard section template”. As a result of these actions, a window with settings will open.
What is noteworthy is that its left side will look exactly the same as in the one we examined earlier. The main difference lies in the main parameters:

In the “Section” field, you will have to select a section, the list of categories of which will be displayed when you click on this link in the menu. By the way, a visitor, when viewing a list of categories, will be able to view the list of materials in each of them by simply clicking on its name with the mouse. The purpose of the “Description” and “Image” fields is similar to that discussed above.
It will be easier for you to see the purpose of the remaining fields in action than to read about it. All other settings are no different from those discussed above.
Let's try to create a menu item in Joomla based on a category list template and see how the settings differ:

In the settings below, you can set the number of articles displayed in the list, as well as allow or disable the display of list column headings, creation date (you can set your own format for it) and a filter that will allow you to sort materials by headings, authors, or by hits (number of views of the material by visitors).
Well, finally, I’ll say a few words about creating a menu item in Joomla based on a standard material template. Everything is very simple here, in the main parameters you only have the ability to select the article you need from the material manager, which will open when you click on the menu item link.

It is possible that this bourgeois vision of successful blog promotion will be useful to you (the author of the most popular blog on SEO in the bourgeoisie speaks):
Good luck to you! See you soon on the pages of the blog site
You might be interested
 Creation and display of articles (content) in Joomla using sections and categories, a blog on Joomla and a Read more button.
  Contacts for the site and feedback form using the built-in Joomla component
  What is Joomla
  Modules for displaying a list of sections in Joomla, random and latest news, similar materials, arbitrary photos and Html code
  Menu in Joomla - adding a nested or drop-down menu, as well as creating and configuring a module to display it on the site
  Modules in Joomla - viewing position, setting and output, as well as assigning class suffixes
  Organizing content in Joomla - deleting and creating articles in the admin panel, as well as setting parameters for all materials
  K2 component for creating blogs, catalogs and portals on Joomla - features, installation and Russification
  Joomla admin - a complete manual on all the settings of the Joomla admin panel in details and pictures
This article explains how Joomla acts as a blogging platform. In the latest versions, it has acquired significant improvements and new tools for blogging on Joomla.
Joomla Features
The core of Joomla itself has undergone significant changes to improve the blogging platform. The introduction of nested categories makes it much easier for the administrator to manage content in the backend. Combined with the Komento extension, which is freely available from StackIdeas, a fully functional basic blogging platform is ready to use.
If you have another commenting system of choice, such as Disqus or LiveFyre, third-party extensions also integrate easily into Joomla. Check the Joomla extensions directory for available applications in this category.
The ACL (Access Control List) is being updated and improved. The new system is very powerful and provides more flexibility for more experienced users.
EasyBlog
According to StackIdeas, EasyBlog is named the best blogging platform for Joomla. As already mentioned, the latest versions of Joomla are more suitable for blogging. But when you add EasyBlog, you also get a full suite of blogging features, such as inline comments, advanced media management features, and social app integration.
Creating an RSS feed or automatic announcements on social networks such as Facebook and Twitter are simple functions in the application. The extension allows direct integration of subscription and social extensions such as Jomsocial and Community Builder.
EasyBlog is for those who want to quickly install and work with a powerful, multifunctional blog.

Joomla 3 blog is one of the layouts of the Joomla system for displaying website articles. The appearance of the Joomla 3 blog type layout is familiar to you. This is a one-page display of article announcements with links to further reading. The layout determines how article announcements will be placed on the page, how the title of the articles will be shown, how the link to detailed reading will be shown, and in what form the navigation on the blog pages will be displayed.
The structure of Joomla materials combines materials into categories. One Joomla 3 blog can contain articles of the same category (category blog) or categories of different articles (featured materials). The number of both types of Joomla 3 blog is unlimited. You can create any number of blogs, both category and featured blogs.
There is no need to confuse the blog with selected materials and the main page of the site. If selected materials can be combined into any number of blogs, then there can be only one main page on Joomla. Also, let me remind you that on the main page of the Joomla 3 site, you can display any of the Joomla layouts, including a list of materials, a blog of materials or a separate article.
To understand the Joomla 3 blog layout settings, for example, let’s step by step create a blog of category materials and configure its display on the site.
By the way, you noticed how the ability to communicate with software products and the Internet has deeply penetrated various spheres of life. This process continues to deepen. For example, just yesterday, available only in science fiction films, 3D scanners were quite routinely used in various spheres of human activity, from medicine and construction, to everyday life and entertainment. The market for modern scanners is no longer so expensive and is available in a wide range. see special material.
How to create a Joomla 3 blog
We start creating a Joomla 3 blog, like creating any Joomla layout, by creating a menu item of the desired type. A menu item is created in any site menu, and not necessarily a published one.
Creating a menu item
When creating a menu item to display a blog, you need to specify its type. For a blog, the menu type should be “Category Blog” or “Featured Content”. The "Favorites..." blog can include articles from several categories.
For example, in the “Mainmenu” menu, we will create two blogs: a category blog “Category Blog” and a selected materials blog “Selected Materials”.
Create a category blog
You can create a category blog without having articles in this section, but for a blog to appear on the site, at least one article must be published in this category. It would be more accurate to say that the menu item for this blog will not appear on the site if there is no published article in the category of this blog.
- Log in to the site's administrative panel.
- Enter “Menu Manager”;
- Open the desired menu and click "Create" menu item. The menu item must have a name. The name, or rather the name alias, must be unique within the site,
- Next, click “Select”;

- To create a blog, you need to select the menu item type “Materials” → “Category Blog”.

- After selecting this type of menu item, the page will reload and the settings for the content blog will appear.

- On the left side of the page, select the category for which the blog is being created.
- From the right, select the menu that includes this menu item and the parent item in the menu. If there is no parent, then select “Root menu item”.
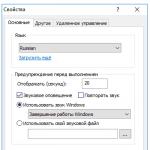
- There are 8 items in the category blog settings. The appearance (layout) of the blog is configured in the “Blog Layout Options”. Let's look at the photo.


class="eliadunit">
1- Full width: The number of materials that will always be the full width of the blog, regardless of the specified columns.
2- Introductions only: Number of introductions to articles on one blog page. Does not include Full Width articles.
3- Number of columns: You can set 1-2-3-4 columns. Introductions to blog articles will appear in these columns.
4- Number of links: Determines the number of links to other articles on the site.
Important that these settings for displaying materials on the blog will override the general settings for materials (Tab Material Manager→Settings). If you do not fill in anything, then the general blog content settings will be applied to the blog.
However, if in the “Options” settings of this category, an Alternative template style, “List,” is specified, then it will not be possible to display this category as a blog. For a blog, set the category template on the Category Manager→Category Editing→Options, “Default” or “Blog” tab.

How to Create a Featured Content Blog
The blog of selected materials is done in a similar way, only the type of menu item is selected “Featured materials”, and when selecting categories, not one, but several categories are selected.


How to make a blog the main page of the site
Any blog can be made the main page of the site. To do this, when creating a menu item for this blog, set the “Home Page” button to the green “Yes” sector. Again, Joomla can only have one home page.

And one more note. If, when creating an article, you place it in featured materials, then it will be placed in all “Featured Materials” blogs that include the category of this article.