How to open 1c xml file. Generating an XML file. Easy upload for third party application. Generating the “Invoice” document
In an organization, accounting can be maintained not only in solutions on the 1C:Enterprise platform, but also in other software systems (Galaktika, Parus, SAP, etc.). This raises the challenge of integrating two applications.
For example, some application (let's call it "X") needs to read a list of configuration documents. We will not talk about the practical benefits of solving such a problem; I will only note that the most convenient and universal way in such a situation would be to upload a list of documents in XML format.
Exchange using this format is universal because most applications can work with it. Let's look at how you can upload a list of configuration documents to an XML file from 1C:Enterprise.
Upload to XML
And so, let's move on to the main thing. We need to traverse the list of document metadata and generate the list in the XML file. The following screenshot shows the algorithm for generating an XML file:
Function CreateXML() Export // Get the name of the temporary file Path = GetTemporaryFileName() ; // Initialize the "XML Record" class Entry = New EntryXML; // Open a temporary file for writing- 8 " ) ; // Write the XML file declaration Record. WriteDeclarationXML() ; // Record. WriteElementStart(" DocumentsConfigurations" ) ; // First element // Attribute of the first element with the date the file was created Record. WriteAttribute(" generated ", Format(CurrentDate(), " DF = yyyy-MM- ddThh:mm:ss; DLF= DT" ) ) ; // Write an element for each configuration document. We put the name of the document in the text. For Each Doc From Metadata. Documents Cycle Recording. WriteElementStart("Document"); Record. WriteText(Doc.Name) ; Record. WriteEndElement() ; EndCycle ; // Finish writing the first element Record. WriteEndElement() ; Record. Close(); // Close the file // Get the file's binary data and put it in temporary storage BinaryData = new BinaryData(Path) ; Address = PlaceInTemporaryStorage(BinaryData, New UniqueIdentifier) ; Return Address; // Return the address of the file to the storage EndFunctionEach element created must be completed correctly. After executing “WriteStartofElement()”, the “WriteEndElement()” method must be executed, otherwise the structure of the XML file will be incorrect.
The general template for creating XML files is the following sequence:
// 1. Initialize the "XML Record" class Entry = New EntryXML; // 2. Open a temporary file for recording Record. OpenFile(Path, " UTF - 8 " ) ; // 3. Write the declaration of the XML file Record. WriteDeclarationXML() ; // // 4. ++ Write the contents of the XML file Record. WriteElementStart("XMLElement"); Record. WriteEndElement() ; // -- Write the contents of the XML file // 5. Close the file Record. Close();These five steps create almost any XML file.
In our example, the generated file is converted to binary data and returned to the location where the CreateXML function is called. This file can then be written to the file system.
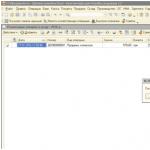
You could see an example of the uploaded file in the screenshot above.
Third party application
As an example, I created an application in the .NET Framework to demonstrate reading an XML file in a third-party application.
The program reads the created file and displays the documents in the form of a list:

You can try it yourself, the application is available for download using the link at the end of the article.
Versatility
The XML format is used in most configurations for data exchange between application solutions on the 1C:Enterprise platform. Another commonly used communication method is through a COM connection. XML allows you to exchange with almost any application, which is why it deserves to be called universal.
Files for download:
XML file reader application.
Processing the generation of the XML file.
Transferring information between databases is one of the tasks of their support and administration. For its effective implementation, processing is created in automated 1C complexes. They greatly facilitate routine work, speed up the processes of uploading and downloading information and at the same time implement control over its correctness. Uploading from 1c to xml allows you to create a file with the contents of any configured configuration object, and use it when you need to upload data to an identical configuration.
Tools for creating uploads
To export information contained in databases, the xml format is mainly used. For 1C, many processing methods have been developed (for example, UploadLoadDataxml82 epf), with the help of which it is possible to output and load data to a file. In this case, the user must receive a file of a certain structure, which allows the information stored in it to be loaded into the native database or transferred to another location. When creating an upload, the following rules must be observed:
- Save the created files until complete recovery and completion of procedures for verifying the correctness of the transferred information;
- If you use processing as a backup tool, create separate subfolders for data copies and keep a log of them for quick retrieval.
Supplied in the 1C user support program, which can be found on the ITS website or disks, it is an excellent tool for exporting and importing information. A computer user can upload both the entire database and its individual objects, and in addition to the actual export, various operations are performed to check information that help get rid of critical errors in the data. Processing 1c upload to xml works in two modes:
- Unloading. Creates a file containing user-defined pageable objects;
- Loading. Reads a previously exported file and writes the information contained in it to the information base.
Processing allows you to check objects for invalid characters, and also includes a function for exporting information with restrictions.
Uploading can be used not only when exchanging information between 1C databases. With its help, you can ensure the integration of various complexes, for example, 1C and the Parus system. The versatility of the XML format allows you to create programs for transferring information for almost any information banks. Processing, uploading and downloading xml data is the most important tool for exchanging information.
The process of uploading data toxml
Let's look at how to upload from 1c to xml in normal mode. After downloading the processing UploadLoadDataxml.epf and opening it, you must perform the following steps:
- Select objects for export;
- Set up the necessary filters, for example, by period;
- Determine the location of the file with information on the disk subsystem;
- Start unloading objects.

It must be remembered that the header part of the upload file format differs from the file format used when uploading according to exchange plans.
xmlThe xml is loaded into 1c into the receiving database with a configuration identical to the source database. Before loading xml 1c into 1c, you need to open processing in the receiving database. Then you need to specify the path to the previously uploaded file and download the data by clicking on the “Load data” button.
If necessary, checkboxes are activated to load data in exchange mode in a distributed infobase and ignore errors that occur when loading objects.

After this, you need to check the databases and make sure that all elements are loaded correctly so as not to lose them, for example, if an error occurs in the event handler after loading an object.
When an enterprise constantly uses some kind of software package in its work, then, naturally, the question of its ongoing support and administration always arises. There is no way to avoid the tasks of exchanging, storing and restoring data. Let's look at how to load or unload data from 1C in XML format, since this is an important procedure for this topic.
They are built in such a way that when uploading, you can receive an XML file in which the data necessary for the client will be recorded. At the same time, simultaneously with the recording, the correctness of the transferred records is monitored for critical errors.
Thus, uploading to an XML file (importing records) from one information base and subsequent loading from XML to another represents an exchange of data in XML format between databases.
This procedure, especially with large amounts of information, saves a lot of manual work.
Import (the resulting file) can also be used as an archive for recovery in unexpected situations (if lost or damaged).
A lot of such processing tools have been developed, and they are available on the Internet. Responsibility for their use falls on the shoulders (and head) of the client.
But for official users of Odeneski, the developers have created a universal processor “Upload/Load XML Data”.
IMPORTANT. Export to XML in 1C and further loading into XML from 1C is acceptable for identical configurations - otherwise it will be damaged.
Universal handler
Key points for using the universal developer:
- Save importing files until the transfer of records is completed and their correctness is checked;
- When used as backup copies, a record of them should be kept to sort the search.
Its operation has two modes: creating a file when saving information and reading/writing it when importing.
In addition, the user can set additional restrictions both when exporting and loading data.
Extracting records
You can upload data both throughout the entire database and selectively - object by object.
After downloading, installing and opening the handler, the following occurs:

Their selection is made in the dialog box that opens after launch. To do this, check the boxes in the list that displays the metadata objects to be retrieved;
- The necessary filters are configured (for example, by date);
- Disk space is selected;
- The operation itself starts.
Uploading records to the receiver
The first step to accept data into the receiving database is to open the processor program in it.
After the path to the source file has been specified and the procedure settings flags have been activated (if necessary), you can start the process with the “Load data” button.

Now you know how to load or unload data from 1C in XML format to save data and exchange between databases.
- well-known web pages, which are also an analogue of XML with weak checks.
XML Reader/Writer Objects, FastInfoset, HTML extend text file reading capabilities with built-in processing of markup tags.
They are also used for DOMBuilder/DOMRecord objects (see below) as data sources.
XML 1C files contain text information, that is, they are text files. The 1C XML Reader and 1C Write XML objects are an “add-on” that makes it easier to work with XML tags in a 1C file.
The objects ReadingFastInfoset 1C and WritingFastInfoset 1C, ReadingHTML 1C and WritingHTML 1C are completely similar to ReadingXML 1C and WritingXML 1C and serve to work in the same way with other formats.
XML 1C file used in the examples
Directory>
Directory>
Text valueProps>
Directory>
Configuration>
Example 1. Reading a 1C XML file into a value tree using Reading XML 1C
//open the XML 1C file for reading using ReadingXML 1C
File = New ReadXML();
File.OpenFile("D:\ConfigurationStructure.xml");
//prepare the value tree
//each XML branch can have a name, attributes and value
dzXML = NewValueTree();
dzXML.Columns.Add("Name");
dzXML.Columns.Add("Value");
dzXML.Columns.Add("Attributes");
//since an XML string can have several attributes, we will write them in the values table
//each attribute has a name and a value
tAttributes = New ValueTable();
tAttributes.Columns.Add("Name");
tAttributes.Columns.Add("Value");
//the nesting level will help us understand when we need to add a nested branch, and when we need to go back up a level
Nesting Level = 0;
//current line is a tree line, will change as nesting increases
CurrentRow = Undefined;
//reading the XML 1C file is not done line by line, but according to the structure; when the file ends, reading will return FALSE
While File.Read() Loop
//we are interested in three types of nodes - the beginning of the element, the text (the value of the element) and the end of the element (to return to the top level)
If File.NodeType = XMLNodeType.ElementStart Then
Nesting Level = Nesting Level + 1;
//if this is the first line, then add it to the very top of the tree and save only the name
If CurrentRow = Undefined Then
CurrentRow = dXML.Rows.Add();
CurrentLine.Name = File.Name;
Continue;
Otherwise
//nested lines
CurrentRow = CurrentRow.Rows.Add();
CurrentLine.Name = File.Name; //save the name
//does this XML element have attributes?
If File.NumberAttributes() > 0 Then
//if yes, copy the prepared empty table to save attributes
tAttributesNode = tAttributes.Copy();
//cycle through the number of attributes of this element
For Account = 0 by File.Number of Attributes()-1 Cycle
//for each attribute, remember the name and value
Row = tNodeAttributes.Add();
Line.Name = File.AttributeName(Sch);
Row.Value = File.AttributeValue(Ac);
EndCycle;
//save the element's attribute table to the current line
CurrentRow.Attributes = tNodeAttributes;
endIf;
endIf;
ElseIf File.NodeType = XMLNodeType.EndElement Then
//at the beginning of the element we increase the nesting level, at the end of the element we decrease it
Nesting Level = Nesting Level - 1;
//return the current line one level up
CurrentRow = CurrentRow.Parent;
ElseIf File.NodeType = XMLNodeType.Text Then
//if the element has a value, just save it
CurrentRow.Value = File.Value;
endIf;
EndCycle;
File.Close();
Example 2. Recording a 1C XML file using the 1C Record XML object
//create a file Record XML 1C
File = NewWriteXML();
File.OpenFile("D:\ConfigurationStructure.xml", "UTF-8");
File.WriteElementStart("Configuration");
//use metadata to traverse all directories (for more details, see "Working with metadata")
For each Directory from Metadata.Directories Cycle
//WriteStartofElement - opens a new [subordinate] branch
File.WriteElementStart("Directory");
//WriteAttribute - writes an attribute to a previously opened branch
File.WriteAttribute("Name", Directory.Name);
File.WriteAttribute("Synonym", Directory.Synonym);
//using metadata we go through all the directory details
For each Props from the Directory.Props Cycle
EndCycle;
//use metadata to traverse all tabular parts of the directory
For each PM from the Directory. Tabular Parts of the Cycle
File.WriteElementStart("TabularPart");
File.WriteAttribute("Name", PM.Name);
File.WriteAttribute("Synonym", PM.Synonym);
For each Props from PM.Props Cycle
File.WriteElementStart("Props");
File.WriteAttribute("Name", Attributes.Name);
File.WriteAttribute("Synonym", Attributes.Synonym);
File.WriteEndElement();
EndCycle;
File.WriteEndElement();
EndCycle;
//WriteEndElement - “closes” the branch previously opened using WriteBeginElement
File.WriteEndElement();
EndCycle;
File.WriteEndElement();
File.Close();