Setting up a mouse in Windows. How to set up a mouse on a computer, simple tips for beginners How to set up mouse movement
There are a variety of situations in our lives in which unwanted individuals gain access to our personal computer without permission. These could be children, acquaintances who want to play a joke, or simply a virus that changes system settings. Today we will talk about how to set up a mouse on Windows 7. This is not as complicated a process as it might seem at first glance.
Drivers
Optical mice, just like any other personal computer equipment, need the right software. You probably noticed that this device is sold without driver disks, but installation still occurs. There are two options for how to configure a mouse on Windows 7 programmatically.
- If you are using the official one, then you have nothing to worry about. The developers thought of everything in advance, so the operating system contains all the necessary drivers for the mouse in advance. You just need to insert it into the desired connector and wait a little. The OS will notify you that the installation has completed successfully.
- This scenario is more common when using a low-quality pirated operating system. The mouse will, of course, install, but problems may arise when using a wireless device or multi-button gaming models. Therefore, you will have to look at the mouse model on the packaging and download drivers from the Internet. Their installation is carried out in the same way as any other program.

Buttons
Now let's figure out how to configure the buttons on the mouse. The following instructions will be standard for setting up most of the parameters of this device, so it will be better for you to remember it.
- Open the menu by pressing
- We are interested in the "Devices and Printers" item. If it is, then go to point 5.
- If it is not there, then click “Control Panel”.
- "Equipment and Sound".
- Click "Devices and Printers".
A window will open in front of you with all the devices installed on the computer. If you have not previously installed the drivers, then your mouse most likely will not appear here.
Next, right-click on the icon that interests us. Select "Mouse Options". A window appears in front of us with 5 tabs, each of which is responsible for how to configure the mouse on Windows 7. We are interested in the first open tab.

- Button configuration. This “checkbox” is responsible for assigning the main mouse buttons. If we usually make a “left click” with our index finger, and a “right click” with our middle finger, then when we set the pointer, the LMB begins to perform the functions of the right one, and the RMB - the functions of the left one. This function was conceived for the convenience of left-handers, but on the other hand, if you have been accustomed to working with your left hand since childhood, then there is no point in changing the purpose.
- Double-click speed determines how quickly you need to press the LMB before activating a folder, shortcut, etc. The lower the speed is set, the longer it can take between clicks. At the lowest speed, you can make a click at any frequency, it will still be counted.
- Sticking is one of the most useless features. When you turn it on, you need to hold down the mouse button for a few seconds so that a frame appears to highlight the area. Although it is much faster to use standard selection.
Decor
Having understood the functional purpose of the mouse, we move on to the visual effects. How to customize the mouse on Windows 7 in the style you like? Repeating the procedure from the previous paragraph, go to the “Indicators” tab. You will be presented with a window that can be divided into two components.
- List with pictures. This displays the visual appearance of the mouse pointer for various actions in the current configuration.
- In it you can see all possible mouse pointer designs. Just click through them and choose the one that suits you best. In addition, such “sets” can be downloaded on the Internet.

Options
The next step in answering the question “how to set up a mouse on a Windows 7 computer” is setting up the pointer. By going to the "Pointer Options" tab, we can see the following customizable characteristics:
- Movement speed. In earlier versions of the OS, this parameter was called sensitivity. The further to the right the slider is, the more sharply the pointer reacts to the movements of your hand and the less you need to drag the mouse across the table to move the pointer.
- "Home position in dialog box." If enabled, automatically moves the mouse pointer to the default button when opened. It is quite inconvenient, since accidental clicks on the mouse buttons and selection of the wrong option are possible.
- The last menu item is responsible for the visibility of the pointer. Well suited for people with low vision and who work a lot with text. It often happens that users lose sight of the pointer, so you can use the settings to enable a cable behind the mouse or turn on a signal that alerts you to the position of the pointer.

Wheel
It also needs to be configured. How to properly configure the mouse and its wheel? Unfortunately, there are not many options for working with this element. In the corresponding tab, you can only specify how many lines the screen scrolls when you turn the mouse wheel. You can customize several lines or the entire page at once. This is a matter of taste and habit; if you have been using a PC for a long time, then it is better not to change this parameter. If it’s recently, try different options and choose the one that you like best. Horizontal scrolling is now practically not used.
Macro
One of the most interesting settings of any mouse is the macro. What it is? This is a sequence of commands that will be activated when you press just one button. Very convenient for games. For example, you press one button, and your character fires a series of shots, reloads and buys ammunition, all in one second.
So, how to set up mouse macros? You can use a Microsoft-developed utility called IntelliType Pro, but it is ineffective and you won't need much knowledge of how to create macros. A much better option would be to use a third-party application. For example, Oscar Mouse Editor. This program will allow you to assign mouse buttons to any model, increase the number of operations per second and create macros on an intuitive interface. Moreover, this program initially contains several of the most commonly used scripts (macros) in games.

Laptop
Another question often asked by users: “How to set up a mouse on a laptop?” Windows 7 is a unified platform that natively contains drivers for any hardware on which it is installed, be it a computer or laptop. Thus, you do not need to separately search for how to set up a mouse on a laptop. All parameters and settings can be changed in the same way as on a computer. That is, as we wrote above.
The only thing that was not mentioned was setting up a mouse with multiple buttons. But just like additional buttons, they are useless until you install an additional program on your PC and assign macros to them. Otherwise, they can be used exclusively for games.
Games
If you are trying to configure the mouse for a game or a specific application, then this should be done in the toy itself. Currently, more and more projects are appearing where management is standardized and cannot be changed. However, in the vast majority of games, the user has no choice but to configure the mouse himself.

For games, the path to settings usually looks the same. "Settings" - "Management". After this, you will see a list of all the teams in the game. If you need to change something, simply click on the command you need, and then on the key that will activate this command. This setup is usually carried out by players who do not use standard mice, but with 5-7 buttons, so as not to climb on the keyboard, but to have everything at hand.
How to set up a mouse on a computer? This article will provide answers to this question, and simple tips for beginners on setting up a computer mouse. It happens that a computer mouse does not work correctly or you need to change its settings for convenient use. Therefore, we will set up a computer mouse for convenient work with it on the computer.
How to set up a mouse on a computer, general information
Hello, friends! In our modern time of computers, it is not possible to work on it without a computer mouse. It is a secondary device for working on a computer; its functions and portability make working on a computer convenient.
Let's talk further about how to set up a mouse on a computer. In principle, you don’t have to configure it if there is no need. But if you play games, or your mouse speed is low, it is quite possible to do this. We will configure the computer mouse in such operating systems as:
- Windows 7;
- Windows 10
The mouse sensitivity will also be adjusted, its pointer and double click will be changed. I’ll tell you about all this further.
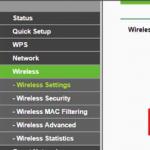
Now, we will look at the question of how to set up a mouse on a computer - in the Windows 7 operating system. To do this correctly, follow simple tips. So, first step. Open the Start menu. Next, select from the section category – “Control Panel”. After this, the “Hardware and Sound” section opens (Screen 1).

Then, click on it once to open and find another section - “Mouse” (Screen 2).

And the second step. After clicking this section, a window with settings for the computer mouse will appear. What can you configure here? Basic mouse settings:
- these are pointers, of which there are quite a few;
- you can set other mouse wheel parameters;
- swap mouse button controls;
- you can set the mouse wheel rotation to one click or more;
You can make many other mouse settings. For example, we need to “Enable Sticky”. Place a checkmark in front of this function and click “Apply” so that all settings are saved. Thus, this example helps to understand how it is configured in Windows 7. The same is true for other mouse functions. Next, we will look at setting up a computer mouse in Windows 10.
Setting up a Windows 10 computer mouse
Setting up a computer mouse in Windows 10 is quite simple. Through the "Start" menu, look for "Control Panel" and go to the customizable functions "Mouse". Next, open the window with mouse settings.
For example, we need to change one mouse button to another. Click on the checkbox opposite – “Change the meaning of buttons” and confirm this action with the “OK” button (Screen 3).

After this, the left mouse button will work on the right side, and the right mouse button on the left. There you can also adjust mouse speed, pointers, stickiness and much more.
Adjusting mouse sensitivity
The sensitivity of a mouse is its operating speed. Typically, a computer mouse operates at standard speed. Her usual speed is low. There is a need to increase sensitivity.
For example, while playing games, surfing the Internet, or performing other complex computer tasks. Increased mouse sensitivity can be adjusted quickly.
Setting the sensitivity of a computer mouse in operating systems 7 and 10 is the same. Therefore, we again go to the properties of your mouse (we discussed the process of going to settings earlier).

To reduce mouse sensitivity, scroll the slider to the left and click “OK” or “Apply”. After this, you may notice how the mouse pointer moves slowly across the desktop.
If we want to increase its sensitivity, move the same slider to the right and click “Apply” again. Now, the mouse on the computer will work quickly, without time delays.
Adjusting mouse sensitivity in Windows 10
To correctly adjust mouse sensitivity, write “Mouse” in the search box in Windows 10 on your computer and go to “Mouse Options”. Next, you will be offered several settings to choose from. We move the mouse cursor over – “Select how many lines should be scrolled at a time.” And set the slider in the direction you need.
You can also enable the function to scroll inactive windows when you hover over them with the mouse. All changes in this system are saved automatically.
How to change mouse pointer, double click setting
The mouse pointer is the arrow that we see when we hover the cursor over any object on the computer. If you want to change it to a different type of pointer, to do this, go to “Mouse Properties” again. Then, open the “Indicators” section (Screen 5).

The presented list of pointers shows that there are many of them. Select any of them and click “Apply”. You can also use the “Browse” button to load a pointer image from your computer into these settings. And change it to another pointer icon.
When opening a folder on your computer, you have to click on it several times. Therefore, it is possible to configure a double click of the mouse. Go to these settings in the “Mouse Buttons” section (Screen 6).

And look for the “Speed” item there. To enable double-clicking, you just need to move the slider two lines forward and click “Apply”. Then you will be able to open folders and files on your computer by double-clicking. You can also configure single click and triple clicks. Move the slider of this setting in different directions.
Conclusion
In the article we looked at the question of how to configure a mouse on a computer. These simple tips will be useful to beginners and experienced professionals not only in games, but also in working on the computer and via the Internet. It is advisable to correctly configure the computer mouse to suit your capabilities so that it is convenient for you to use it while working at the computer. Good luck setting up your computer mouse!
Receive new blog articles directly to your email. Fill out the form, click the "Subscribe" button
A huge part of users of personal computers on Windows have information on how to change the type of computer mouse pointer to another, but mouse settings For them the forest is dark. But for some reason, almost no one wants to change the mouse settings and similar mouse functions, just like the speed of double-clicking and the speed of moving the mouse pointer across the display. Very much in vain. Since a properly configured mouse significantly increases the comfort of working on a personal computer.
How to set up a mouse on Windows 7/10
In order to start setting up the mouse, you need to open the following: Control Panel, which is located in the “start” menu - find “All control panel items” - then “Mouse”.
Change button layout— if you check the box, then the left button will perform the functions of the right button, and the right button will perform the functions of the left button. This feature is designed specifically for people who primarily work with their left hand.
Double click speed- this is another mouse setting, move the middle mouse button and select the click speed suitable for you by clicking on the file display.
Mouse Button Stuck— if you enter this program, then it will be possible to drag and drop computer data without holding the button. All you have to do is hold the button down for a couple of seconds and the file you have selected will “stick” to the mouse pointer. In order to “release” the file you will need to make one click. As with “window scaling”. The required period for enabling sticking can be configured by clicking on the pointer parameters tab.
Moving— with mouse wheel support it is possible to speed up or slow down the movement of the mouse pointer. The higher the screen resolution, the slower the mouse arrow moves, which leads to excess effort and increased fatigue of your precious muscles.
Adjust the speed of mouse movement so that the mouse arrow moves quite simply, easily and freely across the entire screen. If you have set the highest movement speed, but the mouse arrow moves slower than necessary, then uncheck the “Enable increased pointer accuracy” checkbox; this will allow you to speed up your mouse. A very useful mouse setting and feature in this day and age with large displays. Surprisingly, almost no one even saw this function, much less configured it.
Initial position of the dialog box- any interactive window contains a number of buttons, one of the most important is selected by default. The button that is selected by default in Windows is blue. If you want the mouse arrow to always automatically be on the button by default when opening interactive windows, then check the box next to this option. It's very comfortable.
Visibility— here the visibility characteristics of the pointer are adjusted. Experiment with these features and enable those that suit your needs.
Here you can adjust the speed of horizontal and vertical scrolling of text files, Internet bookmarks and other windows using the mouse wheel.
Vertical scrolling— it is allowed to set the number of lines to rewind when turning the mouse wheel. If you set the value to one display, then rotating the mouse wheel will be equivalent to pressing keys on the keyboard.
Horizontal scrolling— this parameter is based on mice that support horizontal scrolling by tilting the wheel. You can determine the scrolling strength by entering a certain number of characters.
Probably, this tab is known to the majority of Windows users better than other tabs in this control panel. Since here you can change, supplement and eliminate types of images such as a pointer.
In order to select one of all schemes, use the drop-down list - “ Scheme". The opened scheme can be changed using the zone - “ Settings«.
Select the system and use the button " Review» change the pointer type to any of your tastes.
In order to erase a specific scheme, find it in the drop-down list and click on the " Delete". It is impossible to delete system parameters in this way.
Certain Windows 7 design themes change the mouse pointer type. To prevent themes from doing this, remove the flag from the “Allow themes to change mouse pointers” function. To turn off the pointer shadow, remove the checkbox from “Enable mouse pointer shadow”.
Driver and device information is displayed here. By clicking on the button Properties“, it is possible to refresh, delete or roll back to an earlier state of the driver and view auxiliary information about the computer mouse, as well as in the “Device Manager”.
Assistive abilities of a computer mouse
In order to enter fast scrolling of files, you need to click on the mouse wheel, and then move the mouse in the direction you need.

To set the special abilities of the mouse, go to Control Panel- then Accessibility Center and click on Making the mouse easier to use(changing the characteristics of a mouse or other device).
To properly set up mouse control using the keyboard, select "Mouse Pointer Control Settings". With mouse wheel support, set the speed of the mouse pointer that suits you (it is possible to set the initial and final speed of the pointer movement, as well as the duration of the boost and other characteristics).

Today we will talk about how to set up a mouse on a laptop or computer running Windows. And although we will talk specifically about a wireless mouse, the instructions are completely suitable for a regular one, since the difference between them is only in the type of signal transmission.
A computer mouse is one of the main peripheral devices, without which it is difficult to imagine a modern computer or laptop. It was created to help the keyboard - even before Windows appeared in its familiar form, it was easier to navigate through lines of text using the mouse than using keys. Today it has a wider range of functions.
Basic Bluetooth mouse settings
In order to get to the mouse settings section, the actions on Windows 10 and 7 are slightly different, so I’ll tell you in detail about them separately.
Windows 7
So, in Windows 7 you need to left-click on the “Start” menu and go to the “Control Panel” section
Click on it and get into settings.
Windows 10
In Windows 10, right-click on the Start icon and select Settings


and in the left column select “Mouse” and follow the link “Advanced mouse settings”

- In the first tab, you can mirror the button assignments - this is convenient to do if you are left-handed. That is, the functions of the right button will transfer to the left and vice versa.
- The next mouse setting is the double-click speed. The higher the speed, the faster you need to press the button to trigger a double click and, accordingly, to open files and folders. If you do not have time to do this quickly, then bet on a lower value.
- Sticky - when this function is enabled, a single click locks the mouse in the position in which it is currently located. Pressing it again releases it. That is, instead of holding the key down constantly, for example, to move a window or highlight text, you just need to click once, move it to the desired location, and click again to release.
To save the settings, you must click the “Apply” button

Adjusting mouse sensitivity
To adjust mouse sensitivity, you need to switch to the “Pointer Options” tab. Here we are interested in setting the speed of the pointer movement in the “Move” block. Not everyone is comfortable with the mouse pointer moving quickly or slowly, and this requires decreasing or increasing the mouse's motion sensitivity setting.
If the mouse was working fine before, and then you notice that it has started to slow down, check it. whether dust has stuck to it - it is often a common cause of loss of sensitivity to movement
For more detailed settings, activate the “Enable enhanced pointer precision” checkbox.

In the “Visibility” section, you can enable and configure the length of the trail that the cursor will leave behind.
The remaining settings are addressed to complete beginners who may confuse the mouse and keyboard pointers.
Customizing the mouse cursor
If we go to the “Pointers” tab, we can configure the graphical display of the mouse cursor. If someone doesn’t like the standard ones, then other options are chosen here. Firstly, there are already several pre-installed sets from which you can choose a whole set of signs made in a single stylistic solution.

If you need to replace any individual pointer, then select the cursor from the list, and then click on the “Browse” button

Find the folder with cursors downloaded from the Internet with the extension .ani or .cur

select it and click on the “Open” button and then click on the “Apply” button.
Customizing the Mouse Wheel Control
Another parameter we can adjust when setting up a mouse is the wheel.

- Vertical scrolling - here you set the distance by which the page is scrolled when you scroll the wheel one notch. Either we set a specific number of lines, or the whole screen is static. This is convenient when reading documents, when you can turn an entire page at once with one movement.
- Horizontal scrolling - This feature is supported by some more sophisticated and expensive mice to move a certain number of characters horizontally.
Most novice users ask questions: how to adjust the speed of mouse clicks and cursor movements, change mouse pointers, adjust the wheel and other important parameters. We will find out the answers to all these questions now.
So, in order to configure mouse in windows 7you need to do the following:
Step 1 . Click the Start menu and select Control Panel. In the control panel window that opens, click on the linkEquipment and sound.

Step 2 . In the window that opensEquipment and sound in line Devices and Printers select Mouse.

Step 3 . Next, the window required for mouse settings will open. In this window all mouse settings will be made in the Windows 7 operating system.
Properties Window: Mouse consists of five tabs:
- Mouse buttons.
- Pointers.
- Pointer parameters.
- Wheel.
- Equipment.

In the Mouse Buttons tab you can customizeButton configuration. Namely change button assignments. This option will allow you to swap the mouse buttons (right to left, and left to right). This function is convenient for those who use the mouse with their left hand, i.e. for left-handed people. To activate this function, check the boxChange button assignments.
In the next block you canadjust double click speed. To do this, in the line Speed Click the slider once and, without releasing the mouse button, drag it to the right or left. If you drag to the right, the double-click speed will be higher , and if you pull to the left, then below . After this, you can test the double-click speed by double-clicking the folder icon. There are 11 divisions for setting, so you can easily choose the most convenient speed for yourself.
In the block Mouse Button StuckYou can enable or disable this option by checking or unchecking the Enable sticking box.
Mouse Button StuckAllows you to drag and select without holding down a button. To turn it on, briefly hold the mouse button pressed. To turn it off, click again on an empty area of the monitor.
After configuring all the settings, click OK .
For mouse pointer settingsgo to the tab Pointers.
In the Scheme block you can change mouse cursor. To do this, click on the drop-down list itself and select the most suitable cursor scheme for yourself.
In chapter Settings you can change mouse pointers. Simply double-click on the desired component and select a separate cursor for it.
If you want to cancel the mouse pointer settings you have made, click on the button Default.
Also you Enable pointer shadow by checking this box. If you want the cursors to change when you change the theme, check the box Allow themes to change mouse pointers.
After completing the pointer settings, click OK.

To configure pointer settings, go to the tab Pointer Options.
In the block Moving you can adjust the speed of the pointer. To do this, click on the slider and, without releasing it, drag it towards the words Below or Higher. I also recommend checking the box Enable increased pointer accuracy.
In the block Visibility You can enable or disable the following components:
- Show mouse trail.
- Hide the pointer while typing.
- Indicate the location of the pointer when pressing CTRl.(if you hold down the ctrl key, circles will appear around the mouse after each mouse click).
After completing the settings, click on the button OK.