How to add your applications to the firmware. How does the system load on ARM using android
Almost every user of the android smartphone had a desire to create or edit the firmware to fit his needs and desires. In this article, we consider the principle of editing the firmware for CWM (in zip format).
Training:
First of all, you need to decide what firmware we will take as a basis. It is better to use off. firmware in zip. For almost every common device there is a clean firmware + root.
When the firmware is selected, you need to download it at any place convenient to you on the PC (you should not unpack it).
We also need an archiver, I advise you to use 7zip and the best of its kind text editor Notepad ++.
Firmware structure:
Opening the archive with the firmware you see the following:
META-INF - The folder contains the firmware installation scripts.
system - folder with all firmware files (applications, tweaks, scripts, etc.).
boot.img - the core of the system.
Almost all manipulations are carried out in the folder systemits structure:
app - system applications.
bin - resources of the system itself.
etc - Scripts, tweaks, configs, profiles and system settings.
fonts - System fonts.
framework - Main system files are stored here (graphics, animation text settings, etc.).
lib - system libraries.
media - multimedia files (notification melodies, download animations, wallpapers, etc.).
usr - the settings are not changed further by the system (they work in the "read only" mode).
xbin - again, system configs and other tweaks.
build.prop - info about the system, locale settings and system performance.
Applications:
Before adding / removing software to the system, it is necessary to check whether your firmware is deodexed (that is, check for the presence of .odex files in the app folder. If there are any files, then you need to get rid of them instructions .
Add software to the firmware:
First of all, you need to install into your smart those programs that you want to add to the assembly. After installation we get them out of the system using Root exporer and its analogs, they are located along the data / app path, so we either need them (if there are of course) they are along the data / data path. They are in the application folder with the same name and have the extension .so . Then seized .apk Files are put into the archive on the system / app path and files with the extension .so (lib "s) along the path system / lib.
Remove the software from the firmware:
Everything is simple, go to the folder app - we determine what we do not need and remove all unnecessary software (the system is better not to touch).
Language and firmware version:
Copy the build.prop file to the desktop. Open it with a notebook and find the lines:
ro.product.locale.language = en
ro.product.locale.region = US
for the Russian language, you need to do this:
ro.product.locale.language = en
ro.product.locale.region = RU
we enter the name of our mod in the string
in the same build.prop
Graphics:
The entire graphical part of the firmware is stored in two files framework-res.apk file path systemframework and SystemUI.apk along the way systemapp. And the graphical part of the settings application is stored naturally in the Settings.apk application.
Scripts and tweaks (acceleration and optimization of the system):
Most of the settings are in the file. build.prop, you can read about this. Also if your kernel supports
Let's start with a simple mention that the chip made according to the ARM architecture is a system on a chip (SoC). That is, it is a complete computer implemented on a single chip. The processors of this architecture make many devices (routers, switches, embedded computers on televisions, gaming portable consoles, etc., etc.).
This architecture also has low power consumption and heat dissipation characteristics; therefore, it is used quite effectively in devices such as smartphones and tablet computers.
The exact addressing of devices is not the purpose of this review article. I just want to introduce potential modders to the basic principles that will give a more complete understanding of what is being done on their device.
So, we proceed directly to the description of the download of this type of device. Virtually every ARM processor has flash memory built into the chip, into which so-called is placed. loader. In the absence of such memory on the chip, or not using it as a space for locating the bootloader, the chip usually refers to launching this bootloader to a NOR-flash at a strictly defined address.
There are several downloaders. A number of them are commercial. But there is an open source bootloader, u-boot. Unfortunately, when the code is open, it contains processor-dependent code, so without processor specifications it cannot be simply ported (adapted) to a processor that does not have open documentation.
Now we will describe what the bootloader usually does after launching it. A fairly direct analogy can be made with the BIOS of computers based on x86 processors (those with the bulk of people). The ARM loader, when launched, also performs in the same way a low-level initialization of the hardware of the device (RAM, data storage, network adapter, etc., etc.). After initializing the serial port (usually in RS232 format, but with 3.2 volts), it is possible to work with it through the console initialized on this port.
It looks like this
Through this console, you can perform almost complete configuration or reconfiguration of our hardware. For example, in order to load Linux, at least we will need to reconfigure the string of parameters passed to the kernel at boot (with the default setting for downloading android). Also there you can fully work with the nand sections - erase, split, modify, protect from writing and vice versa, etc. etc. (in order to avoid additional questions about changing the nanda sections). Even in the console, you can download and run some software. All settings made in this console can be saved and used as default settings when the device boots.
We make a small digression. In addition to NOR-flash for locating the bootloader, in some cases, NAND-flash or even SD-card can be used. In addition, it is possible to use combinations of these types of flash memory in the device. For example, the bootloader can be placed in the NOR, and as an internal drive (for OS placement) NAND or SD, etc.
So, we included a piece of iron. She loaded the bootloader. Loader initialized hardware. At the end of this initialization, the loader performs the following procedure:
1 - reading and placing in memory of the kernel image and ramdisk - both at strictly defined addresses (can be configured on the u-boot command line).
2 - launching the kernel from the correct entry point, indicating to it where to get the external ramdisk (initrd) from the root file system and what to use as init.
Another part of the RAM is allocated for devices that require their memory, for example, for the video core. Now you understand where some part of the device’s RAM is declared.
Further booting is not much different from booting Linux on a regular computer. After booting, the kernel executes the specified init (this is just another program). The init configuration is done in the init.rc file, which is located in the ramdisk. It sets up environment variables, mounts disk devices, starts necessary services, etc., etc. At the end of the execution of pre-start instructions from init.rc, the android itself is launched. The type of android launch is determined by the androidboot kernel launch option. The standard launch of android is performed as a whole by passing the parameters of using the desired ramdisk (in ramdisk.img) and the parameter androidboot.normal. To start the recovery mode, as a rule, another ramdisk is used, containing the recovery program (in recovery.img) and the kernel parameter androidboot.recovery.
As a variation of the Linux kernel for android, it can be assembled not with the support of the initrd (the root system on the ramdisk), but with the so-called initramfs In this case, the entire root filesystem will be located just inside the kernel. In this case, the recovery mode requires, as a rule, the second kernel with the root file system containing the recovery program. And setting up the bootloader is simple to load and execute the recovery kernel
And as a result, a simple scheme:
Starting the processor -\u003e starting the loader -\u003e initializing the iron -\u003e reading from the kernel and ramdisk -\u003e starting the kernel using this ramdisk -\u003e running the init program -\u003e starting the android itself.
You can read more about u-boot and its commands, for example, on this wiki _http: //www.denx.de/wiki/view/DULG/Manual.
If this information is not enough for you, then you can read more about the Linux kernel startup parameters in the Documentation / kernel-parameters.txt from the archive of its source codes. Or find this file on the Internet for the version of the kernel you need. But do not forget to take into account the specifics of Android mentioned above.
Hello Habr!
A few years ago, when I first met Android, I heard from my work colleague that Android provides for the ability to install modified or self-made firmware. Frankly, then I was far from that. And even half a year ago, I was hardly interested in such things. Deep in the shower, I was sure that what the manufacturer was doing was already intended for normal use.
What was my disappointment when I purchased a phone from China, where the use of Google, Skype, Facebook and other applications was prohibited by factory settings. In principle, it was possible to close my eyes to some things, but when my phone did not imply the use of a Google account, I made myself promises to make sure I didn't become so.
Half a year has passed and my custom firmware has been successfully used around the world.
This series of articles will discuss how to do reverse programming for Android, implement patches, tweaks, and mods.
Preamble
So! Let's first define the concepts that will be used in given article. Your usual understanding, however, can be very different.Patch - modification or replacement of existing program code in order to modify the program algorithm.
Maud - As a rule, adding additional functionality to an existing program code without changing the algorithm.
Tweak - Improving the functionality of the program in order to facilitate access to system parameters.
I also want to note that all the examples will be taken for the HTC phone, but this does not mean that this information cannot be used on other phones.
I draw your attention to the fact that I, as the author, are not responsible for the possible loss of data on your phone as a result of using the information below.
Environment preparation
I can do without detailed instructions on how to use this or that software. If you are interested in this article and you have finished reading these lines, then I hope that you are already an experienced user and have experience using, well, or at least experimenting in this area. Instructions, articles and test results are fully available, however, as well as on Habré. Also I will manage without the description of some terms, otherwise the article will turn out very big and tedious. We will write only in the case. I am sure that your environment has been standing for a long time. If not, I suggest to download and install.1
. Android SDK . This is an application development environment for Android. In order to make modifications, we will definitely have to check our program code. The development environment is the best we can use.
2
. Android Kitchen . This utility will allow you to work with images of the system partitions of the official well or unofficial firmware.
3
. Jd-gui . Java language code decompiler. Immediately, I note that this is the best decompiler in terms of ease of use.
4
. DJ Java Decompiler . Another decompiler, or disassembler, as some like to call it, is Java programming code. Not convenient in terms of use, but parses the code, which sometimes does not understand the JD-GUI.
5
. smali . Another disassembler, but already dalvik code. smali is needed for disassembling, and backsmali for assembling code.
6
. dex2jar . A utility for converting executable files Dalvik code.
Firmware conversion
Of course, the firmware that you have on the phone from the manufacturer is optimized in order to reduce energy consumption. In order to be able to change the firmware, it must be converted to a format that allows you to change the code. It uses Android Kitchen. You can of course with your hands, as I did before, until I found this very “kitchen”. How to pull the system area out of the phone, set the environment, make DEODEX firmware, you can read on the Internet. If you don’t already understand anything, I think you should postpone the article until you gain enough experience.After the firmware from the optimized view (ODEX - optimized dalvik executable code, if memory does not change me) became DEODEX (that is, NOT optimized), all executable files are ready for modification.
Directly modifications
Creating patches
As I already told, my phone initially had a ban on using Google. Well, at least you burst, do not go to Playstore, do not configure your account, the phone book does not really synchronize. Why do you need such an Android? Long digging into the logs (logcat) of the device itself, I found records that said that using Google is prohibited. The most inconvenient in Android, you see the log, but do not know which system application produces it. In order to find where the legs grow from, I had to gut all system applications to the disassembled Java code. This took quite some time, but I still use the work done to analyze and search for the necessary code. The steps to get this tool are as follows:1 . Make deodex all firmware
2 . Your new DEODEX firmware will need to be assembled and flashed to your phone. How this is done is the topic of another article.
3 . From each file located in / system / framework, pull out the classes.dex file and convert it to JAR using dex2jar.
4 . Open each JAR in JD-GUI and re-save to source code
5 . Unpack the source code from the archive.
As a result, I got as many folders as there were JAR files in the / system / framework, and each folder had a structure of Java source codes.
By simple manipulations, I quickly found the place that generated the logcat entries.
We will not consider the entire logic of the ban, as for each case it is a separate story. I had to spend a couple of hours before I found where the checks are being made, build a block diagram in my head and figure out where to go in order to get the algorithm a little bit “spoiled”.
It turned out all simple. There is a subroutine that, on the basis of predetermined constants, responded to the call when it came to whether the phone belongs to China or not.
The code was in the file HTCExtension.jarand the class that contained this subroutine was in
Unpacking and analyzing the original file
1 . First we need to take the original DEODEX JAR file, which is responsible for the part of the code we need. In our case HTCExtension.jar.2 . Open with any archiver and pull classes.dex from there
3 . Using dex2jar converter, convert it to a JAR file. Team: dex2jar.bat classes.dex
4 . View the resulting classes_dex2jar.jar file in the JD-GUI.
5 . Yes, most often JD-GUI decompiles the code not as it looks in the original, it is understandable, but it is quite possible to read. In the source code, we see that the subroutine checks the project parameters and the language flag of the firmware. In our unfortunate case, the return value is TRUE.
public static boolean isChina () (if ((HtcBuildFlag.Htc_PROJECT read the value of the crystaffinau dt 216) || (HtcBuildFlag.Htc_PROJECT_flag == 218) || (HtcBuildFlag.Htc_PROJECT_flag == 23 the forfeit the property && (2 == HtcBuildFlag.Htc_LANGUAGE_flag)) || (HtcBuildFlag.Htc_PROJECT_flag == 27)) return true; return false;)
6 . To make a patch, we need to disassemble the Dalvik code itself. For this we use baksmali. The most convenient way is to create a separate folder and put three files there together: HTCExtension.jar, smali.jar and baksmali.jar. Give the java command -Xmx512m -jar baksmali.jar -a -d -o HTCExtension -x HTCExtension.jar
This is the API of your Android version. For JB is 16
- folder where all the firmware frameworks are located.
In my case it was a team.
java -Xmx512m -jar baksmali.jar -a 16 -d S: \\ dev \\ Android \\ Android-Kitchen \\ WORKING_JB_15 \\ system \\ framework -o HTCExtension -x HTCExtension.jar
7
. In our newly created folder there was a folder HTCExtension, and in it our files with Dalvik code.
8
. We look for the file on the way \\ com \\ htc \\ util \\ contacts \\ BuildUtils $ Customization.java and look at the code:
.method public static isChina () Z .registers 3 .prologue const / 4 v0, 0x1 .line 276 sget-short v1, Lcom / htc / htcjavaflag / HtcBuildFlag; -\u003e Htc_PROJECT_flag: S const / 16 v2, 0xd8 if-eqqROduct_flag , v2,: cond_13 sget-short v1, Lcom / htc / htcjavaflag / HtcBuildFlag; -\u003e Htc_PROJECT_flag: S const / 16 v2, 0xda if-eq v1, v2; ; -\u003e Htc_PROJECT_flag: S const / 16 v2, 0x17 if-ne v1, v2,: cond_14 .line 297: cond_13: goto_13 return v0 .line 283: cond_14 sget-short v1, Lcom / htc / htcjavaflag / HtcBuild; Htc_PROJECT_flag: S if-ne v1, v0,: cond_1d .line 285 const / 4 v1, 0x2 sget-short v2, Lcom / htc / htcjavaflag / HtcBuildFlag; -\u003e Htc_LANGUAGE_flag: S if-eq v1, af; 291: cond_1d sget-short v1, Lcom / htc / htcjavaflag / htcBuildFlag; -\u003e Htc_PROJECT_flag: S const / 16 v2, 0x1b if-eq v1, v2,: cond_13 .line 297 const / 4 v0, 0x0; method
9
. Scary, is not it? Nothing is clear. But this is a fixable matter. Having created several of your patches and having thus filled your hand, you can easily modify the code without third-party tools. In our case, in this code
.prologue const / 4 v0, 0x1 assigns the variable v0 a value of 1, that is, TRUE. Then there are all sorts of checks, and if the phone is not Chinese, then the value of the variable changes:
.line 297 const / 4 v0, 0x0 goto: goto_13
10
. The easiest way to save the father of Russian democracy is to change the code to the following:
.prologue const / 4 v0, 0x0, that is, changing the variable value from 1 to 0. That is, whatever it was, the value would always return FALSE and in the JD-GUI code would look like a public static boolean isChina () (if ((( HtcBuildFlag.htc || (HtcBuildFlag.Htc_PROJECT_flag == 27)) return false; return false;)
11
. Yes, the method will work. But we are not looking for easy ways - this is the time. Secondly, not quite beautiful. I want code something like
public static boolean isChina () (return false;)
12
. And how do we get the Dalvik code for this source code? For beginners, we do a little trick.
Creating Dalvik Code
1 . Open Android SDK.2 . Create a new project, and in our only test class we write the following code
package ru.habrahabr.test; public class test (public static boolean isChina () (return false;))
3 . We compile our project and then take the assembled application from the workspace.
4 . We put the collected application in the folder where we have gutted the JAR file.
5 . Give the command java -Xmx512m -jar baksmali.jar -a -d -o test -x test .apk
6 . We disassembled the application we just compiled into Dalvik code.
7 . Open our file test.smali and see the code there
.method public static isChina () Z .registers 1 .prologue .line 7 const / 4 v0, 0x0 return v0 .end method
8 . Everything, the code for patching is ready.
Rolling a patch
1 . Dalvik code is littered with markers indicating a line of code in the original source file. This is necessary when displaying errors, if any, in your program. Without strings, the code also works great.2 . Delete lines with line numbering, copy and replace the method (subroutine) in our \\ com \\ htc \\ util \\ contacts \\ BuildUtils $ Customization.java file.
.method public static isChina () Z .registers 1 .prologue const / 4 v0, 0x0 return v0 .end method
3 . Save the file. Yes, I forgot to say, the editor needs a normal one, for example, Notepad ++ or EditPlus. Who likes what.
Compiling and building a patched JAR file
1 . With the help of backsmali we have gutted our JAR file, and now we need to build it back.2 . Give the java command -Xmx512m -jar smali.jar -a 16 HTCExtension -o classes.dex
3 . The classes.dex file appears in our daddy
4 . Open again HTCExtension.jar file with the archiver and replace the existing one classes.dex on our newly created.
5 . All our HTCExtension.jar contains modified program code.
Replacing the original file with a patched one
Usually, for ordinary users, special scripts are created that are replaced with recovery. But we are not interested. First, long and tedious, secondly, we are experienced users and can afford some subtleties.1 . You can replace the current working file with the following commands, if you already have the DEODEX firmware and have root access:
Adb push HTCExtension.jar /sdcard/HTCExtension.jar adb shell su mount -o remount -rw / system dd if = / system / framework / HTCExtension.jar of = / system / framework / HTCExtension.jar.back dd if = / sdcard /HTCExtension.jar of = / system / framework / HTCExtension.jar chmod 644 /system/framework/HTCExtension.jar rm / data / dalvik-cache / [email protected]@[email protected] reboot
The 1st team uploads the patched file to the USB flash drive.
2nd command opens the shell
3rd command gives root access
The 4th command mounts the system in read / write mode
Team 5 makes a backup file
The 6th command overwrites the existing file with the new patched one.
7th team sets permissions
8th command deletes cache
Team 9 reboots the device.
2
. Thank you for reading this point, it remains a bit.
3
. After the reboot, your new patched code will take effect.
4
. If the code does not work or an error pops up, then by not tricky combinations you can back up the backup.
adb shell su mount -o remount -rw / system dd if = / system / framework / HTCExtension.jar.back of = / system / framework / HTCExtension.jar rm / data / dalvik-cache / [email protected]@[email protected] reboot
Epilogue
Yes, this article seemed to someone too specific, to someone a little-clear, and to someone useless. I deliberately did without in-depth detailing and illustrations of how it all looks live and in practice. Firstly, this work will be ungrateful and only raise more questions. Secondly, I don’t want to see an army of users on forums that complain that they have killed their phone.By the next article I will tell you how to do tviki. There will be an example of the use of automatic recording of phone calls by the native means of the telephone. Thank you for your attention.
P.S. If something is not clear or confusing, ask questions - I will always be happy to answer and explain.
Creating custom firmware for android is not easy, for this you need special software and certain skills, as well as an algorithm of actions that we describe in this article.
Let us consider a particular case and begin in order. To create a custom firmware, Android will need:
- A personal or portable computer that has Ubuntu operating system on board and Java is installed.
- "Kitchen" - an application for processing images of system partitions.
- Actually, Android firmware to be processed.
Step 1 - Install Ubuntu
The Ubuntu system is based on the Linux kernel and is based on Debian, developed by Canonical. It is not at all necessary to install this system instead of the current one, run it through an emulator, and so on.

To comfortably use all its advantages, it is enough to use the Wubi application that can install Ubuntu under Windows. Wubi - shorting from Windows Ubuntu Installer.
After downloading the installer, and installing through it a new OS, when you boot your computer, you can go into one or another system to choose from and manage it through the Windows control panel.
Step 2 - Install Java
Java is a programming language developed in 1995, its name seems to have been taken from movies (ridiculous folk Java from Star Wars).
This technology is based on most modern software of various types. Some sites work only with Java onboard PC.

To install it you need:
- Log in to the Ubuntu system, and open the Terminal with the Ctrl + Alt + T keys.
- Use the sudo add-apt-repository command “deb http://archive.canonical.com/ubuntu lucid partner” to open a new repository from which you can download Java. To do this, you will need to enter a password to get Super-Admin rights, which is set during the installation of Ubuntu. Next you need to use the following commands:
- sudo apt-get update to update the source list.
- sudo apt-get install sun-java6-jre sun java6-plugin sun-java6-fonts for installing Java.
Step 3 - work with the "kitchen" to create firmware
The program "kitchen" is the main tool for working with android firmware. There are several types of them, we will consider working with the kitchen from Dsixda.
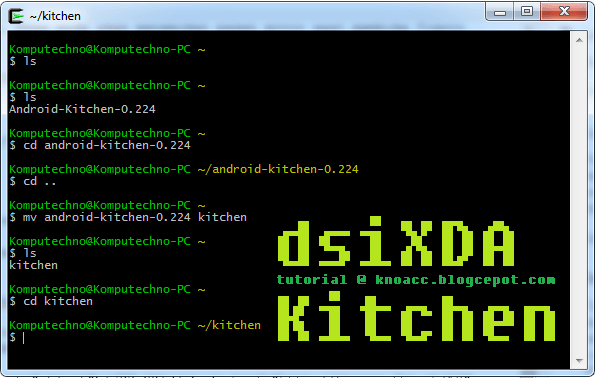
- After downloading the necessary files, you need to unpack them into your home folder in the kitchen directory.
- Start the Terminal, using the Is command to display a list of documents in your home folder. Directories will be highlighted in blue, archive files in red, and so on.
- Open the Kitchen folder, transfer the processed firmware file in any format to the original_update directory.
- Return to the Terminal with the open folder Kitchen, enter the command Is. Menu appears among the files, it should be started with the command. / Menu. This will open a list of numbered commands that you can execute by typing their number on the line and pressing Enter.
- To disassemble the firmware, enter command 1. The kitchen will then start displaying many questions that need to be answered with the Enter key (the required values are entered by default).
These actions will lead to the initial menu of the program. Returning to the Kitchen folder, you can find the WORKING_x_y folder, where x and y are the date and time it was created.
It will contain the disassembled firmware files. In the System folder you can find all the system files. parts of these files will change the firmware.
Changing the set of basic applications, functions, settings, and making all the desired amendments to the firmware files, you need to collect it.
To do this, go back to the Terminal, enter the command 99, and answer the questions with the Enter key again. After that, the program will throw the user into the initial menu, and the OUTPUT_ZIP folder will contain the new firmware file, which can then be installed on the mobile device.
There are other ways to create custom custom firmware android, and the necessary programs for this can be found on the network, they allow you to “open” the files of the operating system, and change certain parameters at will.
Here are some more programs designed for this:
- Android SDK is a development environment created specifically for working with Android applications, it allows you to check the program code.
- Android Kitchen - necessary for processing images of system partitions in the firmware.
- JD-GUI is a decompiler capable of working with the Java programming language. Its counterpart is DJ Java Decompiler.
- smali - to work with dalvik-code. Designed to disassemble the code, backsmali allows you to assemble dalvik code.
- dex2jar is a utility that allows you to convert executable files compiled on dalvik-code.
Any Android user has his own idea of how the operating system should look, what functions should be performed and what set of software in it should be installed by default. However, not everyone knows that creating your own firmware is not that difficult. To do this, it is not necessary to understand the Linux kernel, to be able to compile Android sources, or understand how a smartphone works.
Introduction
There are three ways to create your own firmware for Android-communicator: 1. Finishing and compiling the operating system from the sources published by Google or the CyanogenMod team. 2. Modification of the communicator's stock firmware. 3. Modification of third-party firmware created using the first or second method.
The first method is the most correct and flexible, but it often requires deep enough knowledge about the features of Android and the ability to edit the source system so that they then work on the device. This topic is beyond the scope of our article, so we will not consider assembling Android sources, but we’ll dwell on two other methods, more precisely on the third one.
Third-party firmware (the so-called mods) exist for almost any Android device, from the moment of its entry into the market at least a week has passed. Usually they already include all the necessary modifications necessary for the correct operation of the firmware on the communicator, and therefore represent an excellent platform for experimenting with the system. They can be modified almost beyond recognition, include any software in the OS, change its appearance, create a lot of low-level settings using a simple text editor and file manager. These actions do not require deep knowledge of the OS and can be performed by any reader of the magazine.
We choose the experimental
So, suppose that our communicator is already logged and the ClockworkMod recovery console is recorded in the boot area, allowing you to install any firmware on the device without any restrictions (we wrote about how to do this in the article “Total submission”, published in the October issue] [] ). Now we want to install another firmware on the device, but not anyhow what, but with our own modifications, settings and software. Therefore, we need a framework, namely someone else's firmware, stably working on our device. Where to get it?
The main habitat of all romodels is, of course, the xda-developers.com forums. There you can find anything for communicators running iOS, Windows Mobile, Windows Phone and Android. Open the site in the browser, click on the Forums section and look for your communicator in the forum lists. Next, go to the appropriate section of Android Development and carefully review the list of topics containing the word "" in the title. It is better to find some kind of clean firmware with a name like “Pure Android 2.3 Rom” or the port of CyanogenMod, although, in fact, any other will do (although it may be necessary to cancel the author’s changes). We open the topic, we flush the first post, we find somewhere at the end of the link to download and download the ROM to your computer.
Now you need to open the firmware file. This is done using the most common unzip:
$ mkdir ~ / rom; cd ~ / rom $ unzip ../path/up/proshivki.zip
General directory structure and important files
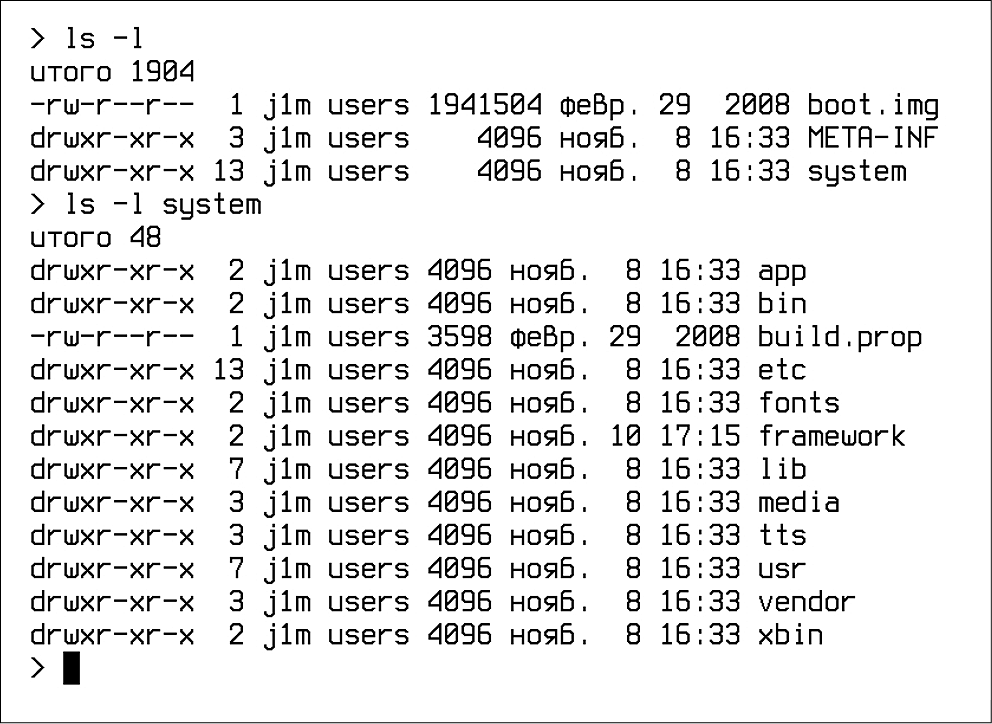
The set of files and directories resulting from the execution of the previous command is, in essence, the Android operating system, and exactly as it will be placed in the NAND memory of the device. Depending on the version of Android and the author’s imagination, it may contain different sets of directories and files, but it always contains three mandatory objects: META-INF, the boot.img file, and the system directory.
The first directory contains meta information about the firmware, including the author’s certificate files, a manifest with a list of files and their checksums, as well as an update script that can create new files in NAND memory, change access rights and display a progress bar that users see during install firmware.
The boot.img file contains a boot image that includes the Linux kernel and the initrd image. It can be unpacked, but for us it does not bear any particular benefit, since almost any system parameters can be changed using the configuration files and the / proc file system. If you need a kernel compiled with special parameters, for example, with an activated BFS scheduler or NFS support, you can almost certainly find it on the same xda-developers and flash it with ClockworkMod.
Finally, the system directory is what it was all about. The contents of this directory is the Android operating system without the Linux kernel. It contains everything that is needed for the OS to work, and therefore it is simply necessary to know its structure. It looks like this:
- app - pre-installed applications: phone, calculator, calendar, etc.
- bin is an analogue of the / bin and / usr / bin directories on Linux. Contains various system components used by higher-level system components. For example, this is where the dalvikvm virtual machine is located.
- etc - settings files. The full equivalent of / etc in Linux, used, however, only by system components. Android applications store settings in the / data / data directory.
- fonts - fonts. The default contains only Droid branded fonts (or Roboto in Android 4.0).
- framework - sets of Java classes used by the system and Android-software. There is also a framework-res.apk file containing a complete description of the operating system interface, including all graphic files.
- lib - Linux libraries used by low-level system components. The analogue of the / lib and / usr / lib directories on Linux includes standard libraries such as libc (but Android uses its own Bionic instead of Glibc), libz (gzip encryption), libssl, and others.
- media - media files: ringtones, notification sounds, interface sounds and OS boot animation files.
- tts - Files required for speech synthesizer.
- usr - optional directory, which usually contains the files needed for softin from the bin directory. In fact, analogue / usr / share.
- vendor - files supplied by the manufacturer of the device. Usually contains binary firmware for various “iron” components, such as a Wi-Fi module.
- xbin - optional directory that contains everything that is not included in the bin. As a rule, it is used to store useful utilities, nevertheless optional for system operation (top, text editor). CyanogenMod uses it to store administration tools: bash, ssh, powertop, busybox, etc.
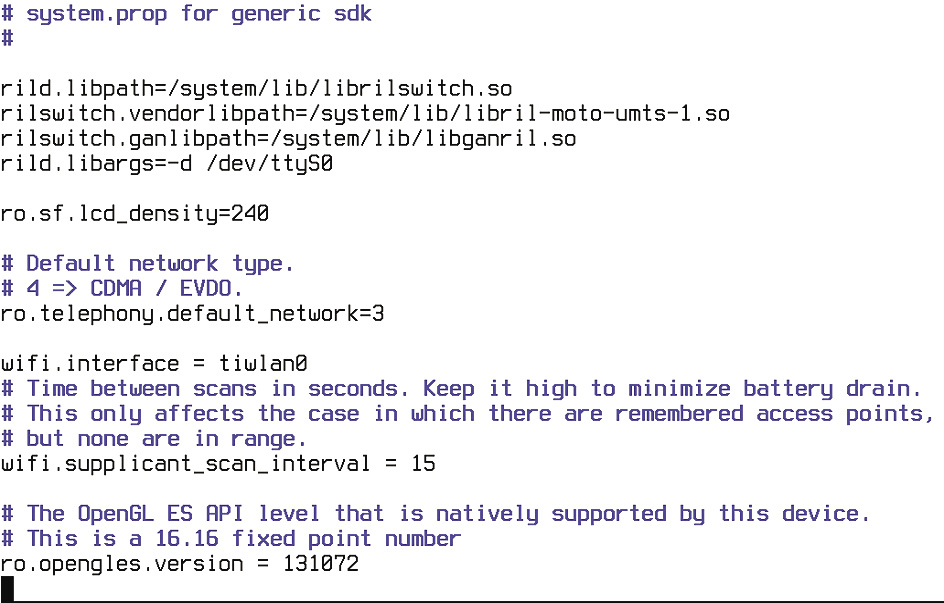
- build.prop - file containing information about the assembly, as well as various low-level settings.
Command setprop
The build.prop settings in the article can be applied to an already running system using the setprop command:
# setprop debug.sf.nobootanimation 1
Own software suite
The directory / system / app contains all the software preinstalled in the firmware. By removing and adding packages to this directory, we can change the set of applications available out of the box. For example, it is not a secret to anyone that the standard Android lunch (and ADWLauncher in CyanogenMod) slows down and has many drawbacks. OK, replace it with LauncherPro:
$ rm system / app / Launcher.apk $ wget goo.gl/U9c54 -o system / app / LauncherPro.apk
And it's all. No need to install anything, no need to poke around anywhere, just throw the necessary application into the directory - and you're done. Even the name does not matter, Android itself will find the desired application and install it as a home screen. In the same way, you can put any other program in the firmware or remove it from there.
It is useful to put into the firmware one of the applications for finding a lost smartphone (for example, prey), then even in the case of a reset to the factory settings, it will remain in the OS and will work. You can also replace some system software, for example, add Dialer One instead of the standard Phone.apk or Go SMS instead of sms.apk.
What about system Linux applications, such as an ssh server or mc? Here, too, everything is simple. You can build a soft for Android and an ARM processor using the Google NDK kit, but most of the necessary applications have already been compiled before us. For example, we want to preinstall mc in our firmware. Go to xda-developers and do a search for Midnight Commander. On the first page we find the apk-package with the installer and unpack it with the help of the same unzip:
$ cd / tmp; unzip ~ / NativnuxInstaller_1.1.apk
We see in the list of unzipped files assets / kits / mc-4.7.5.4-arm.tar.jet. This is a tar.gz archive, which is unpacked into the root of the system after installing the apk-package (or rather, after installing apk, launching the application and clicking the Install button). We can immediately unpack it into our firmware and get the pre-installed mc:
$ cd ~ / rom $ tar -xzf /tmp/assets/kits/mc-4.7.5.4-arm.tar.jet
Now, to start the file manager on the device, just open the terminal and type mc. Other applications may be distributed in zip archives for firmware using ClockworkMod Recovery. Putting them in your mod is even easier; to do this, go to the root of the firmware (in this case ~ / rom) and unpack the archive using unzip.
Appearance
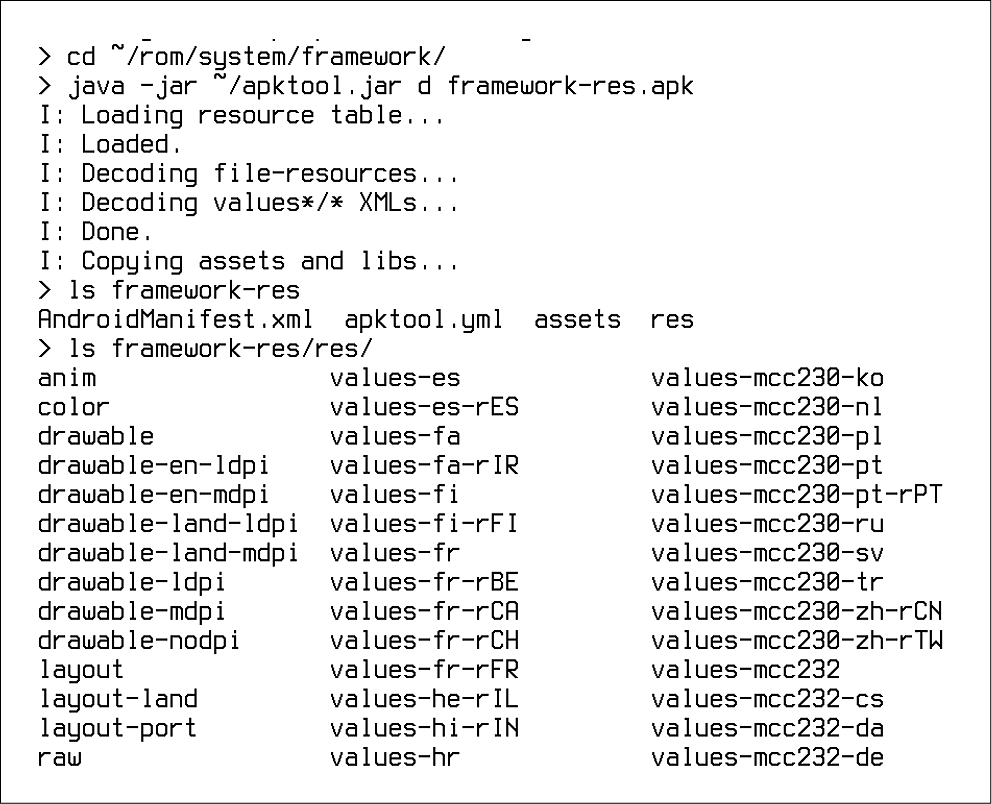
Own firmware is most often created in order to change the appearance of Android to your liking. To do this in Android, again, is very simple. All Android GUI settings are stored in the framework / framework-res.apk file. It can be unpacked using the apktool utility:
$ cd ~; wget goo.gl/hxz5l $ tar -xjf apktool1.4.1.tar.bz2 $ cd ~ / rom / system / framework $ java -jar ~ / apktool.jar d framework-res.apk
As a result, the framework-res directory containing all the package files should appear in the current directory. The most interesting subdirectories inside it are res / drawable- * and res / layout- *. The first contains all the graphic elements in the form of png-files for different resolutions and screen positions. For example, drawable-land-mdpi is a directory with graphic resources for medium-resolution screens that are in a horizontal position (when the screen is rotated, the OS switches to using other files). Of course, any file can be edited or replaced by another.
Layout directories contain descriptions of graphic elements in XML format (in fact, they are stored in binary AXML format, but apktool converted them to plain XML). The format of the description is quite simple and straightforward, but it’s difficult to deal with it, especially if you don’t know where everything is. Therefore, we again turn to the services of the inhabitants of the forum xda-developers, who have already managed to come up with a lot of different modifications for the Android graphical interface. They are easy to find using the search request "framework-res mod device_name".
Usually, such mods are distributed as a ready-made framework-res.apk file, which you can simply put in your firmware. If you want to find specific differences in the content, then the mod can be unpacked and compared to your framework-res using diff:
$ diff -R ~ / framework-res \\ ~ / rom / system / framework / framework-res
Unfortunately, within the framework of one article, we cannot consider at least part of the internal structure of the framework-res, so for more information, refer to the relevant topic of the forum w3bsit3-dns.com.
After making modifications, you can build framework-res.apk using all the same apktool. However, this operation requires the aapt utility from the Android SDK, which apktool uses for the final packaging of the apk-file. It can be obtained separately:
$ cd ~ / bin; wget goo.gl/tC7k8
Now you can collect the file:
$ cd ~ / rom / system / framework $ java -jar ~ / apktool.jar b framework-res $ cp framwork-res / dist / framework-res.apk. $ rm -rf framework-res
The next step is to change the loading animation. It is stored as ordinary png files packed in the system / media / bootanimation.zip archive. Unpack it:
$ cd / tmp $ mkdir bootanimation; cd bootanimation $ unzip ~ / rom / system / media / bootanimation.zip
Inside is the desc.txt file, which describes the animation in the following format:
Width Height FPS p Order Pause Catalog ...
The standard view of this file is:
480 800 30 p 1 0 part0 p 0 0 part1
This means that the image has a size of 480 x 800, and the image change rate (FPS) is 30 pieces / s. Next comes the description of the first part of the animation, the files of which are in the part0 directory. It is played once (number 1 after p). The next part (part1) is played an infinite number of times until the device boots. Usually the part0 directory contains images corresponding to the first part of the animation, and part0 contains all other images that are played in the loop. The images themselves should be the same size, and their names should contain numbers in ascending order, for example, 0001.png, 0002.png, etc.
Since the download animation has a very simple format, it is fairly easy to make. It is enough to convert the video to png-images using mencoder (in desc.txt, you must set the value of FPS 24):
$ mplayer -nosound -vo png: z = 9 video.avi
But it will be superfluous. The forum participants xda-developers have done so many animations that the need to work with the hands is no longer necessary. Links to interesting animations are given at the end of the article.
Low level settings
The last thing I would like to talk about in the article is editing low-level settings. In Android, there is a system / build.prop file for this, which stores information about the firmware build and settings for specific devices. By adding lines to this file, you can change the functioning of Android, speed up its work, or reduce battery consumption. Below are the most interesting settings.
- Prevent desktop unloading from memory: ro.HOME_APP_ADJ = 1
The option allows you to make working with the device more convenient due to instant access to the desktop at any time. Not recommended for devices with low memory.
- Improving the quality of saved JPG files: ro.media.enc.jpeg.quality = 100
Allows you to make camera shots clearer, but significantly increases the load on the CPU.
- Disable boot animation to speed up the loading of the operating system: debug.sf.nobootanimation = 1
- Laying part of the work on drawing the interface on the GPU: debug.sf.hw = 1
Allows you to make the interface faster and smoother.
- Block notification of the active debugging mode (when connected to a computer using USB): persist.adb.notify = 0
- Eliminating the problem with the appearance of a black screen after the end of the call: ro.lge.proximity.delay = 25 mot.proximity.delay = 25
- Turning on the backlight control keys immediately after the screen is turned on: ro.mot.buttonlight.timeout = 0
In addition to all this, many users also recommend using the following flag combinations:
- Reducing touchscreen response time: debug.performance.tuning = 1 video.accelerate.hw = 1 windowsmgr.max_events_per_sec = 150
- Increase battery life: wifi.supplicant_scan_interval = 180 pm.sleep_mode = 1 ro.ril.disable.power.collapse = 0
- 3G module tweaks: ro.ril.hsxpa = 2 ro.ril.gprsclass = 10 ro.ril.hep = 1 ro.ril.enable.dtm = 1 ro.ril.hsdpa.category = 10 ro.ril.enable. a53 = 1 ro.ril.enable.3g.prefix = 1 ro.ril.htcmaskw1.bitmask = 4294967295 ro.ril.htcmaskw1 = 14449 ro.ril.hsupa.category = 5
- Improving network performance: net.tcp.buffersize.default = 4096,87380,256960,4096,16384,256960 net.tcp.buffersize.wifi = 4096,87380,256960,4096,16384,256960 net.tcp.buffersize.umts = 4096,87380,256960,4096,16384,256960 net.tcp.buffersize.gprs = 4096,87380,256960,4096,16384,256960 net.tcp.buffersize.edge = 4096,87380,256960,4096,16384,256960
All these lines need to simply put in the file system / build.prop and save.
Assembly
OK, we made the necessary changes, implemented our applications, tweaked the system and now have to create an OS image ready for the firmware. This utility will help us testsign. First you should pack the firmware with zip:
$ cd ~ / rom; zip -r my-rom.zip *
Now you need to sign the archive so that Recovery can install it:
$ wget goo.gl/OyBBk $ java -classpath testsign.jar testsign \\ my-rom.zip my-rom-signed.zip
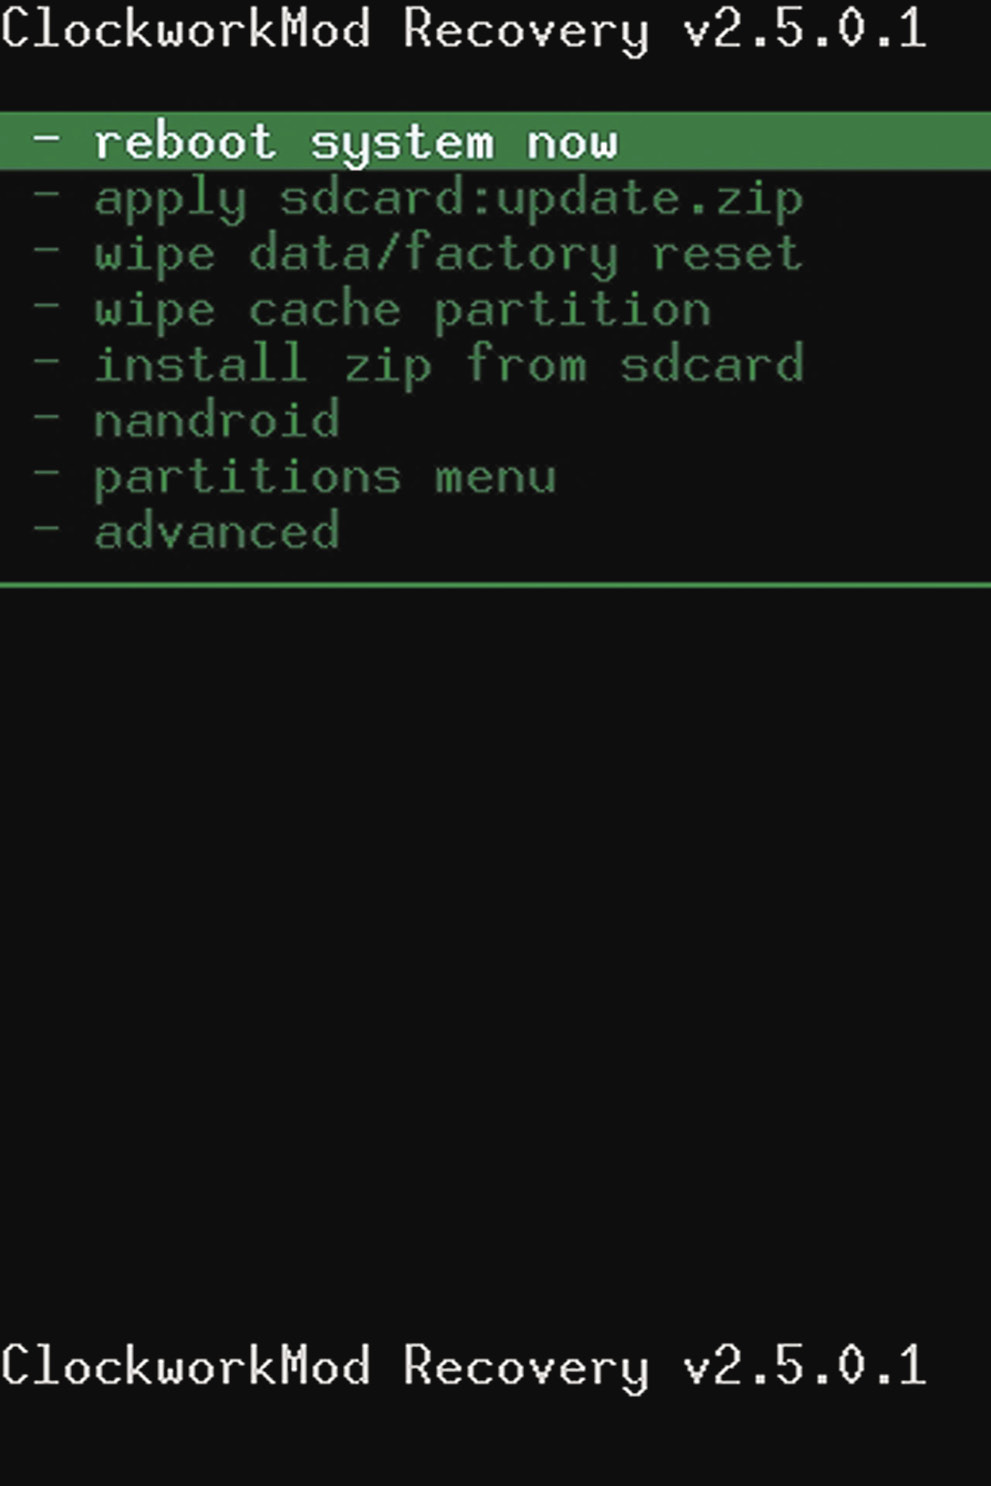
After that, we upload the archive my-rom-signed.zip to the device’s memory card and turn off the device. To get to Recovery, we turn on the device with the volume down key pressed (for some devices, the procedure may differ).
Now go to the item “Install zip from sdcard”, and then in “Choose zip from sdcard”, find my-rom-sign.zip on the SD card and select Yes. After the installation is completed, select "Reboot system now".
findings
Android is a flexible platform, and in this article, not all possibilities for its modification are described. A deeper modification may include replacing the kernel, changing the lock screen and standard applications, activating features such as automatically installing applications on a memory card, introducing a boot script engine (/etc/init.d), and much more. We will talk about all this in the following articles.