How to replace the shortcuts on windows 7. How to change the shortcut icon on the desktop
Icons are a means to visually display files and folders in the computer's explorer.
You will learn more about what an icon is, how to create your own icon, how to change the icon of a file or folder in this article.
What is an icon
Looking through the list of files and folders on the computer monitor, in addition to the names of these files and folders, we also see them badgescolloquially called iconswhich differ from each other and provide the ability for the user to quickly form a visual representation of the structure of computer files.
Thanks to the icons, it is very convenient for the user to distinguish files of some types from others, click on them with the mouse, performing various operations in a visual manner.
Icon (icon) - this is a small rectangular image stored in a separate separate file located somewhere on the computer’s storage device. The computer, forming on the monitor a visual representation of the list of all files, substitutes for each file and folder a suitable icon.
That is, it can be said that a certain system of interconnections is embedded in the computer's operating system, in which each file has an icon corresponding to it, which is displayed on the monitor as an icon of this file, but is actually stored separately from it. At the same time, the user can make changes to these relationships and force the computer to substitute any other icon with a certain file or folder instead of the “standard” one.
A feature of this system of interrelations is that in it any icon corresponds not to every single file, but to all files of this type. Accordingly, you can change the icon not for a specific file, but for all files of this type at the same time.
After downloading, install the program and run it. In the program window, you must first open a photo from which the icon will be created. To do this, click the “OpenPicture” button and point to this photo in the opened explorer (see the image, click on it to enlarge).
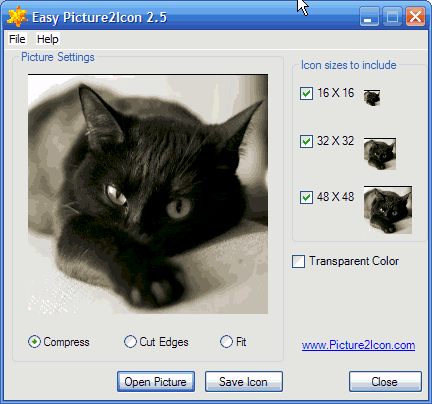
In the Easy Picture2Icon program window under the image, you can select one of 3 options for fitting it to the “square” format:
- Compress - compression of a photo along a longer edge to the size of a shorter one;
- CutEdges - crop the photo along the longer edge to the size of the shorter one;
- Fit - leave it as it is, inserting the field.
To the right of the image, you can select from 1 to 3 icon formats (16X16, 32X32, 48X48), which will be created from the original image and placed in the generated .ico file.
To create an icon file, you need to click the “Save Icon” button, after which you need to specify where and under what name this file should be saved.
How to change folder or shortcut icon
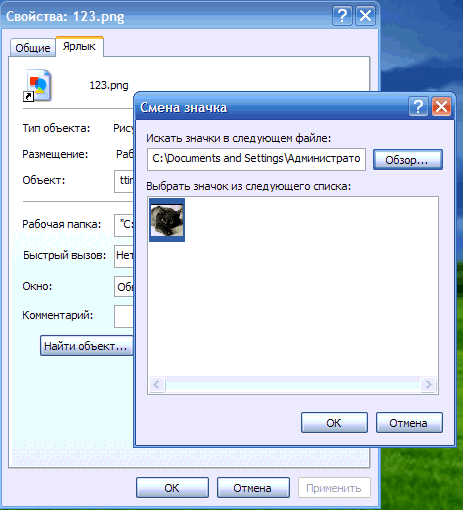
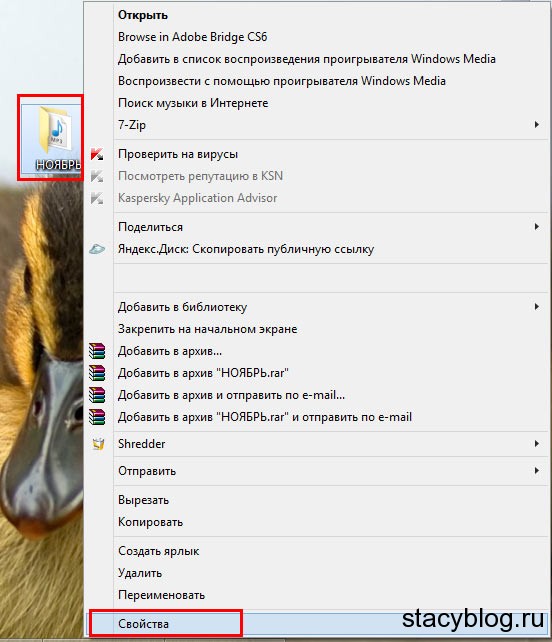
In order to change the standard icon of a folder or shortcut to another, it is necessary to click on it with the right mouse button, in the opened context menu select the “Properties” item. Then...
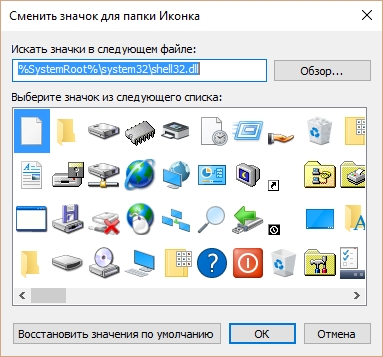
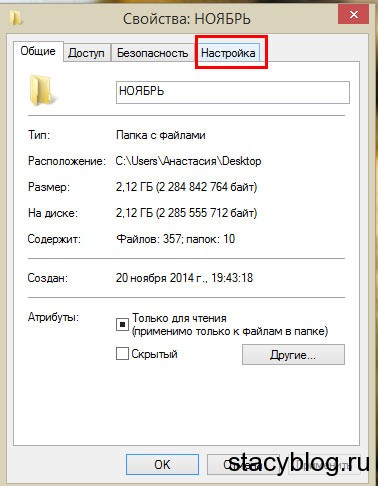
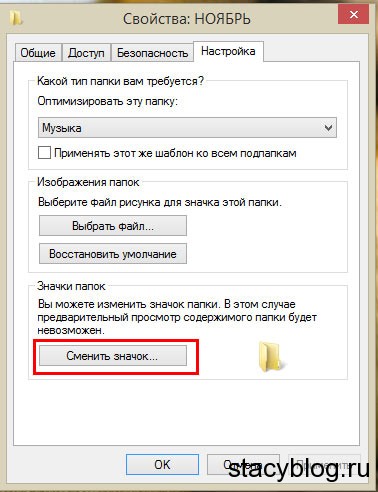
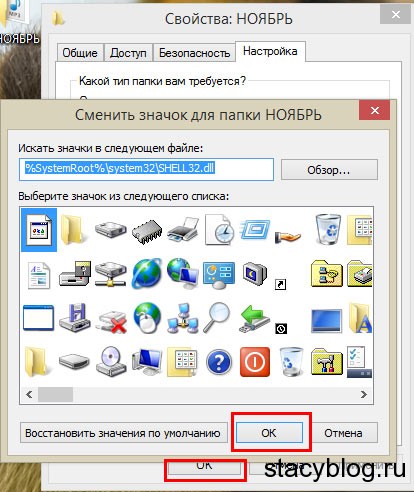
For a folder: in the window that opens, go to the “Settings” tab, click on the “Change icon” button, in the “Search for icons in the next file” window, specify the desired icon file and confirm the changes (see the image, click on it to enlarge) .
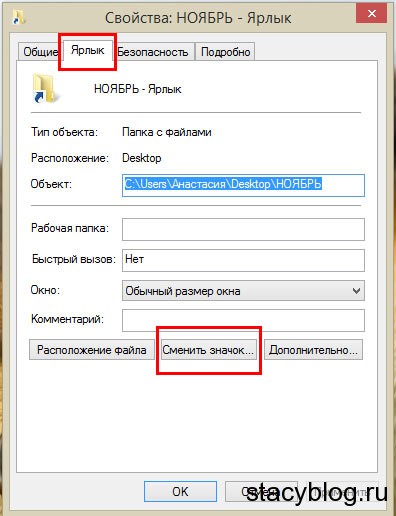
For a shortcut: in the window that opens, go to the “Shortcut” tab, click on the “Change Icon” button, in the “Search for icons in the next file” window, specify the desired icon file and confirm the changes.
How to change file icon
As mentioned above, in the Windows operating system, you can change the icon not for a specific file, but for all files of a certain type at the same time.
in Windows XP
:
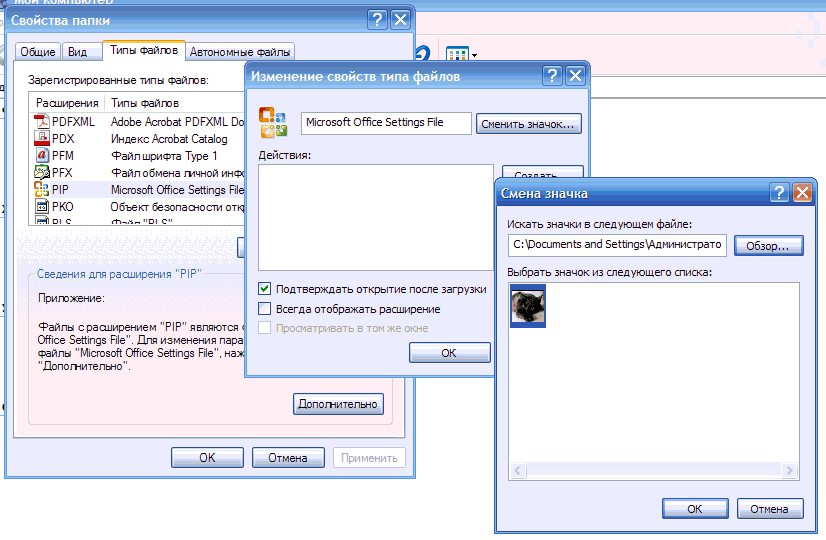
one . Open any folder or section, once click the left mouse button on the item “Service” located in the upper part of the open folder and select the item “Folder properties” in the list that appears ( see drawing).
2 In the window that opens, go to the File Types tab and select the type of files for which you want to change the icon in the window titled Registered File Types (with one click of the mouse), then click the Advanced button under this window (see the image ).
3 Another window will open with the name “Modify file type properties”, in which you need to click the “Change icon ...” button and in the explorer point to the new file of the icon that needs to be assigned to this file type, then confirm the changes.
To change the icon for a specific file type in Windows Vista / 7/8
You will need a special utility, because the necessary staffing tools in these versions of Windows are missing. 
The utility is called Default Programs Editor. It is a single file and does not require installation. Just download it and run by double clicking the left mouse button.
In the utility window, click "File Type Setings", and in the next step - "Icon". A window appears with a list of file types. It is necessary to select the type of files for which you need to change the icon (one click of the left mouse button), then click the "Next" button (see the image).
In the next step, you need to click the “Browse ...” button, in the opened explorer, point to the new file of the icon and confirm the changes.
Good day, dear readers.
Many users want their operating system to look unique. To do this, there are lots of tools, including changing wallpaper, window colors and adding widgets. Today I will tell you how to install icons on Windows 7 that are different from the standard ones. As often happens, there are several ways that involve the use of standard third-party tools and programs.
This method allows you to change the appearance of individual documents. In this case, everything can be done without programs - only built-in tools are used. You have the ability to connect files format * .ico. These may be existing or downloaded icons from the Internet.
It is important to note that in this way you can only change the appearance of the shortcut.
You need to take a few steps:
Change folder view( )
Changing the icon for a folder allows you to select it from a number of others - the same. We perform several movements:
This method also works on Windows 10. If you suddenly change your mind and decide to return everything as it was before, we will do the first four items from the list. And then choose " Restore Defaults". Clicking this button will restore the standard icons.
IconPackager( )
Among those who like to change the appearance of the operating system, the IconPackager utility is quite popular. Using the program, you can quickly and easily choose what you want:
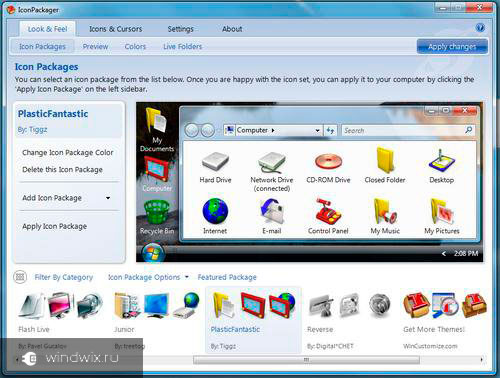
If any individual elements were not taken into account in the pack, their appearance will remain the same.
Sometimes there are situations when you need to return the icons back. To do this, select the file and click on " Windows Default Icons By: Microsoft". And then click on " Apply icon package».
Other applications( )
Some users encounter a situation where the tools listed above are not enough. For example, you want to select a file with the extension * .png, and you can only change to * .ico. To solve the problem, there are other programs.
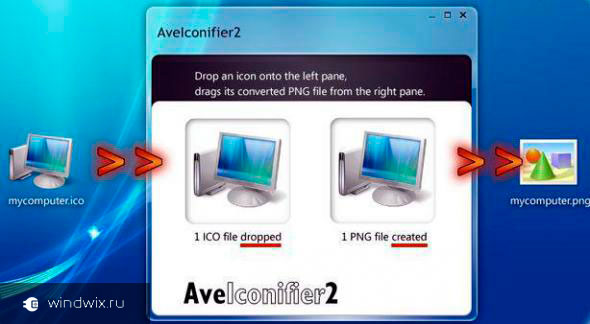
For example, AveIconifier 2 is relatively small collateral. The application allows you to automatically and quickly convert files from one format to another.
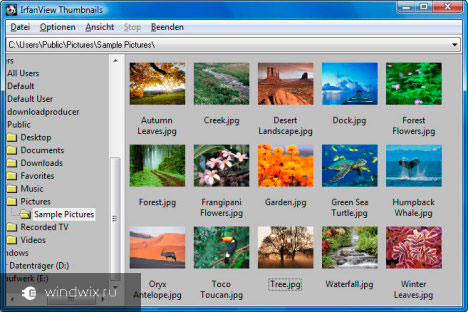
If you intend to change more than one separate item, but immediately a collection, the IrfanView utility is useful.
However, in no case should not forget about the application. The program is endowed with the ability to change the appearance of individual system objects. For example, you have installed new icons for all folders. But one directory still want to distinguish among the rest. This is where this utility will be useful. It is also worth saying that it is suitable not only for the seventh version of the operating system from Microsoft, but also on Windows 8.
So that you can more clearly get acquainted with the topic of changing icons, you can watch the video. Here everything that is needed is described in detail.
Well, as you can see, there are various tools that allow you to quickly and without any problems change the appearance of the files on your computer. Try and experiment.
I hope you found this article helpful. Subscribe, and you can learn a lot more about your computer.
Personalization is an important part when working with a computer. It is much more convenient when everything is laid out “in places” as the owner needs. Unfortunately, there is no such feature in Windows 7 Home Basic. And sometimes you need to post system labels or trite to change their size. However, such a setting of the Desktop is possible if you dig deeper in the system.
How to find standard icons
Unfortunately, without digging in the system, setting up icons for the Desktop will not happen. But if you search a little bit, you can do it in Windows 7 in several ways:
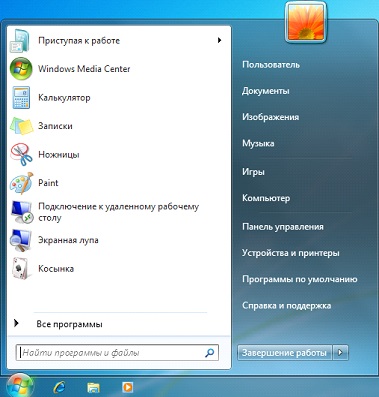
- If there are enough simple shortcuts and there are not many of them, you can transfer the necessary programs from the Start menu with the mouse.
- Select the desired shortcuts, click on them with the right button, and then - the item "Display on the desktop." The option is quite long, given that the icons may need a lot.
- Find a window with standard icons, and then extract the necessary shortcuts from it.
The third method is interesting, since even it can be performed by different methods.
Via command line
First of all, you should open the Command line using the Windows + R shortcut. As soon as a new window appears, enter the following command in it: Control.exe desk.cpl, Web, 0. And then click on Run.

Through "Search"
To find the necessary function through the “Search” button behind the “Start” button, you need to enter into the line the following, very long and intricate name, which was extracted from the Help: “Show or hide icons on the desktop”. Of course, without quotes.
By the way, the Control Panel also has a similar function. Just open the Search, which is located in the upper right corner in the form of an inconspicuous line, and then enter the word "icons" into it. After that, Windows 7 will give the user the desired window.
Total
After any completed action, a window will immediately appear, on which several standard Windows 7 shortcuts will be displayed. To remove them, just tick off their names at the top of the screen. And if you no longer need one of them, the corresponding check mark is removed.
Having released a new operating system Windows 10, Microsoft has given it a lot of new features and significantly reworked the design of the system. Changes have also been desktop icons. Many users are accustomed to the old icons that were present on Windows 7. Therefore, many non-standard PC users didn’t like the non-standard icons after switching to the new Windows 10. In the new Windows 10, you can easily change them for any shortcut on the desktop. In this article, we describe all the ways to change icons in Windows 10. In addition, we describe the process of creating new icons.
Change the icons of the main desktop shortcuts
The main desktop shortcuts include such links as “ This computer», « Control Panel», « Basket". To change these icons, you need to go to the panel “ Options"Links" PERSONALIZATION / Themes».
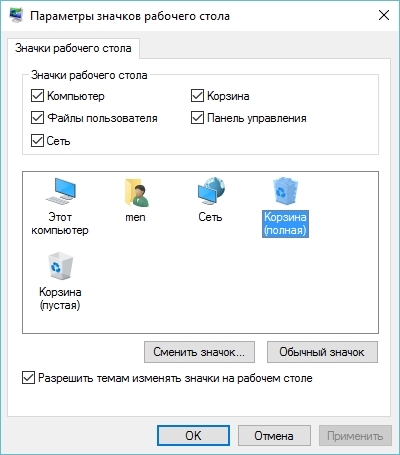
Now try to change the label " Basket". To do this, select the basket and click on the button Change icon.
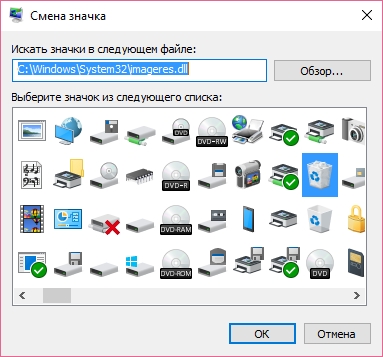
In the list of labels that appears, we will select the one you like and confirm your decision with the Apply button. Below is a basket with a different image.
Also, users can use icons not from standard Windows 10 libraries, but from third-party sources. One of these sources is the free icons package. Open Icon Library". Download this package on his official website https://sourceforge.net/projects/openiconlibrary. After downloading and unpacking the archive, about 10 thousand icons of various formats will be available to you. To use them from the “Open Icon Library”, click on the same button Change icon for the cart shortcut. In the window that appears, click on the Browse button. . . . After that, choose one of the “Open Icon Library” labels. Below is a basket with pictures from the Open Icon Library.

What shortcuts on the Windows 10 desktop can be changed
The main elements of the desktop for which you can change the icons are shortcuts (links to programs, files and folders) and folders. We describe an example of changing the icon in Google Chrome. To do this, go to the properties of the browser shortcut.

Now if we click on the button Change icon. . ., then we will have four choices for the icon.
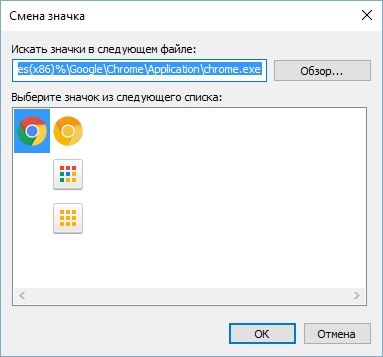
From the example it can be seen that when we get to the icon selection list window, the same window appears in front of us as in the first example. The only difference is that all the icons are not taken from the system library, but from the executable file “chrome.exe”. In this window, just as in the first example, you can select an icon from “ Open Icon Library"Or any other.
Now consider the change of icons for folders on the desktop. For example, we will create a folder named “Icon” on the desktop. After its creation, we will go to its properties tab " Customization».

On this tab, click on the familiar button Change icon. . .. After this action, a window will also appear in front of us, as in the previous examples.
The principle of replacing the folder icon with a third-party folder, and not from the “shell32.dll” library, is the same as in the previous examples.
Create icons yourself
For this example, we will use the program Icofx. This program can easily create different icons from raster images. For this example, we will take a free photo from https://pixabay.com. Thousands of free images can be found on this site.

We will also download and install the program. Icofx. After that, open the IcoFX program and open our image in it.
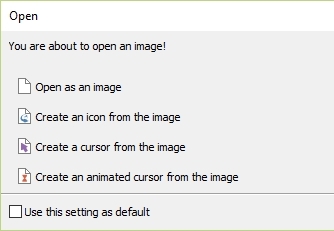
When opening an image, the utility offers you a choice. We will focus on the option " Create an icon from the image". This option will open our image in a reduced resolution, which can be saved for use as an icon.

After selecting the appropriate icon size, you can save it. In our case, the size is 256 × 256. It is saved in the file format "* ico". Below is an example of a shortcut user shortcut with our icon.
Using IcoFX, you can create various icons from raster and vector images, which are located on the desktop.
Customize label sizes
Resizing desktop shortcuts is pretty easy. To do this, go to the active desktop and click on it with the right mouse button. After this action, a context menu will open, in which you need to go to the line “ View».
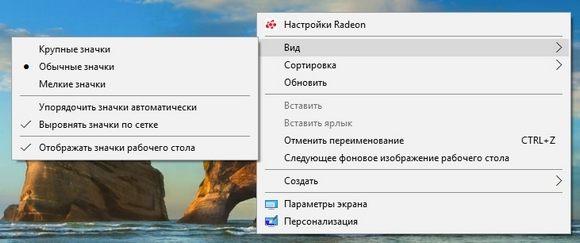
The image above shows that you can make the size large, normal and small. This setting allows you to adjust the size for monitors with different resolutions and diagonal. For example, for large monitors, you can reduce the size of labels, and for small diagonals, make them larger. It is also worth noting that in the "View" you can fix the labels on the grid and fix them automatically on the desktop.
Finally
After reading this article, you will learn how you can easily change the icons in Windows 10. In addition, the article shows how to create icons from raster images on your own. We hope the material will help our readers to change icons in Windows 10, as well as create new ones.
Related videos
How tired of these standard icons on labels and folders! In this article I will tell you how to diversify your desktop and change icons on folders and shortcuts. I will conduct various operations in the Windows 8 operating system. In Windows 7, you can do the same.
Change shortcut icon
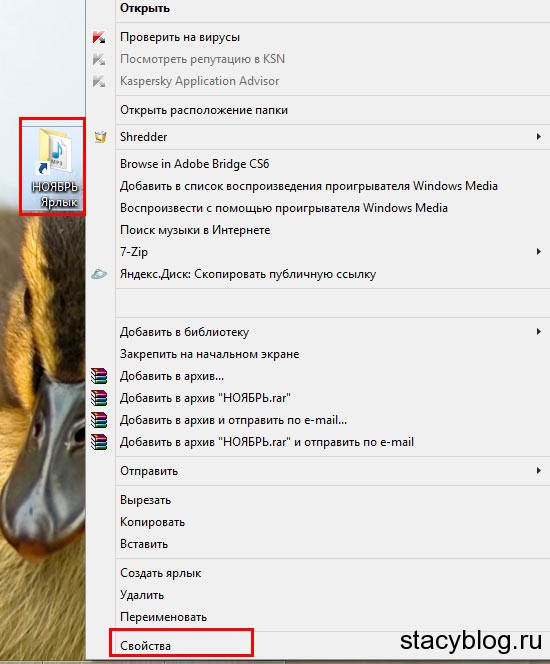
1. In order to change the icon of the shortcut, you need to click on the shortcut with the right mouse button. In the drop-down menu, select "Properties".
2. In the tab "Shortcut" click "Change icon".
3. A window has opened with many icons. Choose the one that you like best and click "OK".

1. Click on the folder with the right mouse button and select "Properties".
2. Go to the "Settings" tab.
3. Click "Change Icon".
Change the icon for Recycle, Computer
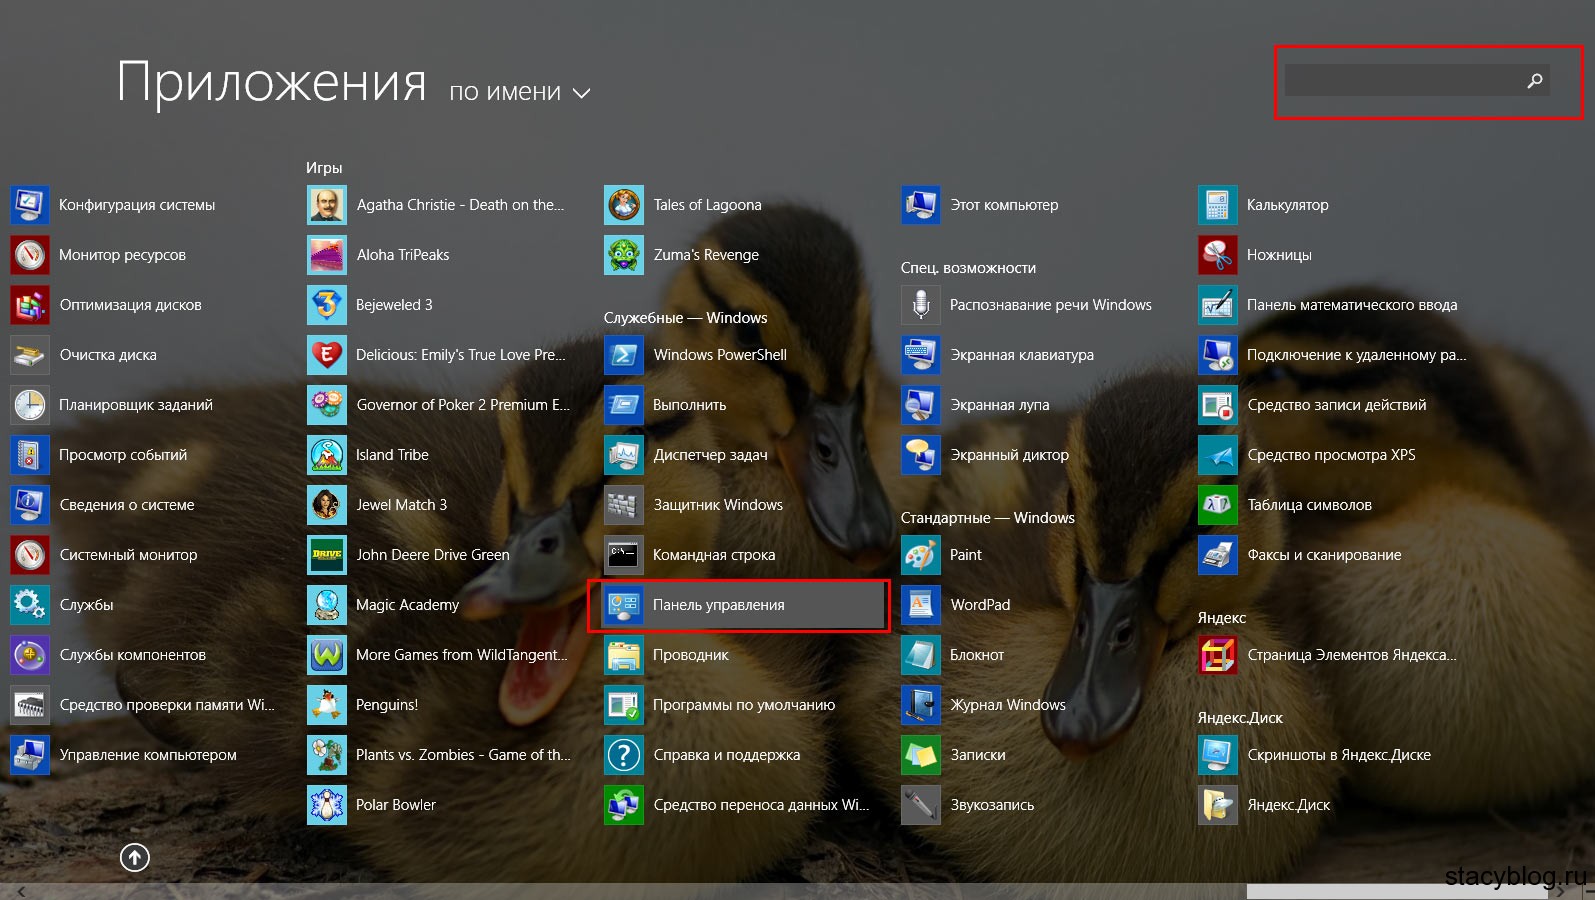
1. Go to the "Control Panel". How to do it in Windows 8, see below.
 Click on the "Menu" button
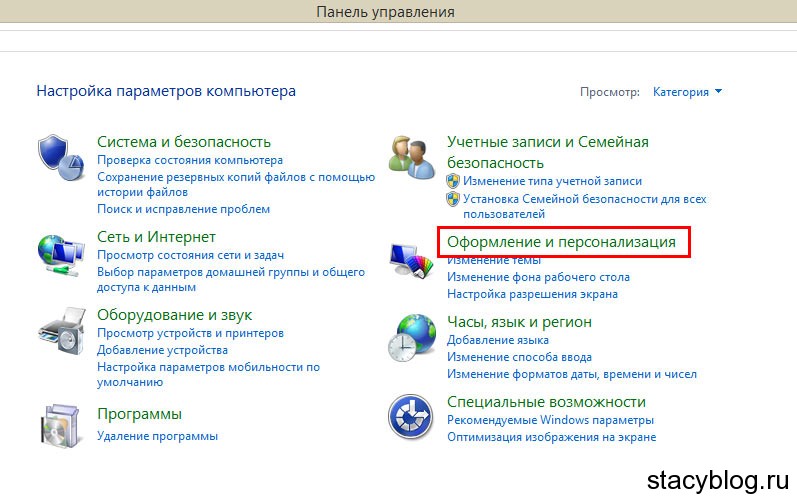
2. Choose “Design and Personalization”.
 Open the “Design and Personalization”
 3. Then "Personalization".
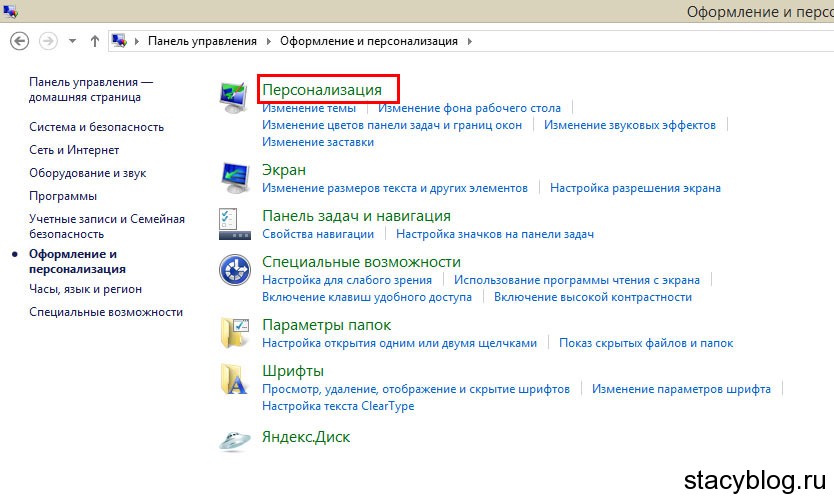 Among the list we need "Personalization"
 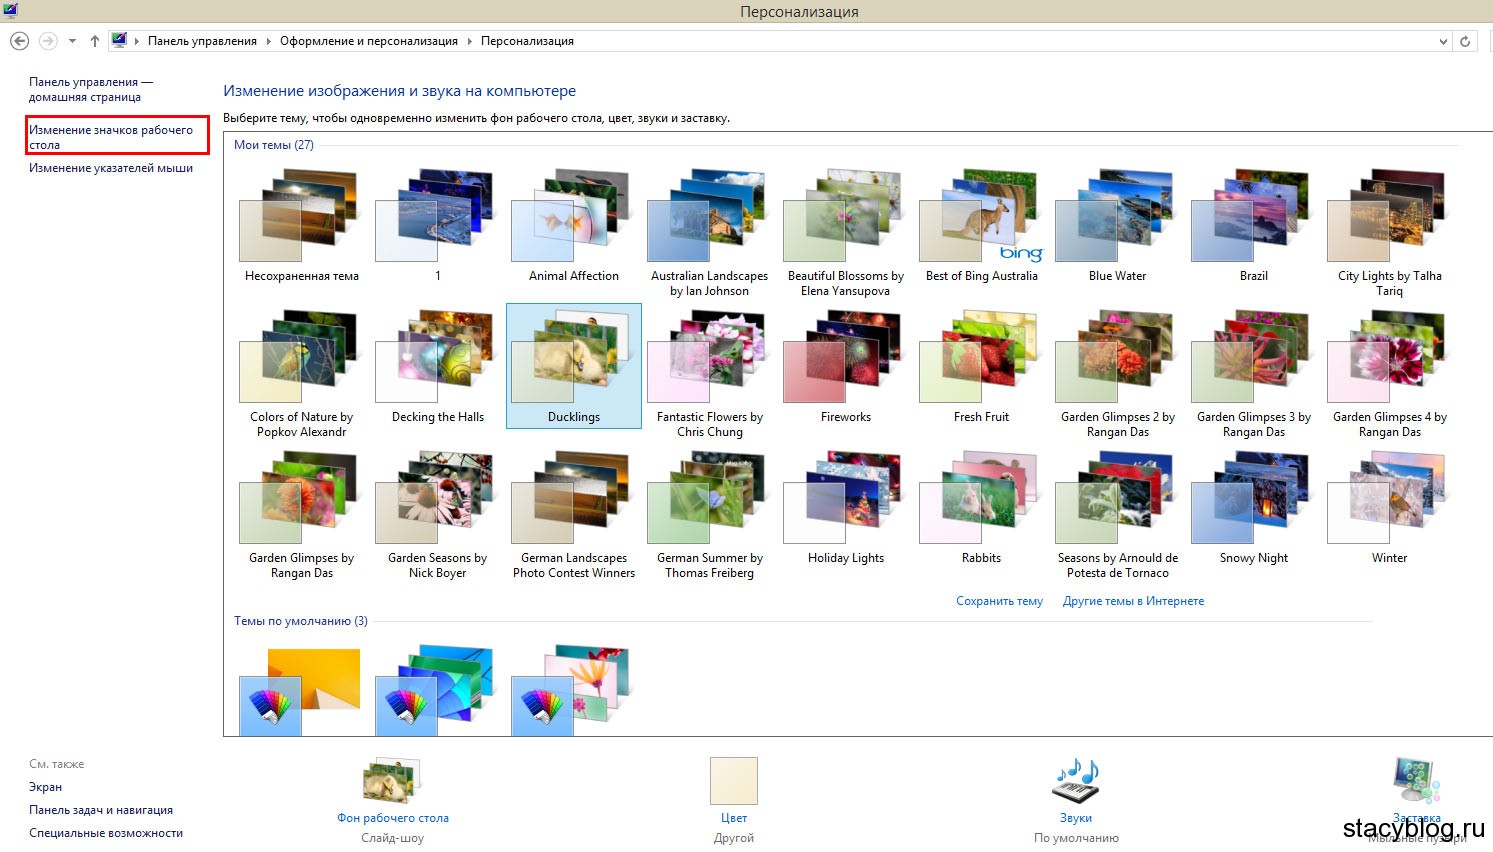 On the left, click "Change desktop icons"
 5. Now select the Recycle Bin or My Computer, click "Change Icon".
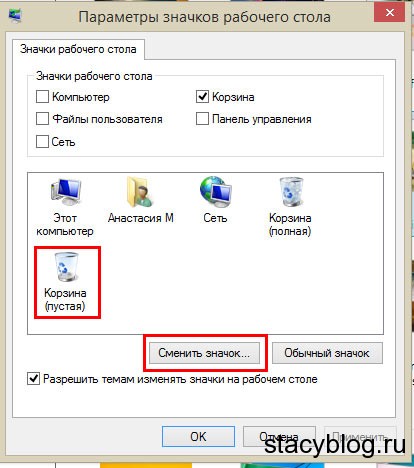 Choose a computer, cart or something else. Click "Change Icon"
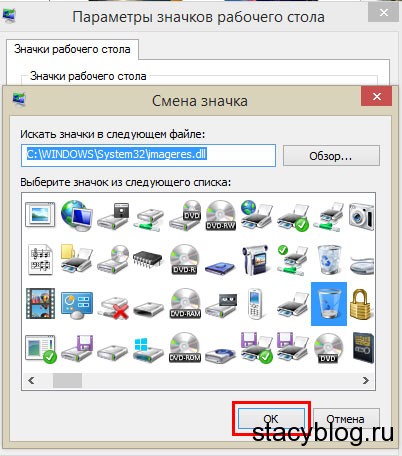
 6. Select the icon that you like and click "OK".
If you want to change the icon of the file with the exe extension, then you can download Resource Tuner or Restorator. But it is better to make a shortcut to this file and carry out all the operations that we did above.
That's all. Thus, you can change the icons on your computer!