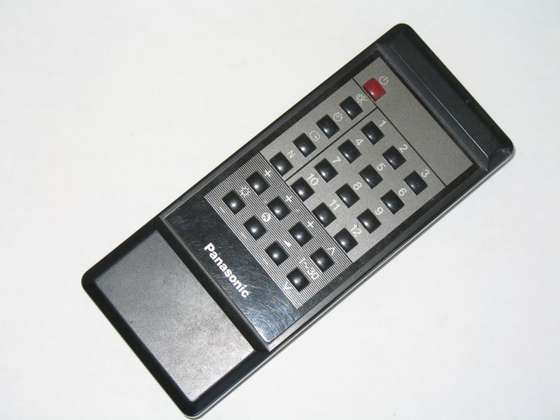
Some buttons on the remote do not work. Repair the remote control
Probably, everyone in the house will have at least one household appliance with a remote control. This is a very convenient thing, but, as you know, you quickly get used to comfort. But remotes, like everything in the world, sometimes fail. It is usually difficult to find exactly the same remote control, so you have to buy a universal programmable remote control. These consoles are massive, you have to get used to the arrangement of buttons again. Therefore, we will tell you how to fix the remote with your own hands, because the repair of remote control units is not difficult at all.
Typical problems with remote controls:
- Some buttons are not pressed or not working.
- The remote does not work at all.
- Oxidized contacts in the battery compartment.
- Sometimes the buttons stick, the reason for this is dirt, which accumulates under the housing during operation.
The most difficult thing in repairing remote controls is to disassemble the case. I do not need any skills in electronics, I can not worry too much about safety.
Tools and materials for repairing the console
- digital camera or mobile phone with camera
- cross and flat screwdrivers
- small capacity
- colander
- denatured alcohol
- dishwashing liquid
- paper towels
- soldering iron with solder
- magnifier or microscope
Technologists repairing the console
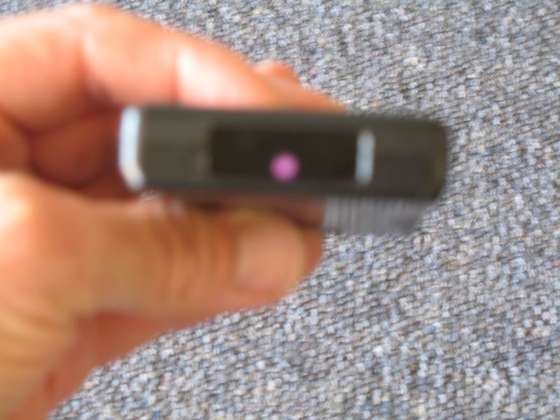
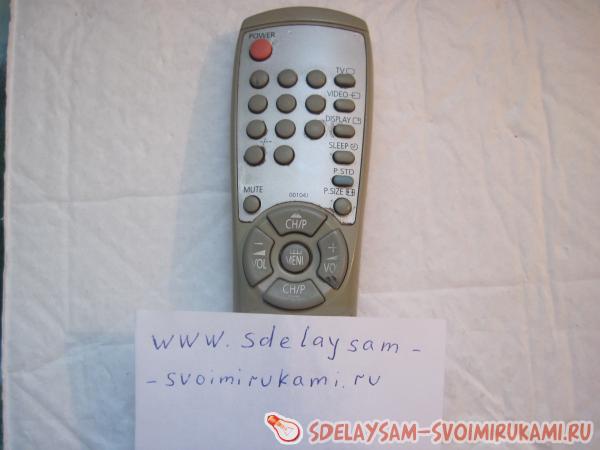
1. Check the batteries, if they have sat down, replace them with new ones. After changing the batteries, check that the remote is working, for this you will need a digital camera or a mobile phone with a camera. Point the camera lens at the infrared emitting diode and press the buttons one by one. On the display of the camera, you should see a flashing diode. If the diode does not react, it is burnt out. Do not be discouraged and go to the next step.
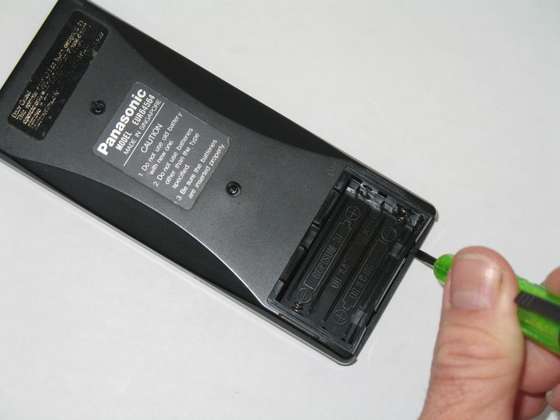
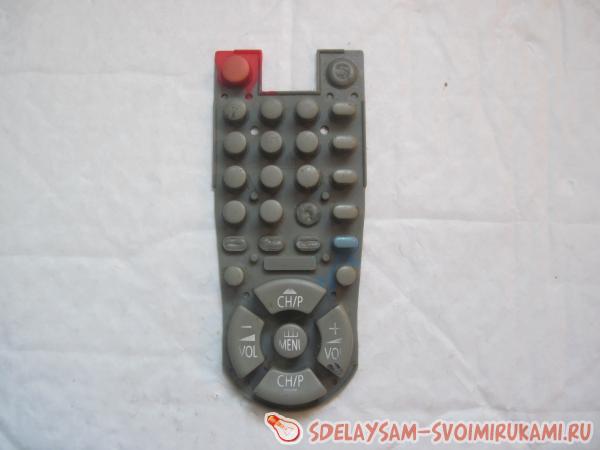
2. Disassemble the remote control housing. If the body parts are connected with screws, unscrew them. Sometimes screws can be hidden under a sticker or rubber inserts. Most often, there are no screws on the case, and its parts are connected with plastic clips. Find the latches and carefully open the remote control is quite difficult, so you'll have to try. To bend the latches, use a thin, non-sharp object, such as a small flat screwdriver.
3. You must have a digital camera at hand that you have checked for the operation of the infrared diode. Therefore, it is desirable to take a photo of the remote with the case opened, so that later it was easier to install the parts into place.
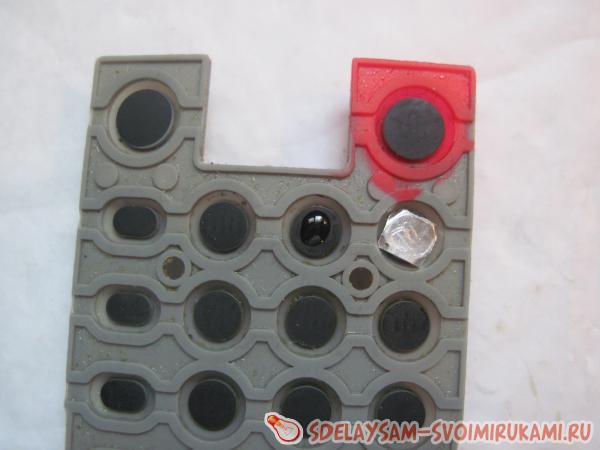
4. Disassemble the console into parts by first making a photo of the location of the buttons (often the keyboard is an integral rubber plate with buttons, in which case it is not necessary to remember the arrangement of the buttons). Fold all small parts in a box.

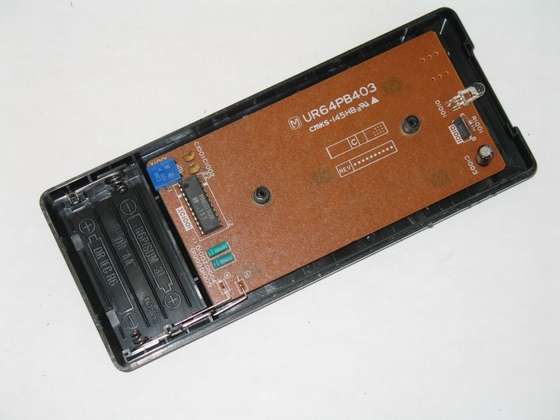
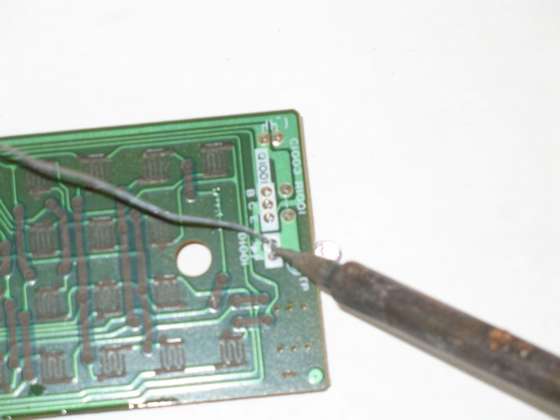
5. Inspect the card carefully and check the integrity of the solder joints. The controls often fall, so the board may crack or solder joints may be damaged. Inspect the board in good light, you can use a magnifying glass or a microscope. Solder all suspicious connections. If the board has signs of oxidation, clean it with a toothbrush and denatured alcohol. If the board is dirty, you can wash it in soapy water, rinse well and blow dry with a hairdryer. We do not recommend this procedure with cards mobile phones, because they have elements that can not be contacted with water.
6. Rinse the housing parts and buttons. Take a small vessel and put all the parts of the console into it. Pour there warm water with a dishwashing liquid. If the dirt is difficult to clean, leave the parts in the cleaning solution for the night.
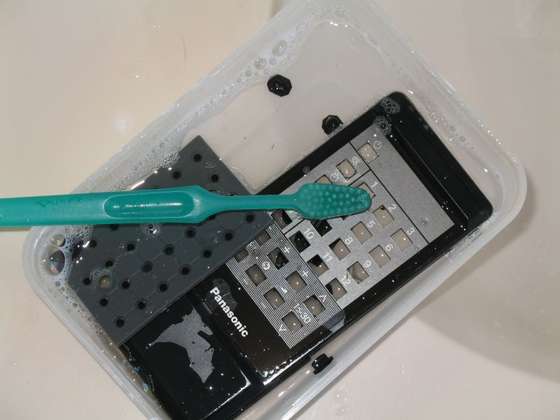
7. Thoroughly rinse the parts under running water. That the small parts do not fall into the sink, put them in a colander or close the drain hole of the sink with a cork. Wipe the parts dry with a paper towel.

8. If the case or buttons of the remote control are damaged, they must be repaired. Cracks can be sealed with hot glue or superglue. Allow it to dry. Put the buttons in place. From scratches and chips on the body can get rid of, heating it with a hair dryer (do not use the burners for this, the plastic can catch fire). If the infrared diode burned in the console, it can be replaced by a radiator from any other unnecessary remote control or bought a new one on the radio market. When replacing the diode, observe the polarity.
9. Check the operation of the remote with a digital camera. Press each button one by one and see if the diode is on. If the diode responds to each press, then you have managed to repair the console.
The remote does not work.
Each of us sometimes encounters a question
How to repair the remote control of TV or DVD ?
It's simple, if you have at least the slightest skills of repairing some kind of radio engineering.
For example, two different quality remote controls were taken from the Samsung TV
Met in the internet a bunch of tips like, and is it worth repairing an old remote ? Of course it does. Have you ever seen the gut of your own remote and
the rubbish that you will be offered in the nearest store? Then look:

In its native panel there is a normal microcircuit on a ceramic base and in a plastic casing.
In the cousin - a drop. The slightest blow or kink, and goodbye tracks. And they're sooo cute. And remotes are known to love to fly.
Spring contacts in Chinese counterfeits are usually done aby as. The rubber has a very thin conductive layer and wears out for a couple of months.

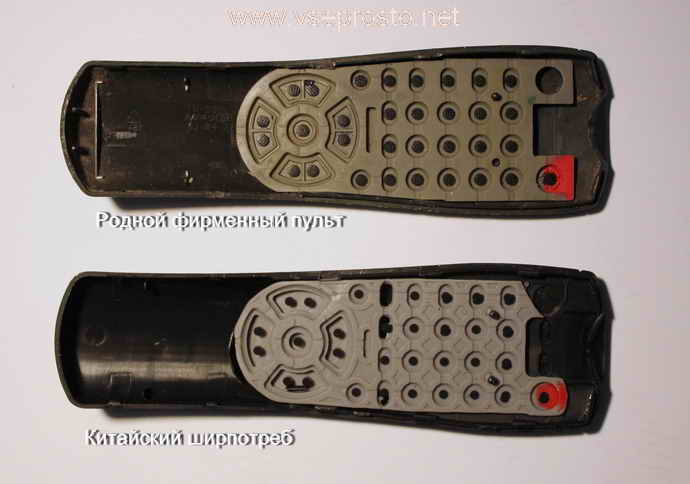
And do not be misled by the beautiful appearance of the new Chinese. It's not for long. Wipe around and do not have time to look back.
In an extreme case, if you are too lazy to bother with repairing your own remote, use Chinese, but do not throw away the one that went with the TV. It's time to go and pat yourself on the head. Type - wai what malades!
So, let's begin.
Disassembly of the modern console
- a terrible sight for the owner of the apparatus, for after unscrewing all the cogs, the remote is parted like a nut. If there is, a hard and thin plastic like a bank card. If not - a dull screwdriver. You need to open it carefully, but confidently. He will not be worse.
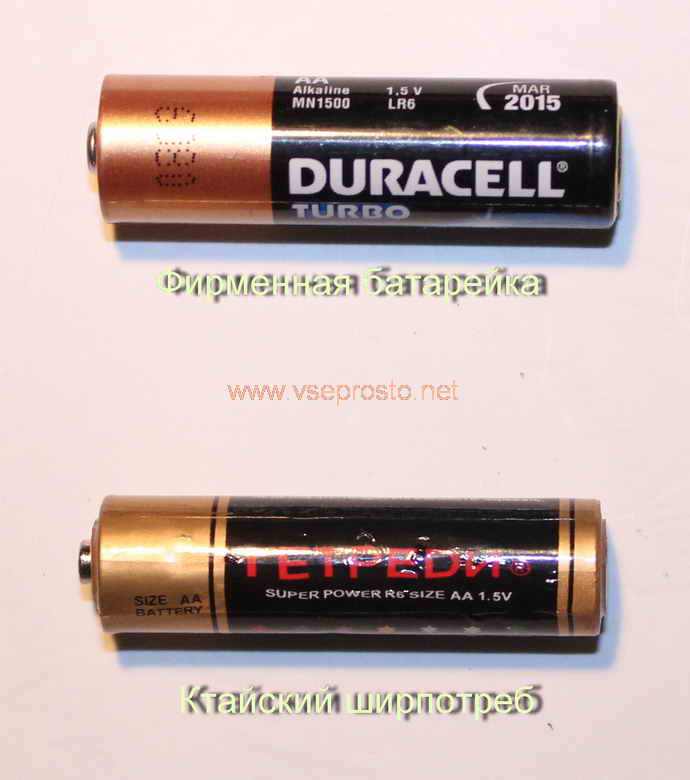
1 . We take out the batteries and measure the device. Should be at least 1.5 volts. And you can not show off and just change them for new ones. You do not need to borrow super-expensive, but it's not a good place for kopeeshny in your console either. For fuckers are running. And this is the death of the console. Electrolyte from batteries is bad friends with copper tracks. Or rather, quite the contrary, but this will not help you much
How to distinguish a good battery from substandard?
You do not need to be an expert for this. A good battery is almost twice as heavy as a counterfeit.
Appearance can also say a lot.
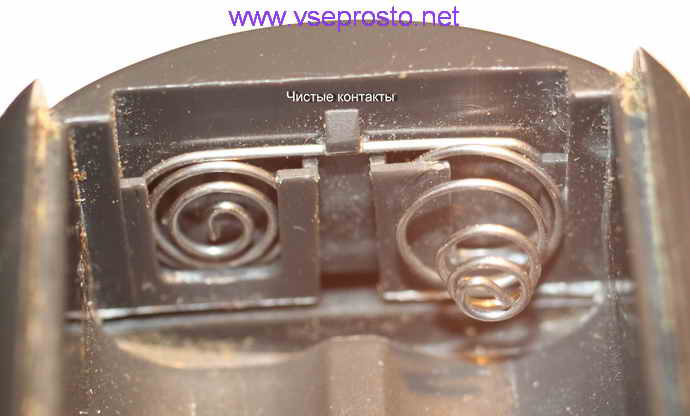
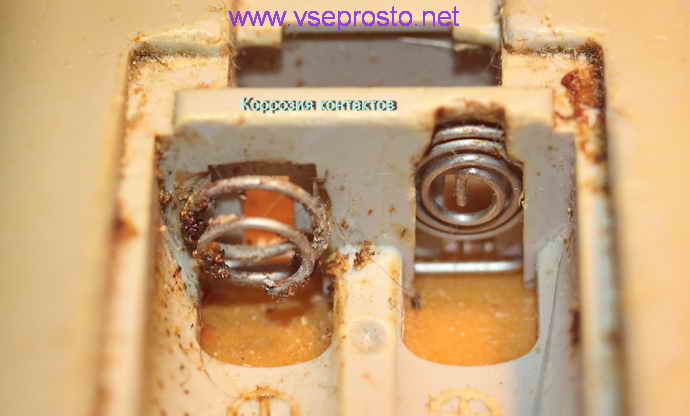
2 . Be sure to look at condition of spring contacts. If they are clean and shiny, then we go further. If dark or rusty or with a white coating, it's time to hide them nazhdachkoy or nadfil.
3
. We wipe with a cotton swab moistened with alcohol the surface of the board with graphite contacts. I recently use wet alcohol wipes. I consider it necessary to have them in my stock. It happens that there is nothing to wipe hands on. And at least even a remote control, even a kinescope with a thick-thick layer of soot
Ideally, the eraser should be washed with warm water, a soft brush and a dishwashing aid (Together with the body, it will be nice to hold) If everything is done in conditions close to the fighting, then the alcohol napkin will go.
Salo on the console by the way with our hands. On the interior of the TV and the console there is much to be said about the owners of the devices. For 20 years I've seen a lot.
4
. It is best to check the remote with a mobile phone camera. Unlike our eyes, the camera sees infrared radiation. If you see a rhythmic blinking of the LED when you press the button - happiness has smiled at you!
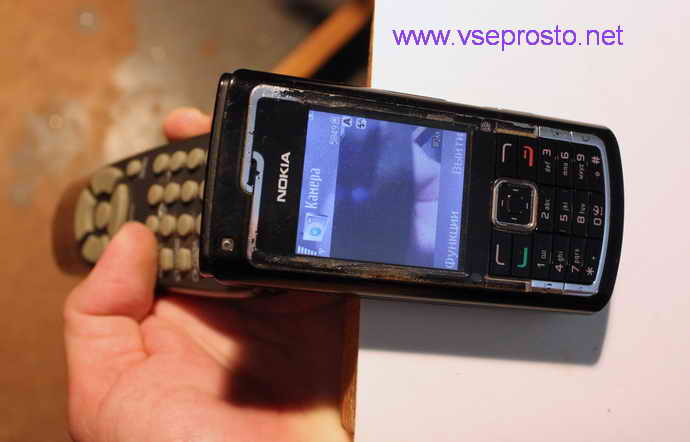
If it flashes without pressing a button, then one of the buttons is stuck, or there are too many kaki on the board.
By the way, the camera does not help you in this. There is an infrared filter and you will not see anything.
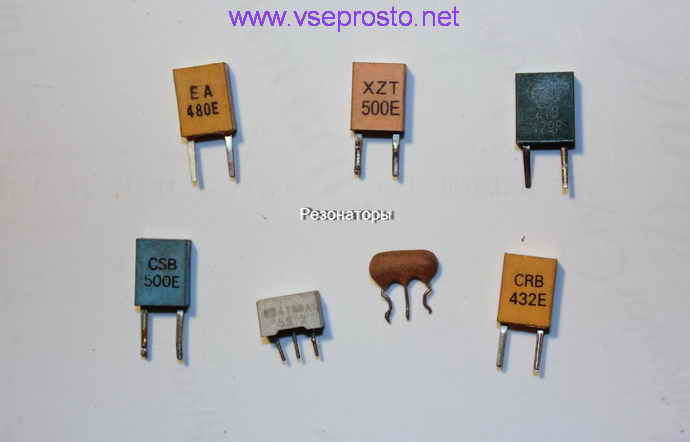
5 . If there is no reaction to pressing buttons, the first thing to be replaced quartz resonator. It can be of different types and you need to put in place exactly the same. By its appearance, its integrity can not be determined, but believe me - this is the most fragile part in the console. Change, but it will be seen. Detail of a penny.
6 . Less likely die light-emitting diode. In return, any infrared, close in size and dimensions is placed. Or from another broken console.
7 . If your buttons work through one, you can:
a. Use a repair kit made of nickel and glue.
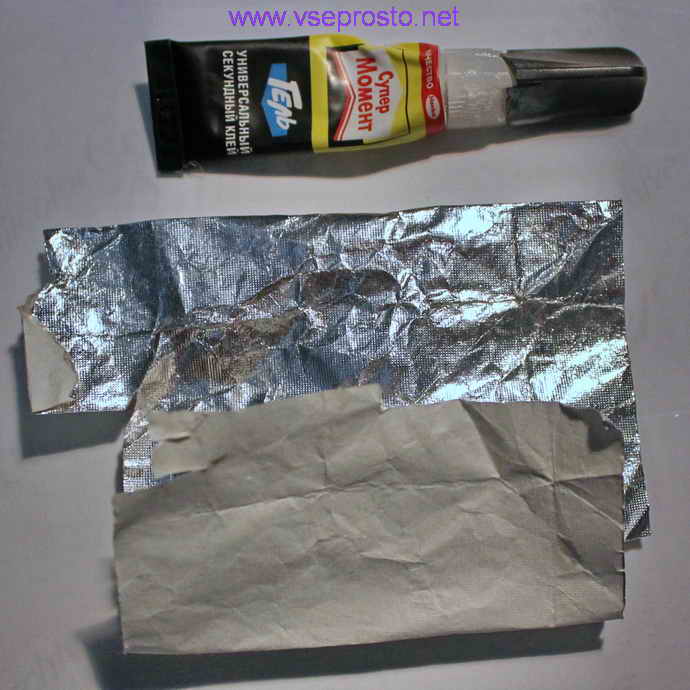
b. Take supermoem gel and foil from a cigarette pack, it is made as specially for this purpose. One side is electrically conductive, the other is paper, onto which glue is applied. Cut out pigs a little more than the size of the button, toothpick drip glue on the elastic and thin tweezers sculpt a nickle and crush.
at. Conductive lacquer. It is beneficial to buy only if you often repair the console, because the good is expensive, and the bad self itself costs nothing.
8 . Still there are cracks on the board, consoles eaten by dogs and other rare phenomena. Here it is necessary to judge its maintainability only in appearance.
With prolonged and intensive operation, a characteristic malfunction begins to appear at the remote controls of the radio equipment. The remote control buttons stop responding. This is due to the contamination of the contact areas of the board and rubber buttons, or because of the wear of the conductive coating of the buttons. To restore the console, you can carefully disassemble the console, clean the areas and buttons with a damp cloth, and apply a few conductive glue to the buttons. But there is another way to restore the functionality of the console. It is to use pieces of foil, glued to current-carrying rubber bands.
To repair the console we need scissors, a knife, tweezers, "Monolith" glue and a foil from cigarettes.
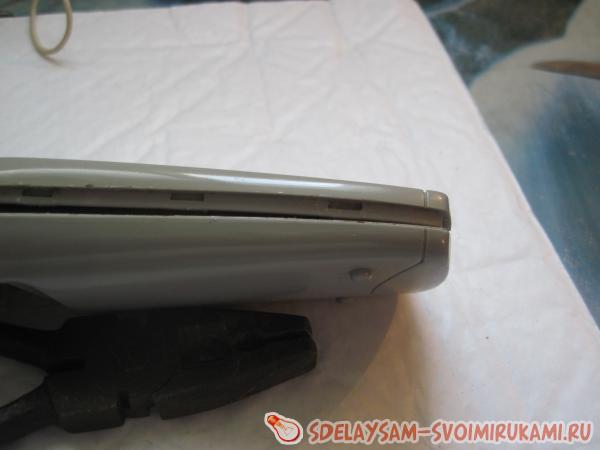
From the remote, we remove the batteries. Knife neatly divide the panel into two halves. The halves of the console are usually fixed with such snaps.
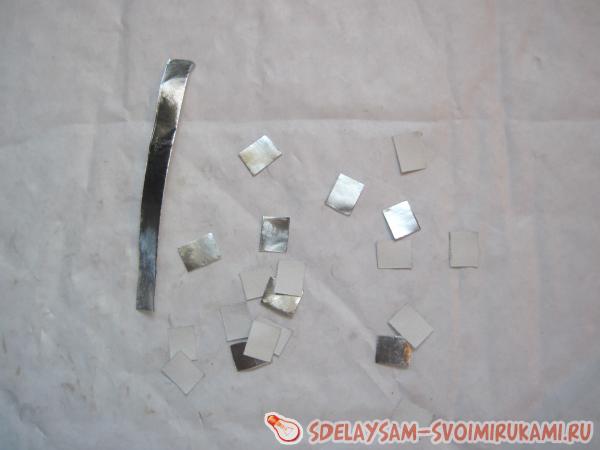
We drip some glue on the conductive coating and, taking a square with tweezers, glue it.
Our remote has five buttons not used. Therefore, it is not necessary to glue the foil on them.

This method restored the working capacity of many remote controls of various radio equipment. A repeated defect occurs approximately a year later. Again, restore the operation of the buttons, you can tear off the old foil and paste a new one. And one more tip. To check the operation of the remote control, you must direct the lens of any digital camera to the infrared LED of the remote and press any button. If the LED flashes, then with great certainty it can be assumed that the console is working.