General information about SAMBA. What is SAMBA?
This product is a set of server and client software for communicating UNIX machines with Microsoft and LanManager networks. In Windows, it is better known as " general access to the files and folder "or ball. Samba server is needed in order to open access to the hard disk of your Linux server from other computers. On the Fedora side, two services nmbd and smbd are responsible for the service (there is also the winbindd service, but without it) everything works fine, it is required for the server to work in the domain).
- SMBD respectively samba server daemon
- NMBD the NetBios daemon which is responsible for resolving host names, as well as ensuring that the computer can be found in the network environment, if it is not started or configured incorrectly, the computer will be visible only by ip-person.
- WINBIND This service is a new tool designed to more fully integrate Samba into Windows domains; it appeared, starting with Samba 2.2.0. This service reads its configuration from /etc/samba/smb.conf and dynamically interacts with the PDC domain, automatically synchronizing the lists of users and groups of the domain and the Samba machine. Thus, winbind is a very convenient tool for automatically maintaining the relevance of the domain user database on Samba workstations.
To work in SMB networks are required:
- client
- server
- administration tools
When using SMB, the following resources are available:
- network drives
- direct drive paths
- printers
- domain authorization and management
Installing Required Packages
Enter the command:
Su -c "yum -y install samba samba-client samba-common"
Both required daemons will be installed: smbd and nmbd and an additional software package. You can also install an additional package for configuring the server in graphical mode:
Yum -y install samba system-config-samba
After that, you need to configure the server:
Server Configuration
In most cases, setting up Samba is to edit the main configuration file /etc/samba/smb.conf and managing users using smbpasswd. If this is unusual, try using the SWAT web interface (Samba Web Administration Tool); To do this, install the samba-swat package and open the URL http: // localhost: 901 / in the browser.
Or you can configure everything through regular graphics, the system-config-samba package.
To begin, save the backup file so that if you can return:
Cp smb.conf smb.conf.backup
Schedule customization
Typical smb.conf configurations
Samba-server configs can vary greatly in size and function. The file can use a huge number of different directives:. Further in the article only the most typical configurations are considered and directives included in them are considered.
Normal server
workgroup = OFFICE security = user os level = 65 domain master = no domain logons = no support = no comment = Public Stuff path = / home / samba / public public = yes writable = no write list = @staffThe section defines general settings the server side of Samba in general for all resources.
- workgroup: Workgroup name.
- security: User Access Level Definition Level.
- os level: The priority of this server among other computers of the working group: determines who will be the main machine responsible for mapping network resources. For comparison, Win9X has os level = 34, and NT4 has os level = 64.
- domain master : defines the master server domain. In this case, the directive is disabled.
- domain logons : Do not become a password server for nearby machines. So, if a furious administrator of a neighboring NT server ran to you complaining that they were not letting him on his own server - put domain logons = no
- wins supportA: Usually in the simplest network, WINS is not needed, we disable it and do the same for ourselves.
- comment : comment visible in the network as a comment to the resource
- path : path to resource directory
- public : read access to all authorized users (including guest users, if defined)
- writable : prohibition of writing to all users
- write list = @staff: write permission for all users in the system staff group
Extended regular config
The most frequent directives are used in this config. It is not necessary to copy it completely, for a regular server this config is obviously unnecessary, but not enough for a server in a domain. However, if you did not manage to start the server with the usual config, you will understand how this server works and how you can debug it if something is not working.
workgroup = servergroup server string = Samba Server version @ netbios name register resolution = mms resolution bmk domain domain name = no domain logons = no interfaces = lo eth0 192.168.1.0/24 log level = 10 passdb: 5 auth: 10 winbind: 10 log file = /var/log/samba/log.%m max log size = 50 wins support = no wins server = 192.168.1.1 wins proxy = yes dns proxy = yes smb passwd file = / etc / samba / smbpasswd socket options = TCP_NODELAY SO_RCVBUF = 8192 SO_SNDBUF = 8192 IPTOS_LOWDELAY IPTOS_THROUGHPUT local master = yes unix charset = utf8 dos charset = cp1251 display charset = UTF8 security = user passdb account = 0damd account number, hr, a number, hr county account number = Public Stuff path = / home / samba browseable = yes public = yes writable = yes printable = no write list = + staff path = / pub browseable = yes public = yes writable = yes
- server string : A string that comes after the computer name when viewing the network environment (For example: MYSERVER Samba Server Version 3.3.4).
- netbios name : this is netbios computer name.
- name resolve order : The directive specifies the order in which the server will try to resolve host names.
- interfaces : Directive sets interfaces and subnets that samba server will listen on
- log level : The level of log detail, supports many debugging classes. More information about the directive can be found on smb-conf.ru
- log file : Indicates the path to the log file. The server keeps various event files for different users or computers (pay attention to this).
- max log size : Maximum log size in kilobytes. After reaching the file size, the rotated log is executed.
- wins support : The parameter is set to yes if your nmbd in Samba is a WINS server. Those. wins The server is the component of the nmb daemon. More about WINS will be a little later.
- wins server : address of the wins server.
- wins proxy : This parameter controls the behavior of nmbd, whether it will respond to broadcast requests for resolving names from other computers. You may need to set the parameter to yes for some old clients.
- dns proxy : Samba says whether or not to try to resolve Netbios names via regular DNS nslookup.
- smb passwd file : This parameter specifies the path to the encrypted password file smbpasswd. By default, this path is compiled into Samba.
- socket options : allows you to specify the socket parameters that will be used to serve clients. Used to "accelerate" the work of samba.
- local master : This option allows the nmbd daemon to try to become a local master browser on this subnet.
- unix charset : Encoding in which Samba interacts with * nix-clients
- dos charset : Encoding for interaction with windows-clients
- display charset : Specifies the character set that samba will use to print messages to stdout (output stream) and stderr (error stream).
- security : Determines the mode of interaction with clients, or rather, tells clients to send a username and password to access the server.
- passdb backend : The parameter allows the administrator to select a mechanism for storing information about users and, possibly, about groups. The default is smbpasswd.
- guest account : When regular or guest users connect to the Samba server, they should match the appropriate server user. Select one of the existing users of the system who will become a Samba guest account.
Important Directives
Directive security
- ADS - Samba server operates as a member of a domain in the domain of an Active Directory domain (Active Directory Domain, ADS). To do this, Kerberos must be installed and configured on the server, and Samba must become a member of the ADS realm using the net command included in the samba-client package. See the net man page for more information. If you select this option, Samba does not become an ADS controller. Specify the scope of the Kerberos server in the Kerberos Domain (Kerberos Realm) field.
- Domain - The Samba server checks the user, relying on the primary and backup Windows NT domain controller. The server sends the user name and password to the controller, and waits for a response from it. Enter the NETBIOS name of the primary or backup domain controller in the Authentication Server field. If this option is selected, the Encrypted Passwords parameter should be Yes.
- Server - The Samba server tries to verify the combination of the username and password with another Samba server. If this fails, the server tries to verify it using the user authentication mode. In the Authentication Server (Authentication Server) field, enter the NETBIOS name of the other Samba server.
- Resource (Share) - Samba users do not have to enter their username and password when connecting to a Samba server. The Samba server does not ask for a name and password until they try to connect to a specific shared directory of this server.
- User - (Default) Samba users must provide the correct username and password for the Samba server. Select this option if you want the Windows Username option (Windows Username) to work.
Directives WINS
WINS (Windows Internet Name Service) is a mapping service of NetBIOS computer names with node ip addresses. If no WINS server is specified, the resol method via wins will be ignored. There is a wins server and a wins client. When a client logs on to the network, he tells his Netbios name to the server and then uses the server to resolve other system names. The presence of a WINS server is necessary to reduce the amount of broadcast traffic. If the subnet is large enough, Broadcast can be a lot.
Starting the server
After the server is configured, you must set the server's smb service to autoload and start the server itself:
Systemctl enable smb systemctl enable nmb systemctl start smb systemctl start nmb
For older systems without systemd, use:
Chkconfig --levels 235 smb 235 chkconfig --levels 235 nmb 235 service smb start service nmb start
Every time we change smb.conf, we reboot the server:
Systemctl restart smb
or, for older systems:
Smbd restart
Also make sure that the right directories are on the shared directories. Remember that SElinux will not allow you to access the balls in the home folders of users.
Configuring iptables firewall
In order for the samba resource to be accessible from clients, you need to configure an Iptables firewall. It is necessary to open ports 137-139 and 445th. In the following example, access to the SAMBA server is allowed from the subnet 192.168.1. *, If necessary, you can remove the -s 192.168.1.0/24 option to allow access to the server to all
Iptables -A INPUT -s 192.168.1.0/24 -p udp -m udp --dport 137 -m state --state NEW -j ACCEPT iptables -A INPUT -s 192.168.1.0/24 -p udp -m udp - dport 138 -m state --state NEW -j ACCEPT iptables -A INPUT -s 192.168.1.0/24 -p tcp -m tcp --dport 139 -m state --state NEW -j ACCEPT iptables -A INPUT -s 192.168 .1.0 / 24 -p tcp -m tcp --dport 445 -m state --state NEW -j ACCEPT iptables-save\u003e / etc / sysconfig / iptables
Creating users for SAMBA
First you need to create a regular user in the system, then use the special command smbpasswd to add the user to the database Samba-server Create a regular user:
Useradd -M (without home folder) -l -s / sbin / nologin (so that you do not log in via ssh) username
Specify user password:
Passwd tom
Create a Samba user:
Smbpasswd -a tom
Server diagnostics
After you have started the server, you can connect to it from it using smbclient:
Smbclient //
Replace
Smbclient -L hostname - see shared resources on the host
If the computer is not visible at all in the network environment, you need to check the operation of the name service using the nmblookup utility. First, the utility runs on the client, then if the client issues a resolv-run error on the server. If the server does not give anything, then the problem is with the nmb-daemon and you need to deal with the server. Firewalls on the client or server can also interfere.
Nmblookup<имя_компьютера> nmblookup -A IP
You can also use the findsmb command to find servers on the network.
Similar screw command:
Net view \\\\ NBNAME nbtstat -a
If nothing works, there is a purpose to see what happens if you disable the firewall:
Service iptables stop
Utilities to work with the server
To work with the server, there are a number of additional utilities:
smbstatus :: Displays a report on current connections to the server.
smbpasswd :: Used to set or change passwords for Samba users.
findsmb :: Used to find Samba computers on the network.
nmblookup :: It uses NetBIOS over TCP / IP to convert computer names to IP addresses.
net :: Used to remotely administer a Samba server.
smbclient :: Used by UNIX / Linux client computers to connect to the server.
smbtar :: The utility is used to create a backup of the data stored on the server.
testparm :: The utility checks the syntax of the server configuration file (smb.conf).
Useful commands
After any changes to smb.conf, you must restart the service:
Systemctl restart smb
To mount a Samba resource in a directory, create a directory if it does not already exist, and run the following command as root:
Mount -t cifs -o username =
This command mounts the resource.
Connect to the host with the username and see the balls on the host host:
Smbclient -L host -U username
Creating a new user:
Smbpasswd -a
Existing user password change:
Smbpasswd
Delete existing user:
Smbpasswd -x
Suspension account without removing:
Smbpasswd -d
Connecting this computer to an existing domain:
Smbpasswd -j
Related Web Sites
- http://smb-conf.ru/ All about Samba in Russian
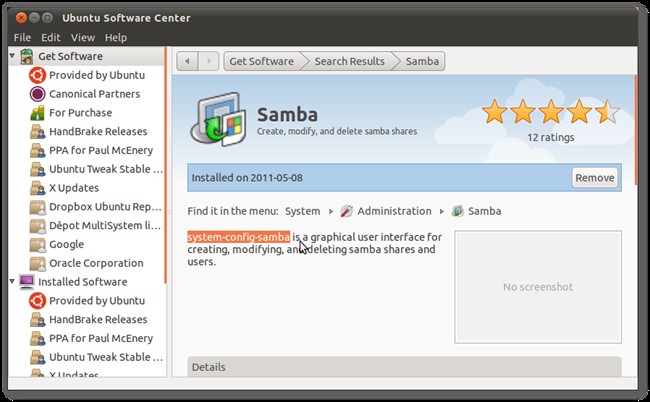
Or maybe just interest and curiosity are pushing users to search for different suitable software. This software is Samba. You need to know how to configure Samba on Ubuntu server, if you want to make a database or file storage from your computer.
Installing Samba on Ubuntu Server allows you to create a database.
If you thought that the page is devoted to the study of dance, you are slightly mistaken. Samba is free software. It provides access to printers and files. And does this on various operating systemsoh.
What is it for?
In comparison with other software packages of similar purpose Samba has several advantages and features.
- Allows you to connect with each other a Unix-like system, i.e., any system on Linux, and Windows. And not only Windows. The program is very "omnivorous": MacOS, Solaris and other operating systems of varying degrees of popularity.
- Samba allows Windows users to use computers on Ubuntu as a server. That is, use the files to which access is established, as well as part of the connected devices.
- Supports the domain structure of the NT Domain, manages NT users, supports the functions of the participant, the primary controller.
Probably for many the most important of this is the connection with the machines on Windows. In this case, they act as a client, and a computer on Ubuntu - as a server. On the other hand, a Ubuntu user can also access the Windows network folders.
Samba has been produced since 1992. And, most importantly, the new versions are still out. The latter was released on March 7, 2017. Every year, developers are trying to establish compatibility with a large number of different versions of operating systems, but the main chip is the connection of Linux-systems with Microsoft. In comparison with Windows Server, Samba may be inferior to it due to the lack of support for some protocols and infrastructure of nodes. However, many argue that the speed of Samba is much higher.
Configuring Samba
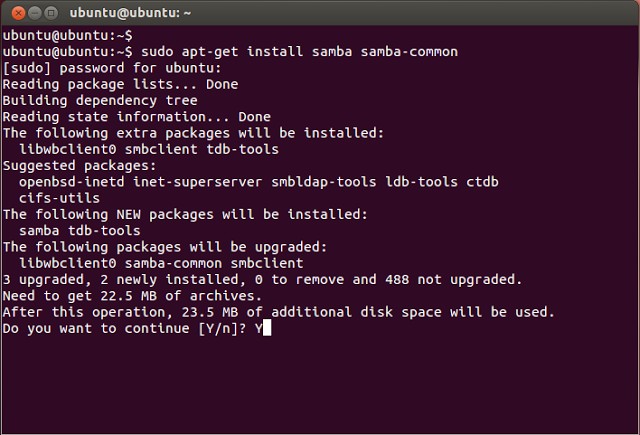
Before setting up directly, the program must be installed. Samba installation is performed in the same way as in the case of other programs - by entering the command into the terminal:
sudo apt-get install samba
Immediately note: all the actions that will be described, including the installation of the program, can be performed on both simple Ubuntu and Ubuntu Server. Only on the latter is available exclusively text interface.
After installation, you should backup the configuration file:
$ sudo mv /etc/samba/smb.conf /etc/samba/smb.conf.bak
$ sudo vi /etc/samba/smb.conf
Or we edit the existing one. This file contains the main installation of the Samba server. To figure out what we will do next, you need to understand what the different lines mean.
- Workgroup - working group. The value of this parameter will also often be Workgroup, because in Windows the default workgroup domain looks exactly like this.
- Netbios name is the name of the Ubuntu computer that Windows users see. Here you can enter a value at your discretion.
- Security - user authorization mode. The default is User, that is, user-level authentication. For now, it’s better to leave it.
- Os level - indicates the priority that Samba has over other clients (PCs) on the local or Internet network.
- Name resolve order - the sequence of IP address resolution on the NetBIOS name.
- Read only - the privilege to read or write to the directory. The value may be “yes” - read only, “no” - write.
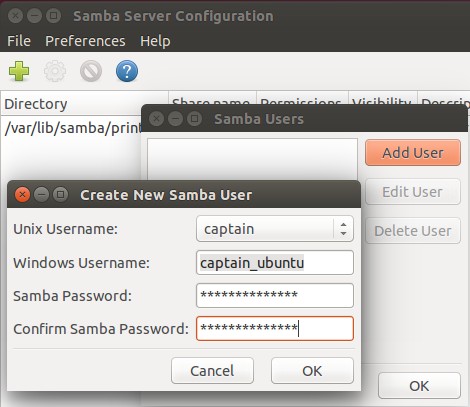
Create user
This is the simplest action from which you can start working with Samba.

Add a user to the OS itself:
$ useradd -M -l -s / sbin / nologin username
Create a password for it:
We bring our user to the Samba database:
$ smbpasswd -a username
Using the $ smbpasswd command, you can perform various other actions:
- $ smbpasswd username - password change
- $ smbpasswd -x username - delete user
- $ smbpasswd -d username - user ban
The server must be rebooted if you make changes to the configuration file. This is done using the command:
$ systemctl restart smb
These are the basic Samba settings. Now you can try to put the program into practice.
Access to folder
First, let's try to create a folder, access to which will be open to all users, even those who are not authorized in Samba.
Create a folder with which we will then work on two computers:
$ sudo mkdir -p / samba / access
Now we are doing extended access for this folder so that any client of ours can open it. local network:
$ cd / samba
$ sudo chmod -R 0755 access
$ sudo chown -R nobody: nogroup access /
The owner according to the code is nobody.

Now in the server configuration file, you need to do two sections: the first, containing the basic information:
workgroup = WORKGROUP
server string = Samba Server% v
netbios name = srvr1
security = user
map to guest = bad user
name resolve order = bcast host
dns proxy = no
#==============
And the second, containing data on the access folder:
path = / samba / access
browsable = yes
writable = yes
guest ok = yes
read only = no
Follow sections one after another in the same order.
Update server changes:
$ sudo service smbd restart
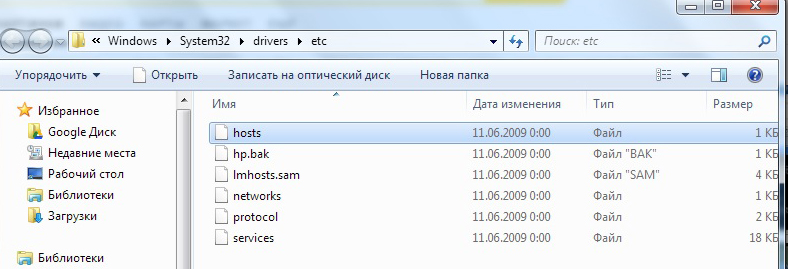
Computer Operations on Windows
On Windows, you also need to perform some actions so that you can easily open a new shared folder and edit it.
- Open up command line. It is advisable to do this with extended rights, i.e. on behalf of the administrator.
- We execute the command:
- notepad C: \\ Windows \\ System32 \\ drivers \\ etc \\ hosts
- A file opens in which we enter the following line:
- 168.0.1 srvr1.domain.com srvr1
Thanks to her folder will be available. - You can open it with the help of the “Run” line. We press Win + R, we enter: After that, we will open the folder.
Closed folder
Customized samba server can be used to create network folders with limited access. This folder must also be created first and then added to the Samba configuration.
Make a folder with the name "Closed":
$ sudo mkdir -p / samba / allaccess / closed
We make a special group that can have access to this folder:
$ sudo addgroup securedgroup
We create special rights for different groups:
$ cd / samba / access
$ sudo chown -R richard: securedgroup closed
$ sudo chmod -R 0770 closed /
Just as in the case of an open folder, add information to the configuration:
path = / samba / access / closed
valid users = @securedgroup
guest ok = no
writable = yes
browsable = yes
Restart the server.
As you can see, we made the folder Closed inside Access. Thus, Access can be opened by each user of the local network, but in order to view and edit Closed, you need to have special rights.
To make sure that everything works exactly as we set it in batch fileYou can perform a few simple steps.
First, install the package samba:
Sudo apt install samba
Now you can set up Samba for sharing.
Samba Setup
The Samba configuration file is located along the path /etc/samba/smb.conf. The original configuration file has a significant amount of comments for documenting various configuration directives.
Not all possible options are included in the default settings file. See the man smb.conf or Samba Help manual for details.
First, change or add the following value to the section. File /etc/samba/smb.conf:
Workgroup = WORKGROUP security = user
Change the name of the working group according to your settings (in Windows, by default the name of the working group is WORKGROUP).
Add a new section at the end of the file, or uncomment one of the examples for the directory to be shared:
comment = a shared folder in Ubuntu path = / home / samba / share browsable = yes guest ok = yes read only = no create mask = 0644
comment - description of the share.
path - the path to the shared directory.
browsable - allows clients to view the contents of a shared directory.
guest ok - allows clients to connect to a share without specifying a password.
read only - whether the resource is “read only” or not.
create mask - set file permissions.
Now you need to create a directory:
Sudo mkdir -p / home / samba / share
the -p option tells mkdir to create a full directory tree if it does not exist.
Set permissions on it:
Sudo chown nobody: nogroup / home / samba / share / sudo chmod 755 / home / samba / share /
Finally, restart the samba services to apply the new settings:
Sudo service smbd restart
Now a Ubuntu share will appear on your network and you can browse its shared directories. If your client does not automatically show your shared resources, try to contact your server by its IP address, for example, \\\\ 192.168.0.1. To verify that the file server is working, try creating a directory inside your shared resource.
To create additional shares, create a new section. in /etc/samba/smb.conf and restart Samba. Ensure that the shared directory is created and that it has the correct permissions.
What is Samba?
To provide access to files located on linux machines from computers running Windows, a specially designed software package that allows access to network drives and printers via SMB / CIFS protocol was developed. Samba package has client and server parts. It is free software released under the GPL license. Samba is a protocol used by Microsoft to separate files and print services. This protocol was developed in 1987 and later transferred to the Linux platform by Andrew Tridgell. Interaction in the network of computers under running windows built on the use of the SMB (Server Message Block) protocol - server message blocks. The Samba package provides execution of all the necessary tasks in these cases for opening, closing, reading, writing, searching for files, creating and deleting directories, setting up a print job and removing it from there. Its capabilities can be divided into two categories: the provision of resources (by which we mean access to printers and files) for Windows clients and access to client resources. That is, a computer running Linux can act both as a server and as a client. A huge advantage of the samba package is access control, which can be implemented either at the share level, when a resource in the network is assigned a password and corresponding usage rules, or a more perfect and flexible organization at the user level, when each user is created account on the server, where in addition to the name and password contains all the necessary information about the rights of access to the resource. Before getting access to the required resource, each user is authenticated, after which he is granted rights according to the accounts.
Samba serverFor the Samba server to work, it is necessary that two daemons be launched: smbd, which provides the print service and file sharing for the Samba server clients under Windows control, and nmbd, which provides the NetBIOS name service. To access clients, the TCP / IP protocol is used. Samba is usually installed along with linux distribution. You can check by running the command: $ whereis samba. And if not installed then $ yum install samba-server |
 |
Samba clientTo access Windows network resources from Linux, you need a Samba client, and in order to evaluate the availability of Windows resources it is enough to run the command / usr / bin / smbclient -L host_name. Further, the line will ask for a password, but in most cases just press Enter. A positive aspect of the Samba client is that it can perfectly see the hidden network resources, these are the drives whose network name ends with the $ sign.) Further work is done by typing commands with which you can perform all the necessary operations for working with files. To get help, just run smb:\u003e help. |
Quite a lot of users of 1c Enterprise use the database in the file version, well, well, it really did :) and therefore you can use the Samba server for competent user interaction with the database. That will limit access, or completely shut it down to databases 1c.
Samba server configuration
The Samba configuration file is called smb.conf and is located in the root directory / etc or / etc / samba. The Samba service reads it every 60 seconds, so changes made to the configuration take effect without rebooting, but do not apply to already established connections. The configuration file contains four sections:,, and. You can open the configuration file for editing with the command: mcedit /etc/samba/smb.conf The section contains the most common characteristics that will be used everywhere, but which, however, can then be overridden in sections for individual resources. Some of the parameters in this section are also related to the configuration of the Samba client.Section Options
workgroup # group_name in windows network. netbios name # netbios name of the server on the local network. server string # The comment string that is visible in the Local Network View Properties window. guest ok = yes # enable guest login to the server. guest ok = no # guest login is not allowed. guest account # account, under which guest login to the server is allowed. security = user # access with user-level authentication. security = share # admission is free. hosts allow # identifies the clients that are allowed to access the server. interfaces # indicates which network the server will operate on.Section Options
comment # comment in the network properties window. The browseable # determines whether a resource is visible in the browse list. writable # allows or denies writing to the home directory. create mode # defines access rights for newly created files. directory mode # defines the access rights for directories.Install the SWAT web interface (Samba Web Administration Tool) to work with smb.conf
In most cases, configuring Samba is to edit the main /etc/samba/smb.conf configuration file and manage users using smbpasswd. Changes can be made in the editor mcedit, nano or kwrite. If this is unusual, you can use the SWAT web interface (Samba Web Administration Tool), which for convenience linux users was created by the developers of the Samba package.You can install the samba-swat package with the command:
yum install samba-swat By default, for security purposes, SWAT is disabled and therefore we go:
mcedit /etc/xinetd.d/swat and change the value of the parameter:
disable = no To enable remote administration, you must add a valid ip to the only_from parameter. And make a restart:
service xinetd restart That's it! Samba-swat is now available at http: // localhost: 901 / and the port number can be changed in the file for security reasons:
mcedit /etc/xinetd.d/swat
Share folders and change access to Samba directories:
The design of our file server will adhere to the following structure:- a directory in which databases of 1c will be stored, with limited access by ip;
- other directories with access at the level of user authorization, there may be many, it all depends on the task. sudo mkdir samba # Create the Samba root folder Inside we create two more and, open smb.conf set in the parameters:
security = share # Users will not pass the authorization system. Now in the parameter we make a restriction on ip:
hosts allow 10.4.8.32 10.4.8.33 # We only allow access to the directory 10.4.8.32 and 10.4.8.33 guest ok = yes # We allow the guest login to the directory We go to the directory and set access restriction by username and password:
valid user = glavbuh geo # This is the list of users allowed to access the resource. username = glavbuh geo # The username of the glavbuh directory.
The syntax of the changed parameters can be checked with the command:
testparm /etc/samba/smb.confIt remains to create users glavbuh and geo by specifying a password to enter the directory. Adding users to Samba smbpasswd -a And let users in Samba
smbpasswd -e
SAMBA is a set of server and client software for communicating UNIX machines with Microsoft ™ and LanManager networks, which themselves are subclasses of SMB networks.
Initially, SMB networks were developed by IBM ™, were based on the NetBIOS protocol, were intended primarily for Token Ring networks and were fully implemented in OS / 2 Warp LanServer. Later in Windows 95, this protocol was replaced with NetBEUI (a somewhat simplified version of NetBIOS).
Earlier in OS / 2 Warp and NT 3.5, a more convenient implementation for TCP / IP — NetBIOS over TCP / IP — was implemented for complex heterogeneous networks. In view of the clear advantages of this approach, it is still used today. When somewhere in Windows you organize work with network shared resources via TCP / IP, then “NetBIOS over TCP / IP” is actually used (which is, for example, in Win95 in TCP / IP properties on the NetBIOS tab there is a corresponding mark) .
Samba also uses the "NetBIOS over TCP / IP" protocol, which allows it to successfully interact with such SMB implementations as those included in OS / 2 3-4, Windows 9X-ME, NT3.5-4 / 2000 / XP, UNIX systems with Samba and possibly others like it. Less obvious is that Samba cannot work without using TCP / IP (on NetBIOS and NetBEUI). This should not be forgotten when designing networks.
So, to work in SMB networks you need:
client;
server;
administration tools.
All this is in the samba-client, samba-client-cups, samba-common, samba, samba-swat packages included in the distribution.
When using SMB, the following resources are available:
network drives;
direct paths to the drives;
printers;
domain authorization and management.
Overview of directories and files
All Samba configuration and authorization files are located in the / etc / samba directory and its subdirectories. Consider them in more detail.
MACHINE.SID
the system identifier of the machine is automatically generated when the server starts and is used to identify the computer in the Microsoft ™ network domain;
codepages /
lmhosts
same as / etc / hosts, but intended to convert NetBIOS IPs. Usually contains only one entry:
127.0.0.1 localhost
but it can be considered a good idea to bring there hosts from other subnets (when for several reasons it is impossible to reliably convert IP-NetBIOS with either broadcast requests or using WINS) or vice versa - key servers of your own domain;
secrets.tdb
key file to identify the machine in the Microsoft ™ network domain. From a security point of view, it has the same value as / etc / tcb / * / shadow files - and therefore the access rights must be root.root 0600;
samba main configuration file. It is needed not only the server side, but also all the other components of this system;
smbpasswd
analogue of / etc / passwd and / etc / tcb / * / shadow - file of Samba server users with passwords. From the security point of view it has the same value as / etc / tcb / * / shadow - and therefore the access rights must be root.root 0600. The correspondence between Samba users and system users is based on the common UID; this file Samba is used in the absence of user data on the PDC or in the absence of the PDC itself;
smbusers
sMB network and local user name mapping file; This is a convenient method for organizing administrative and guest logins to the server. The correspondence of Samba users and system users is made on the basis of symbolic names;
/ var / log / samba / *
samba server side log files. Of these, log.smbd, log.nmbd, log.winbind are the logs of the corresponding processes, and all others are logs of server interaction with individual client hosts in the default naming format log.
/ var / spool / samba
catalog of the dynamic spooling print server Samba. On lightly loaded print servers, it is usually empty; the presence of multiple files there at a time when none of the clients prints is a clear sign that the print server has failed;
/ var / cache / samba / *
files (as a rule, binary databases) formed during the operation of various Samba components. The most noteworthy are:
browse.dat and wins.dat
text filestheir names speak for themselves;
winbindd * .tdb
databases of domain users formed by winbind (see “Using winbind”). From time to time they need to be archived: if during an upgrade, “moving” or reinstalling the server, winbind generates these files from scratch, then the correspondences of system and domain symbolic and numeric names will change and the access rights to the files restored from the archive will be confused. Therefore, it is strongly recommended to archive files /var/cache/samba/winbindd*.tdb;
/ var / lib / samba / *
service directories for the server administrator.
The list of Samba executable files can be obtained with the command:
$ rpm -ql `rpm -qa | grep samba` | grep bin /
and familiarize yourself with each of them by reading the relevant sections of the documentation.
Here we will focus only on the most important and most frequently used components.
1. server components:
/ usr / sbin / nmbd
name and address translation server;
/ usr / sbin / smbd
file server;
/ usr / sbin / winbindd
server import of users and groups with PDC;
/ usr / sbin / swat
samba configuration tool with web-interface
/etc/init.d/smb and /etc/init.d/winbind
service initialization control scripts.
It should be noted that the /etc/init.d/smb script has two restart modes - restart and reload, which are radically different in the following features:
restart makes a complete restart of the smbd and nmbd processes with the reset of current connections. As a rule, clients automatically rebuild themselves to resources, but if files were opened at the time of restart, problems with client applications (for example, MS Office and 1C) are possible;
reload causes smbd and nmbd to only re-read configuration files without restarting and dropping connections. At the same time, old connections continue to exist according to the old rules, and new rules will be applied to all new connections based on configuration files.
2. client components:
/ usr / bin / smbclient
interactive application for viewing network resources;
/sbin/mount.smb, /sbin/mount.smbfs, / usr / bin / smbumount, / usr / sbin / smbmnt, / usr / bin / smbmount
means of mounting / unmounting network file systems.
3. utilities:
/ usr / bin / smbpasswd
user and domain connection management;
/ usr / bin / wbinfo
display a list of users imported by winbindd;
/ usr / bin / testparm
configuration file syntax checking;
/ usr / bin / smbstatus
displaying the status of smbd and nmbd processes;
/ usr / bin / nmblookup
wINS name resolution program (similar to nslookup for DNS).
Customization
In most cases, configuring Samba is to edit the main /etc/samba/smb.conf configuration file and manage users using smbpasswd. If this is unusual, try using the SWAT web interface (Samba Web Administration Tool); To do this, install the samba-swat package and open the URL http: // localhost: 901 / in the browser.
Normal server
By that, we mean a computer that provides file resources to the network. In fact, this is the simplest independent file server that has its own user authorization database.
In order to create such a server, you just need to tweak the standard configuration file smb.conf (substitute the required workgroup name and resource names) and create user accounts as described below, as well as take into account the security recommendations at the end of the article .
Here are the basic smb.conf entries that will create us a “regular server”.
# The section defines the general settings of the Samba server in
# Overall for all resources.
# Name of the working group OFFICE
workgroup = OFFICE
# Level of user access level definition
# The priority of this server among other computers of the working group:
# determines who exactly will be the main machine responsible for
# mapping network resources. For comparison, Win9X os level = 34, and
# at NT4 os level = 64.
# Obviously, since there is no domain, there is no master.
domain master = no
# Do not become a password server for surrounding machines. So that
# if a furious administrator of a neighboring NT server with
# complaints that it is not allowed on its own server - put
# domain logons = no ;-)
domain logons = no
# Usually in the simplest network, WINS is not needed, we disable it and then
wins support = no
Well, now we need to determine which directories we will provide to the network. For each resource there is a separate section.
The simplest option for regular resources is a regular directory named public:
# resource name seen on the network
comment = Public Stuff
# path to resource directory
path = / home / samba / public
# mark read access to all authorized users (including
# number and guest, if they are defined)
# prohibition of writing to all users
# permission to write for all users in the system
#group staff
write list = @staff
Similarly, you can create different network server resources with different access rights; For more help on the directives and their syntax, refer to the reference manual.
Since Samba is not executed in chroot, within resources you can use any symbolic links to locally and on the network (NFS, SMB, Coda, etc.) file objects, which is very convenient in terms of system administration.
Special resources - for example, home directories of users:
# name of the resource, which will be automatically replaced by the name
# home directory of the user under which the client is connected
# and exactly the name of his home directory will be displayed on the network
# as the name of the resource.
# To get access to this resource, the client must provide
# server name and password, all other users to
# This resource does not have access at all.
# comment, seen online as a resource comment
comment = Home Directories
# sign of invisibility - this resource is only visible on the network
# to the user who owns it. To that
# A resource can be accessed directly by specifying its name, but in
# browsing the network, it will be visible only to the owner.
# Write permission.
writable = yes
Printers:
# The name of the resource that will be visible on the network. Besides him, the network will
# also visible local printers under the same names as in
# system by lpq command.
# comment is ignored.
comment = All Printers
# Path to the directory where the printer spool is located
# provided to the network via Samba
path = / var / spool / samba
# resource invisibility in browsing, it is replaced by the system one
# resource.
# permission to print for guest calling.
# prohibition to write, because Samba writes to the spool itself, and not
# user.
# A sign that this is a printer, not a file resource
# mask for creating print job files
create mode = 0700
# Commands executed by Samba to print a document.
# using client driver, applies to non-UNIX
# customers.
print command = lpr-cups -P% p -o raw% s -r
# Using the CUPS driver on the server side (on the side
# clients use generic PostScript driver).
; print command = lpr-cups -P% p% s
# The following commands are standard when setting printing = cups,
# they can be changed if necessary.
lpq command = lpq -P% p
lprm command = cancel% p-% j
Server as part of an existing NT domain
We will connect the newly created Samba machine with the COMP name to the existing DOM domain, the administrator of which is the Administrator user, and the PDC of this domain is implemented on another computer.
First of all, you need to make sure that the machines with the same name as the one that we are going to connect are not in the domain yet. Otherwise, this machine must be removed from the domain by means of the PDC itself or choose another name.
On the COMP machine in /etc/samba/smb.conf you need to make the following changes:
workgroup = DOM
netbios name = COMP
security = domain
password server = *
allow trusted domains = yes
nt acl support = yes
After that, you need to stop the Samba server, if it is running, with the service smb stop command.
Now you need to send a request to the PDC to authorize a new member of the domain using the following command:
$ smbpasswd -j DOM -r DOMPDC -U Administrator
and in response to a request to enter the password of the Administrator user - the same with which this user is registered in the domain.
If a message is received:
Joined domain DOM.
everything is working; otherwise, in smb.conf you need to write:
log level = 4
repeat the last command and find out what is wrong by detailed logs. At this log level, log.smbd contains a detailed exchange report with the PDC. It is possible that mistakes were made in spelling of names or a password was mistakenly entered; any malfunctions on the PDC side are also possible.
From this point on, when the user "user123" with the password "passw" addressed Samba, she:
first, it searches for it in / etc / samba / smbpasswd, if the password and the name match, it allows it, otherwise it refuses authorization or considers it a guest (depending on the setting)
if there is no such name in the mentioned file, it looks in / etc / passwd (by checking the matches through the file / etc / samba / smbusers) and
if there is such a user, the PDC asks if the received password is “passw”;
if so, it allows, otherwise it refuses to authorize or switches to a guest entry, in accordance with the setting.
Usually, when working in a domain on ordinary workstations, / etc / samba / smbpasswd should be completely empty or contain only administrative accounts that are not related to the domain.
This logic of operation is applicable only if winbind is not used. In order for domain users to automatically end up in / etc / passwd on the first successful access (the correctness of the passwords was confirmed by the PDC), you need to write one line in /etc/samba/smb.conf
add user script = / usr / sbin / useradd -d / home / domain /% u -g 600 -m \\
K / etc / skel_domain -s / bin / false% u
accordingly, the directories / home / domain and / etc / skel_domain, as well as the group 600, must already exist. All specific names and options of useradd can be changed depending on specific applications.
By the directive add user script, which is activated when the user is not already registered on this machine, you can call not only / usr / sbin / useradd with keys, but also any other programs; If you come up with fantasy, then with the help of this directive you can do very interesting things.
Do not forget about security - programs running with add user script will run from the almighty within the user's system root, and the parameters of their call are partially determined by the user, which is potentially dangerous!
Now you can enable the Samba server with the: service smb start command and work as a member of the domain in the Windows network domain.
Server as PDC domain
To create a Primary Domain Controller (PDC), you need to make / change the following entries in smb.conf
# Server name; if this parameter is not defined,
# it will take the value corresponding to the host name.
netbios name = COOLSERVER
# Domain name
workgroup = COOLDOMAIN
# The mode of the server authorization system.
# Permission to use encrypted passwords
encrypt passwords = yes
# Path to local password file
smb passwd file = / etc / samba / smbpasswd
# Become a domain master browser
local master = yes
# Be PDC
domain master = yes
# Immediately at the start try to become a master browser for a domain
preferred master = yes
# Be a domain password server
domain logons = yes
# Location of the domain user profile
logon path = \\\\% L \\ Profiles \\% U
# Administrative group domain, presence in the list
# user "administrator" is highly desirable, without
# this user will not receive administrative
# rights on Windows client machines.
domain admin group = root @wheel administrator
# Be a WINS server. WINS server makes sense when there are more than 10 on the network
# SMB machines. The presence of such a server in complex
# Networking significantly reduces broadcast traffic.
wins support = yes
# The order of NetBIOS name resolution, similar to the one in the
# /etc/host.conf for DNS name resolution. The value of wins
# only makes sense if there are wins-servers on the network,
# otherwise it will slow down the work.
name resolve order = wins lmhosts bcast
You also need to create resources for the operation of the domain.
The netlogon resource is required for the operation of the PDC and the domain as a whole. He just has to exist.
comment = Network Logon Service
path = / var / lib / samba / netlogon
guest ok = yes
writable = no
write list = admin, administrator
This resource is necessary for creating and storing domain user profiles:
path = / var / lib / samba / profiles
browseable = no
read only = no
create mask = 0600
directory mask = 0700
When creating a domain user in / var / lib / samba / profiles, a directory with the same name is automatically created the user you are creating and belonging to him (with the rights 0700). This directory will store the user's personal settings.
In order to enable the client machine in the domain, it is necessary to perform the following actions.
First of all, you need to create a local system user with the name corresponding to the NetBIOS-name of the machine connected to the domain. The symbol “$” is added to the name at the end. To add a machine named machine_name, you must run the following commands as root:
# / usr / sbin / useradd -g machines -d / dev / null -c "machine nickname" -s
/ bin / false machine_name $
# passwd -l machine_name $
Now that a user has been created (the “$” symbol at the end of the name means that this is the NetBIOS name of the computer, not the username), you can add it to the domain by running the command smbpasswd -a -m machine_name as root.
Now the computer is connected to the domain.
Work with the creation of a machine account can be shifted to Samba by including the following entry in smb.conf:
add user script = / usr / sbin / useradd -d / dev / null -g machines -s
/ bin / false -M% u
Now Samba will receive requests from the client machines for inclusion in the domain and automatically register them in the same way as NT Server.
From this point on, the domain and the PDC based on the Samba server begin to exist. Users can log in with their own names and passwords from any domain machine with the settings saved, as well as independently change their user passwords without the help of a network administrator.
user accounts
All accounts are stored in the / etc / samba / smbpasswd file.
User accounts used by Samba fall into two categories:
records of computers in the domain;
records of users registered on this server.
It should be noted that in order to create and use any account in / etc / samba / smbpasswd, you must first create the corresponding entry in / etc / passwd. The general rule is that for each user in / etc / samba / smbpasswd there must be a user in / etc / passwd. The converse is not true.
The smbpasswd utility is used to manage accounts; A full list of its features can be found in the corresponding man page, but here we will look at the most frequent methods of use.
Creating a new user:
# smbpasswd -a
Existing user password change:
# smbpasswd
Delete existing user:
# smbpasswd -x
Suspending account without deleting:
# smbpasswd -d
Connecting this computer to an existing domain:
# smbpasswd -j
Use winbind
The winbind service is a new tool designed to more fully integrate Samba into Windows domains; it appeared, starting with Samba 2.2.0. This service reads its configuration from /etc/samba/smb.conf and dynamically interacts with the PDC domain, automatically synchronizing the lists of users and groups of the domain and the Samba machine. Thus, winbind is a very convenient tool for automatically maintaining the relevance of the domain user database on Samba workstations.
The operation of this service occurs without changing the contents of any authorization files in / etc and when the machine is restarted, domain users appear in the system only after winbindd is started. If you stop winbindd during operation, then domain users and groups will not disappear from the system until the reboot, however, the dynamic update of the lists of names and passwords will not occur.
To ensure that when restarting the computer (or just the winbindd service), the internal UIDs and domain SIDs are not violated, it saves the current state of the lists in the /var/cache/samba/winbindd*.tdb files.
For winbindd to function normally, the following directives must be declared in the /etc/samba/smb.conf file:
# The range of local user numbers that will be
# used to dynamically create domain users.
winbind uid = 10000-20000
# The number range of local user groups that will be
# used to dynamically create user groups
# domain.
winbind gid = 10000-20000
# Separator symbol used to compose domain names
# users and located between the domain name and the name
# user.
winbind separator = +
# Interval (in seconds) between winbind requests to PDC
# in order to synchronize lists of users and groups.
winbind cache time = 10
# Template for the name of home directories of domain users,
# automatically assigned to each user. Directories themselves,
# however, not dynamically generated. Instead of variable% D is substituted
# is the domain name, and the username is substituted for% U.
template homedir = / home /% D /% U
# Default command interpreter for
# users authorized through winbindd.
template shell = / bin / bash
It is also necessary to make changes in the /etc/nsswich.conf file to the passwd and group sections, by entering the winbind directive - for example, this way:
passwd: files winbind
group: files winbind
From this point on, you can use domain user names in /etc/samba/smb.conf with the purpose of access control, in the rights to files and directories, to connect to network resources of this host by other hosts.
CUPS print server
By default, Samba is configured to use CUPS as a print spooler. The implication is that CUPS is already configured and running. The following directives are present in /etc/samba/smb.conf:
printcap name = lpstat
load printers = yes
printing = cups
You also need to create a resource; its creation and the assignment of directives are described in detail in the section “Regular server” in the section Special resources.
Peculiarities of client and server localization
In order for all Samba components to work correctly with the Russian names of file objects and resources, the following directives must be added to /etc/samba/smb.conf:
client code page =
$ LANG = ru_RU.KOI8-R
client code page = 866
characte set = koi8-r
$ LANG = ru_RU.CP1251
client code page = 866
characte set = 1251
$ LANG = be_BY.CP1251
client code page = 866
character set = 1251
$ LANG = uk_UA.KOI8-U
client code page = 1125
character set = koi8-u
$ LANG = uk_UA.CP1251
client code page = 1125
character set = 1251U
$ LANG = en_UA.CP1251
client code page = 1125
character set = 1251U
In the last two cases, 1251U is a special designation inside Samba for the combination locally “1251 - remotely 1125”. In Samba, the definition of a remote encoding is done by local name.
It is also necessary to make sure that windows computersWith which interaction through Samba is supposed, the corresponding system localization settings were set. Otherwise, there is a high probability that "?" Or other unsolicited characters will be displayed instead of Cyrillic characters.
The specified /etc/samba/smb.conf directives affect the operation of all Samba components, both server and client. Currently, Cyrillic spellings of names are supported - files, directories and resources.
Some security issues
This section refers mainly to the Samba server side.
First of all, it is necessary to determine which interfaces should be listened on by Samba while waiting for a connection request (by default, all available on the system are listened).
For example, in order to limit listening to the local host and the first network cardYou need to write to /etc/samba/smb.conf:
interfaces = 127.0.0.1 eth0
bind interfaces only = Yes
Further, you can limit the ranges of addresses from which it is possible to access this server. The effect of these directives is similar to the effect of /etc/hosts.allow and /etc/hosts.deny on xinetd and ssh: if the IP address of the host does not fall under the allowing rule, the connection will not be established at all. In order to limit access to two subnets and the local system, additionally excluding one host, you can write:
hosts allow = 192.168.1. 192.168.2. 127.
hosts deny = 192.168.1.12
All of the above directives restrict connections at the interface and IP address level before any authorization. The following directives control the authorization mode of users.
To avoid interception of sensitive data when transmitting them over the network in clear text, it is customary to encrypt passwords. Samba and everything windows versionsStarting from the Win98 version, password encryption is used by default. This directive includes it in Samba:
encrypt passwords = yes
The user name override file is a very powerful tool for managing user accounts, but if used unreasonably, this tool is dangerous and therefore is disabled by default. Read the contents of the / etc / samba / smbusers file carefully before using it.
; username map = / etc / samba / smbusers
Regular client
Samba client functions are represented by browsing the network environment and mounting the / usr / bin / smbclient and / usr / bin / smbmount file systems, respectively. Also available are mount.smb and mount.smbfs, which are symbolic links to / usr / bin / smbount.
When launched, these programs read the current configuration from the /etc/samba/smb.conf file and use the domain functions in case the machine is connected to the Windows domain.
It is also possible to mount file systems using the system command mount, specifying the type as file system smbfs, and use these entries in / etc / fstab to automatically mount when the system boots.
For example, in order to mount a public resource in the / mnt / disk directory from the SMALLSERVER machine as cooluser, run the command: smbmount // smallserver / public / mnt / disk -o username = cooluser
The register of writing computer names, resources and users is not important. In order to get the list of Samba-resources of this machine and the list of workgroup or domain machines, just run the command: smbclient -L localhost -N
More information can be found in the smbclient and smbmount man pages.
The distribution comes with two graphical client applications - LinNeighborhood and gnomba, which run on top of the smbclient and smbmount utilities.
At http://www.public.iastate.edu/~chadspen/homepage.html, you can get a very high-quality graphical client application xSMBrowser.
Client as part of an existing NT domain
The connection is the same as described in p. “Server as part of an existing NT domain”. Further, all the work is exactly the same as described in the previous paragraph.
Features of using Samba 3.0
Samba 3.0 has noticeable differences from earlier versions; the most prominent of these are improved Unicode support compared to version 2.2, support for a much larger number of code pages, a new net administration utility designed to replace smbpasswd.
Package includes samba3-client, samba3-client-cups, samba3-common, samba3, samba3-swat packages.
Specifying code pages
The following new smb.conf parameters are used to set the encodings:
unix charset =
dos charset =
display charset =
where
The client code page and character set parameters are no longer supported. The unix charset parameter specifies the encoding in which the files on the disk will be stored, in which the parameters in smb.conf are specified. Finally, it is possible to store file names in UTF-8!
The dos charset parameter specifies the encoding in which Samba will communicate with clients that do not support Unicode. All versions of Windows, starting with 95, understand Unicode - but still it is worth setting dos charset = cp866, which corresponds to client code page = 866 in older versions.
The display charset parameter indicates in which encoding the program information should be output, directly communicating with the user, for example, smbclient, net, wbinfo and others.
Utility net
The net utility is designed to replace smbpasswd and provides much greater opportunities for obtaining information about the network and network management. The command format of the utility is very similar to the format of the Windows NT / 2000 command of the same name.
Main uses of the net command:
create and delete users: net user
including the machine in the domain: net ads join - Active Directory; net rpc join - NT Domain;
obtaining information about the domain, car, open filesSessions: net info, net ads status, net rpc status;
creating and deleting shared resources on remote machines: net share;
time synchronization with the windows server: net time
Managing the machine with Samba from the Microsoft Management Console
Starting with version 2.2, Samba has the ability to remotely administer from MMC (Microsoft Management Console). This feature is useful when Samba is a member of an NT domain or AD. A domain administrator can create, delete, and modify network resources on a UNIX machine with Samba running.
How to configure Samba for remote administration? To manage resources, use the /etc/samba/smb.conf parameters:
add share command =
The parameter specifies the script that will be invoked when trying to create a new resource in the MMC. The script is passed four parameters:
the name of the configuration file (for example, /etc/samba/smb.conf);
the name of the resource being created;
path to an existing directory on the disk;