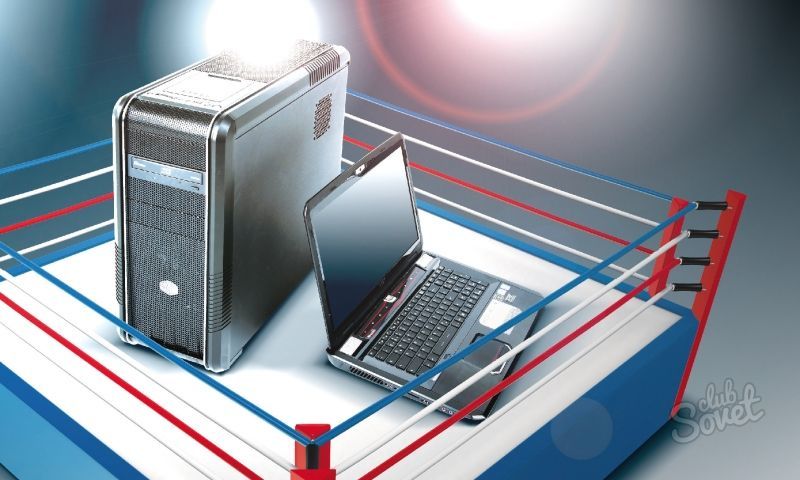
Create a wireless LAN between laptops. How to create a local network between a computer and a laptop. Connection via cable
Causes of combining the computer, laptop into one local home network can be different motivators. For example, to play in a network of two users, if you need to get material from a PC to a laptop or vice versa. And how to build this local area network? There are two approaches - through cable connection, the use of WI-FI.
This feature can be useful when you need to connect your laptop to another person to quickly share some files. With further customization, you can also use this type of network connection to share Internet access on one of the computers.
The not so good part is that it seems impossible to easily change the network profile assigned to this type of connection. In most cases, it will depend on the public, and you will need to manually change the network sharing settings in the public network profile. This, as mentioned above, can lead to security problems if you are connecting to other truly public networks.

However, you can still adjust the settings and make sure that everything runs as you want, and, importantly, you exchange only the files and folders that you want to share. If it does not exist, enter it in the text box. You should see the login screen. And you can access shared files and folders. Connection to a remote server.
Now you should see the login window, and you can go from there. Thus, you can be absolutely sure that you control what is shared. Fill in the name and password. Then go to the "Sharing" panel in "System Settings" and tick the box next to "File".


At the moment, there is nothing unusual in the fact that several computers are in the same house. Thus, each family member often has his own computer. Or individual family members want to exchange images stored on their respective computers from their last vacation.
If the data does not exceed a certain size, they can also be sent to e-mail to the address, and then downloaded to another computer. Both possibilities, however, are very cumbersome and cost a lot of time. A simple network is already present in this way, computers need only be grouped into a working group in which it is possible to easily exchange large amounts of data and, for example, provide general access to the printer. Since different devices were usually bought at different times and for this reason, they probably work in different operating systems, it is necessary to take into account certain features when setting up a workgroup.

The network is now installed. You can see the "names" of computer devices, if you open "Start", then "Network", when you click on "Computer Name", the items that you have shared are opened. Create a local (enterprise or home network) between the computer and laptop is not difficult, if everything is done consistently and carefully.
Computer names and workgroup names. This group must have the same name on all computers. This is the only way to allow computers to connect and gain access to each other. The workgroup name is assigned by the system by default and is the "workgroup". This name can also be configured at any time. Since these two names are necessary for creating a network, you can also be changed in the same place. To do this, go to the control panel located in the Start menu on your computer.
You can choose between the symbol and the category view. In the "Symbol" view, just click the "System" button. If, on the other hand, you installed a category view, first go to the "System and Security" category, and then click the "System" button. A new window will open that will tell you about the basic information, such as the installed operating system and the most important hardware components of your computer. In the "Computer, domain and workgroup settings" section, you can configure the computer name and workgroup name.
If you want to play on two PCs without using the Internet, instantly transfer files from different devices without USB-carriers, then you need to know how to create a local network between two computers. This technology of connecting two PCs has been used for a long time, even today has not lost its relevance.
Just click the "Change Settings" button. Basic information of your computer in system management. Just click "Yes." A window opens in which the names of computers and workgroups are displayed again on the Computer Name tab. By clicking the "Edit" button, you can configure it. The Computer Name tab in the System Properties.
Now you will see another window in which you can change two names. Make sure that the computer name does not exceed 15 characters and contains only numbers, letters, and hyphens. Other special characters, such as a space or period, are not allowed. The same rules apply to the name of the workgroup. The computer name must be unique for your network, whereas the workgroup name must be the same on all computers on the network.
Example of a local network
A local network refers to a group of interconnected devices: PCs, televisions, printers, located, usually, no more than one room. Devices use shared memory, servers, thus complement each other. Such a connection allows you to create a game zone for several PCs, easily and quickly transfer any data, print documents, if one common printer is installed, and do much more. Unification of devices today is more often done with the help of a router, but other connections can also be used, which you can read below.
Change the names of computers and workgroups. In order for the two new names to take effect, the system must be rebooted. Then you should check the network type of all computers, because it controls the security settings that apply to your network connection. To set the network type, go to the control panel in the Start menu on your computer and select "Network and Sharing Center" when you are in the symbol view. If you prefer to view the category, first go to the "Network and Internet" category, then click "Network and Sharing Center".
Creating a connection
Create a connection is fairly easy, and different ways: through a router or cable. The configuration of the devices in both ways is quite similar. The difference is mainly from the method of connection: via cable or via Wi-Fi.
The Network and Sharing item on the control panel. A new window opens, in which you can see if the network has already been configured. The home model already exists in the sample. You can change your network type by clicking the Home network entry. A home network has already been created.
In a home network, all computers are usually known and therefore also trustworthy. Typically, there is a protective mechanism between individual computers and the Internet, such as a firewall or router. Usually, no special precautions are required between computers. For this reason, the security settings should not be set so high. A network of jobs is much like a home network, but is in a business environment. Both types of networks are not suitable for use in public places, such as cafes or airports, because in this case your computer will be visible to all other users on this network.
Communication via Wi-Fi, which is used today much more often, can be much more convenient, but to connect two PCs by cable will be cheaper if you have not installed a router for some reason.
Connection via cable
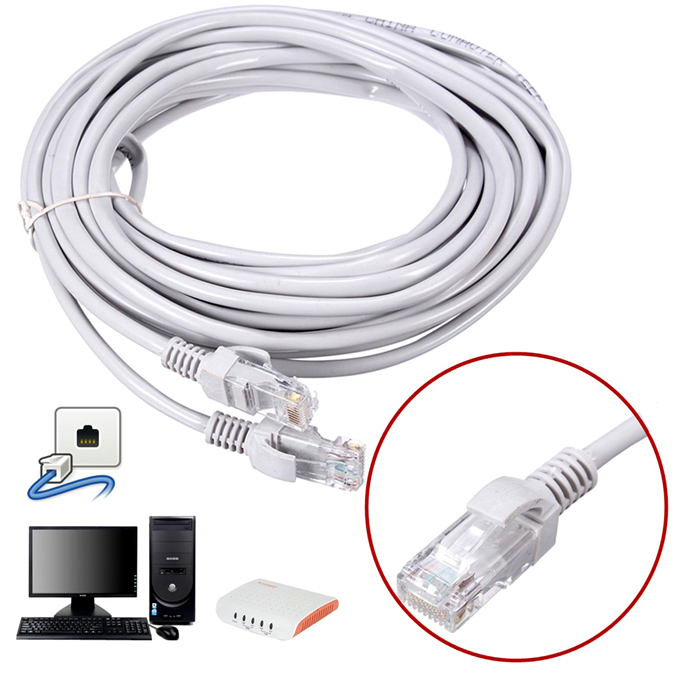
The oldest kind of connection is two cars. For it, you only need to connect an RJ45 network cable. The cable must necessarily be cross, although modern direct cables can often come up for modern computers. Still, when buying, it is better to specify the type of cable from the seller. When you add the ends of the cross cable, the color of the tips of the wires will differ - this is the main difference. Also, network cards on both devices are required for the connection, but today they are already installed. It is only necessary to note that if network Card already busy with the connection to the Internet, then it will not work.
Select a public network for these places. It is intended for networks in which not all computers are known. Security parameters are correspondingly higher than for the other two types of network, so viruses, other malicious programs or curious users can not easily reach your data.
After you've made your choice, just click one of the options. You can exit this window by clicking the "Close" button. Confirmation of network type change. To discover other computers on the network, you must enable network discovery. You can also enable or disable this option.
This connection was used before in order to play. But someone can be comfortable today, especially if you still have an operating theater windows system XP, which hardly supports wireless connections.
After connecting the cable itself, you need to know how to configure a local network between two computers:
To do this, open the Network and Sharing Center as described above, and then go to the "Change advanced access settings" section on the left. Advanced sharing settings in the main information of your computer. A new window opens, in which you will see two profiles of the network "Private or Workspace" and "Publication". To view all general settings for your private network, click the arrow next to the corresponding entry.
Displays two network profiles. In the first section, you can enable or disable network discovery as needed. You will also find additional options for sharing files and printers. More detailed information about this can be found in the corresponding article in the journal. After you have selected the desired option, click the "Save Changes" button.
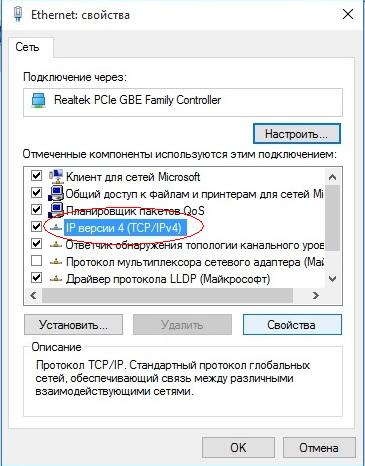
- Control panel, select the item concerning network connections.
- We choose there created by us, click on it PKM, select "Properties"
- Further, depending on Windows: for Windows XP, select Internet Protocol (TCP / IP), for Windows 7/8 / 10- Internet Protocol version 4.
Change the sharing settings for the network profile. After configuring the network, you can see all the other computers that are in the same workgroup in Explorer. Open it and go to the "Network" entry. You will see all the computers on the network, including your own, with the corresponding computer name. If you click the "Computer" entry, you can also see the name of the workgroup at the bottom of the window.
Display the network in Explorer. If you want to log off the network again, follow these steps to change the workgroup name. Just select a new name for the workgroup. Computers on the network can no longer connect to your computer. It is possible to install a small network between two computers using a very cheap network cable, called a crossover. It is also very useful for remote access To a computer that does not have a keyboard or monitor.
- Manually enter the IP-address: 192.168.ххх.ххх. The last six digits can be entered independently, the main thing is that they do not repeat with different devices.

- On Windows 7, you will also need to go to the Network Management Center, there you can select "Private" for the network through the "Settings" item.
- Then in the Control Center, enable file sharing, network discovery, and disable password protection.
After that, you also need to configure sharing. This is done so that the PC can exchange any files. The methods differ on different OS. On WindowsXP:
For this, both computers must have network interfaces and crossover. This is a common network cable, but the ordering of the wires at the ends is slightly different. One pair is used for data transmission, another pair is used to receive data, and the other two pairs are not used. Thus, the connection of two computers using a pin cable does not work: the transfer pair of one computer is connected to another computer transfer and vice versa.
This function inverts the hub or switch. A crossover cable is a common network cable with a twisted pair that connects the transmission pair of the first computer to the receiving pair of the other computer and vice versa, which allows you to establish communication. Check the wire order inside the cable, which must be present at both ends.
- Section Network connections, go to "Tools", select "Folder Options".
- The "View" tab, tick the "Use simple file sharing" checkbox.
- Then go to the "System Properties" window: PCM for "My Computer" - select Computer Name.
- Click "Change", select "Is a member" - a working group. We come up with a common group name for both PCs.
- My computer, click PCM on hard disks (for example, Windows (C :)), click on the "Access" tab, click on the link, set the permission to share.
Everything, the access to the files of the selected disks is completely open. With Windows 7/8/10 we proceed as follows:
To compress the connector to the cable, refer to the link by clicking on the link. Even if you perform this change remotely, it will take effect only by restarting the network or computer, losing this first form of connection. To configure the laptop, simply connect the cross-cable to the raspberry and run the following command.
When the laptop is restarted, the previous connection must be restored automatically. While on raspberries, take advantage of the cross-over cable to comment on the above configuration and return the configuration to the previous standard, and then restart the network on the rasp after exchanging the cross-cable for the network cable you are using.
- Control Panel, then "Folder Options".
- We tick the box "Use the Sharing Wizard".
- The following actions will be the same as for XP.
Connection via router

If you have access to the keyboard directly to both computers, it's easier to temporarily install an internetwork between them. Simply plug the cable between the raspberry and the laptop and run the following commands. Share a link to this text, but if you copy the fragment, specify the source.
Then the properties of this protocol. You have a message that you do not have the necessary permissions: your connection to the port on the local network should inform you that it is protected by a firewall. Click on the owner of the folder for sharing, and then on the sharing tab, and then select "share this folder as a network." Fill in the share name or check the network users to change my files.
This is the most convenient way, as it allows you to connect not only two, but more computers or other devices that support Wi-Fi. Play on such a connection can be without long settings.
IP-addresses with this connection will be automatically displayed. For use common files you will only need to share files, and then add two computers to one workgroup, as described above.
Now, to transfer files, you just need to enter the computer name using the address bar: \\\\ name \\. You can also do this through the Network Connections section. It's also worthwhile to secure your personal or especially important files so that no one can get access to them from a neighboring computer. To do this, it is best to specify disks that do not contain important information for you. For example, a disk that contains data accounts users, it is better not to open for everyone, or, using the settings menu for files and folders, restrict access to them: PCM on the desired folder, after choose there settings for sharing.
Game on a local network
So, we managed to connect two devices to one network without the Internet, let them share files. How to start playing on the local network?
For this, as rules, no advanced settings do not need. We just turn on the game and if we can play on the local connection, we select the corresponding item, and then we play according to the already created one.
For different games, the connection to the shared server may be different. Somewhere, you will need to enter the IP or PC name. For Minecraft, Counter Strike, for example, you will need to create a server. But as a rule, everything is done quite simply.
Hamachi
This happens rarely, but sometimes some game does not allow you to play through the Internet, but it allows you to use the local network. Do not despair, even if it turned out that your friend lives far away from you.
The program Hamachi allows you to emulate a local connection and thus connect a PC to it via the Internet. To do this, you just need to download the program, register, and then create a new connection, come up with a name and, if necessary, a password. After that, you can easily use this network for the game.
As you can see, combining computers into a local network is quite an easy process. It does not take you much time, and you can connect two PCs, then play with your friends, while away from them, and being in the same room with them.
Ways to create a connection are suitable for all Windows, starting with XP, ending with "Ten".