HDD Firmware for XBOX360
In this guide, we will flash hard disk from the company Western Digital (wd) for the XBOX 360. In other words, we sew the usual, laptop Sata Wd hdd,at Hdd xbox 360. Hdd firmware under the Xbox is quite simple, besides it does not take much time. Of course you can buy the original Hdd xbox 360, but it's not cheap. Hdd WD firmware under the Xbox, was developed by craftsmen. Thanks to this, you can save money, for which many thanks to them!
Many people ask why you need to flash the screw? In order for the Xbox to think that this is the original hard drive with a Microsoft signature! ! !
And so, let's get started!
Under the Xbox360 fit Hdd firms Western digita l The following models:
WD Scorpio Series BEVS / BEAS
WD Scorpio Blue Series BEVS / BEVT / BPVT
WD Scorpio Black Series BEKT / BJKT
WD VelociRaptor Series
WD AV-25 Series BUDT
WD Series BMVS
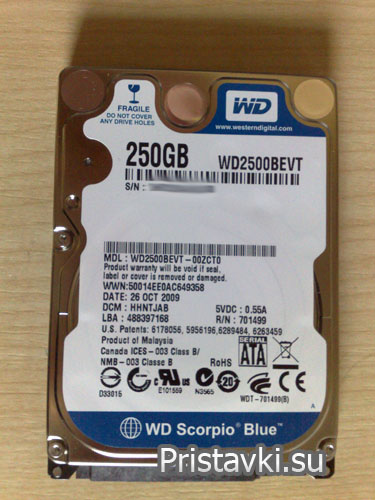
We will flash Wd hdd 250Gb capacity.
Below I attach several links to download all the necessary material for the firmware:
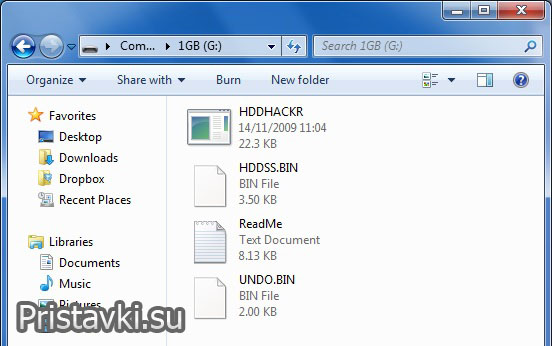
Download the archive, open, run the file XboxHdd.exe. Appears before uscamping program directory:
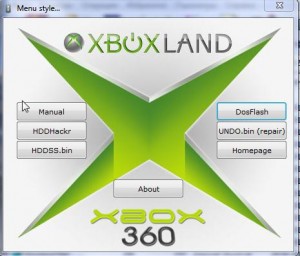
The firmware is made through MS-DOS. Therefore, you need to prepare a bootable USB flash drive. We connect USB flash drive to a free computer USB port.
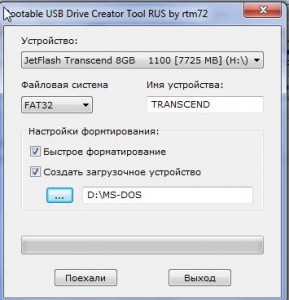
Further in the catalog we press the DosFlash button. A window opens, select our USB flash drive, put checkmarks: quick formatting, create a boot device. Next, specify the path to the folder with MS-DOS files that are in the downloaded archive, this is the USB Drive Boot Files folder. Push the button GO!
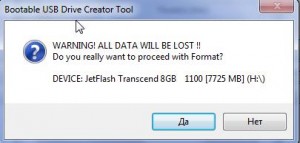
A warning appears, click YES.
The formatting process has begun.
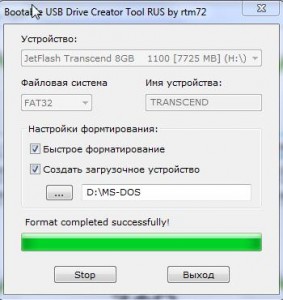
We wait. Formatting is over, the flash drive is ready!
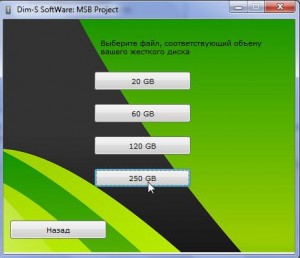
Now you need to copy the flash drive HDDHackr + our firmware to the USB flash drive, this is the HDDSS file. Bin(all this is in the program directory). As we flash Wd hdd 250Gb means file firmware choose 250Gb:
After copying the firmware file, the program flasher on the USB flash drive, turn off computer.Connect the flash drive to the Sata port of the motherboard. It is advisable to disable the other hard ones, so as not to confuse with the firmware! ! ! Connect the USB flash drive, turn on the computer. Go to the BIOS. There we look, whether our screw was defined, if not, use another Sata port. If, again, was not determined, then go to a friend, try with it. When hard determined! We put in the BIOSE boot from a flash drive, save the settings, exit.
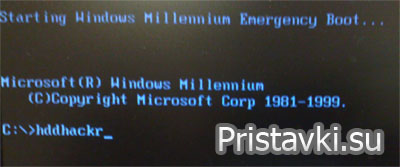
The computer will restart, we will see the MS-DOS command line on the screen. We write "hddhackr".
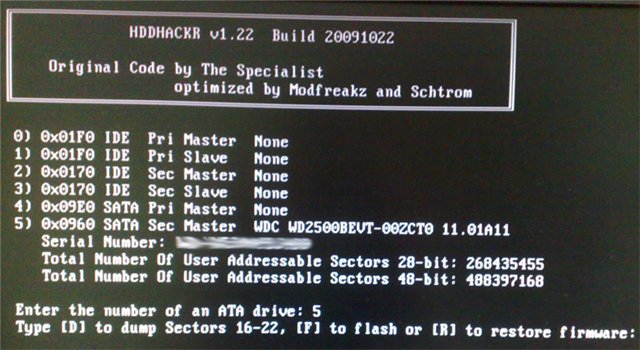
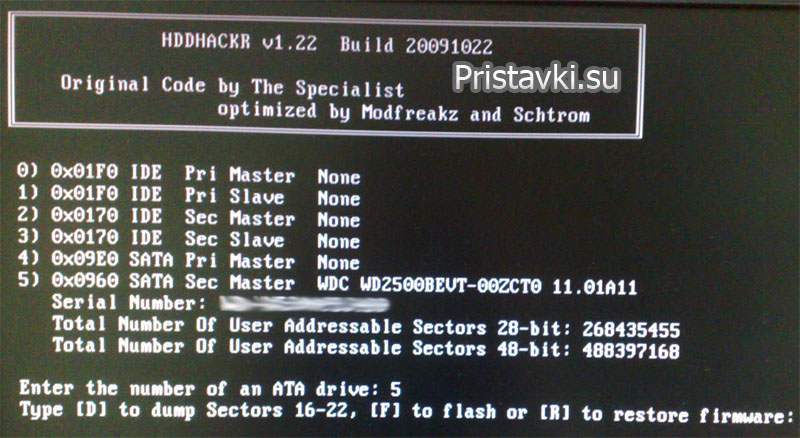
You will see the entire list of computer hard drives. We look at what number is the firmwarescrew . Enter this number, press enter.
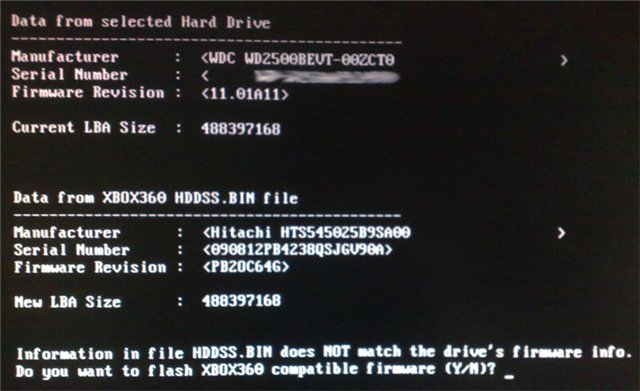
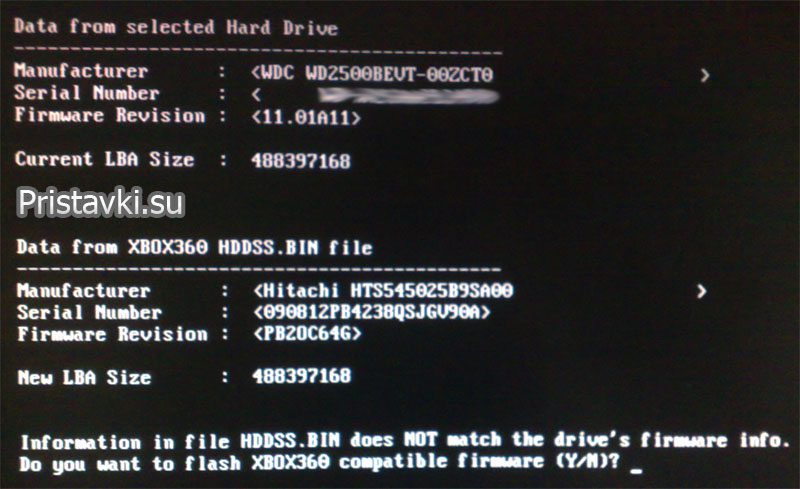
You will receive a message stating that this hard disk firmware Hdd xbox 360 , it does not match the firmware of your hard disk, click Yes.
We are asked about the seriousness of our intentions, press Y, enter.
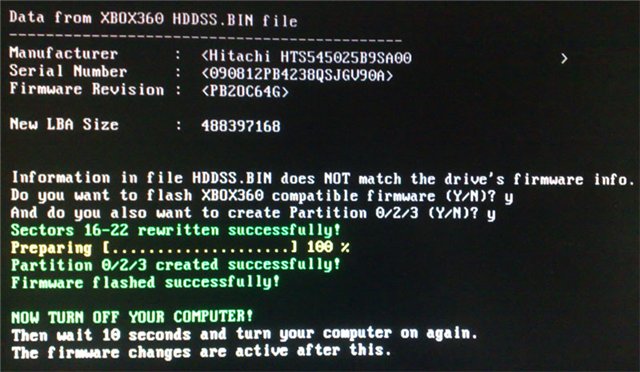
On the proposal to create sectors, we also answer Y.
Now wait a little while. program Hdd will flash. When hdd WD firmware end, turn off the computer. Disconnect stitched Wd hdd he's ready!
Installation in Xbox360 Slim.
Now we take the stitched hard drive, install it in the bay for Hdd on the console. You can install it without a case to Hdd, you can install it with a case (if any) by first placing it there.
To install the stitched hard drive on the Xbox 360 FAT console, you need to disassemble the case where the old screw is located and replace it with a new, stitched one.
Restoring the stitched screw to its original state.
The process is the same as the original. hdd firmware (described above). Now you need to take the program directory instead of HDDSS.BIN, the file UNDO.BIN, along with the program hddhackr, copy to a bootable USB flash drive.
We proceed to the firmware (the process is described above), after the step when we entered the number of the screw being pierced, we need to press the “R” button on the keyboard.
The program will request the file UNDO.BIN, you just need to write UNDO.BIN. Everything, Hdd firmware finished, our disk is back to its original state. Now you can use it as usual. hard for computer.
NEW! ! !
Those who need Hdd WD firmware 320Gb, for and who wants to dispose not of 250Gb, but 320Gb. Below is attached archive for download, which contains files: HDDSS.BIN320Gb and UNDO.BIN320Gb
There is still a lot of useful information.
I recently ordered an x-box for myself, but I don’t want boxing to be without a hard drive, so after studying foreign websites I decided to write a FAQ on how to turn an ordinary 2.5 HDD into an “original” HDD for Xbox!
We will be flashing with the help of hddhackr.
hddhackr runs on the following models of Wester Digital hard drives:
- WD Scorpio Series BEVS / BEAS
- WD Scorpio Blue Series BEVS / BEVT / BPVT
- WD Scorpio Black Series BEKT / BJKT
- WD VelociRaptor Series
- WD AV-25 Series BUDT
- WD Series BMVS
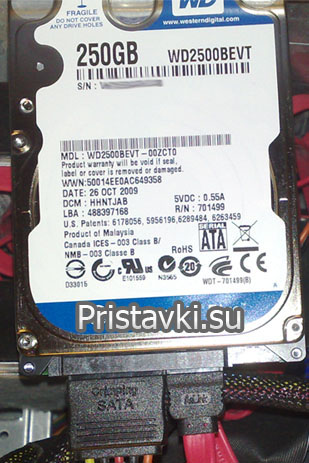
I bought a 250GB WD Scorpio Blue (WD2500BEVT) - its average price is 1500 rubles.
You can also install these hard drives, but other volumes, i.e. 1000GB, 500GB, but the maximum available capacity is only 320.
The first step is to create a bootable USB flash drive (any USB flash drive will do)
This requires this archive.
1) Unpack and run the program (as administrator).
2) Choose your flash drive
3) in the "File System" row, select FAT (FAT32)
4) put a tick in front of the "Quick Format" and "Create bootable device"
5) In the line below, specify the path to the folder with MS-DOS (the folder is in the archive with the program Bootable USB Drive Creator Tool or in the folder with XboxHDD)
6) Click "Go" and for a few seconds we get a bootable USB flash drive
Download the files needed to flash the hard drive:
If you are flashing a 320 GB hard drive, then you need this file.
If at 250, then this one.
At 120 GB this one.
Remember to rename HDDSS_320GB.BIN to HDDSS.BIN
You also need to download hddhackr 1.30 itself.
Unzip HDDSS.BIN and hddhackr to the bootable USB flash drive we just made.

Shut down your computer and connect the firmware to be flashed (in my case this is WD Scorpio Blue WD2500BEVT) into the “master” sata port. I would advise you to disable other hard drives, so as not to flash the wrong one.
Turn on the computer, go to bios and make sure that the firmware you are installing is properly connected and working!
Set in the BIOS menu the boot from the flash drive we prepared earlier, save the settings and restart the computer.
After the reboot, you will be in dosprompt, enter hddhackr and press enter; after this, the program will request the UNDO.BIN file, just enter UNDO.BIN
If everything is done correctly, a list of hard disks of your computer will appear in front of you, in my case the hard disk being flashed is number 5
Did you see a list of hard drives? or even instead of HDDhackr blinking cursor?
then you need to:
check BIOS settings;
check whether you have prepared a flash drive;
If all this did not help, then the output is one “shake up” on another PC.
After entering the number of the propelled screw, you will be asked to make a backup copy or firmware, press the F button on the keyboard for the firmware.
Enter the file name (security sector) HDDSS.BIN
You will receive a message stating that this firmware is for the xbox 360 hard drive and it does not match the firmware of your hard drive.
Choose YES
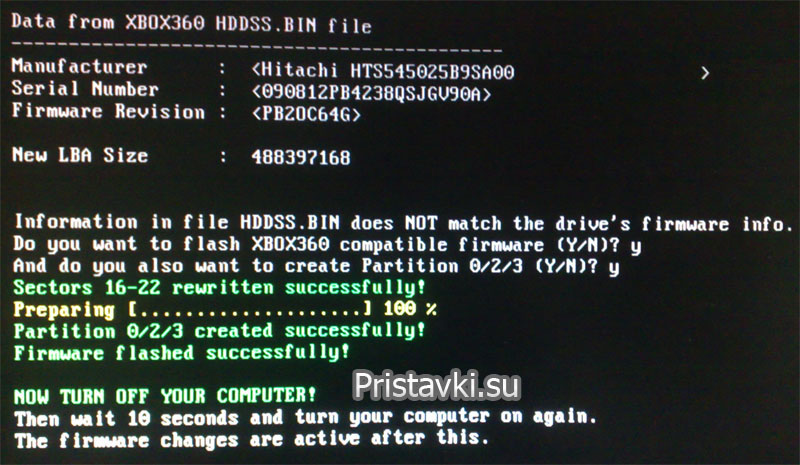
You will be prompted to create partitions 0 \\ 2 \\ 3 \\
and click Yes again
Now install the hard drive in the Xbox 360 and use
Restoring the hard disk to its initial state
If you no longer need to use the stitched hard drive for xbox 360, then you can restore it!The recovery process is not much different from the firmware process:
1) Find the file UNDO.BIN on your storage media.
Attention! Attempting to restore using a non-native UNDO.BIN leads to a hard drive crash!
2) Prepare a flash drive or other media for the firmware (the process is described above) and drop the UNDO.BIN file on it for your hard disk model.
3) We proceed to the firmware (the process is described above) and after the step when we entered the number of the propelled screw, press the “R” button
4) The program will request the file UNDO.BIN, you just need to write UNDO.BIN
Everything! Now the hard drive will work as before.
The list of motherboards on which the firmware has successfully completed:
Asus M2N-SLI Asus p5b
Asus P5N-MX NForce 610i
Asus m3a
asrock g41m-gs
NOTEBOOK Acer5720
Gigabyte 8IPE1000-G
Gigabyte GA-M720-US3
MSI 7392
MSI P45 Neo2
NETBOOK ASUS Eee PC 1000H
How to install a 2.5 "hard drive in Xbox 360 Slim 4 Gb
250 gigs from a laptop
If you bought a new arcade configuration, which comes with an internal memory of 4 gigabytes, but you want to install a hard 250 gigs, then do not rush to buy hard from M $.
As you know, a special hard disk costs about 70 euros. I do not know how much he is in Russia, I did not ask the price, but I strongly doubt that it is cheaper than 2 thousand rubles.
Installing the hard by this method on Xbox 360is different from installing the same hard on Playstation 3. On PS3 who knows, everything is much simpler ... you take hard, pull out the old one, put a new one. You turn on the console ... a few taps on the gamepad and voila ... you no longer have PS3 160 Gb, but PS3 640 Gb. No sectors, no protection, in general, everything for the people
In case of Xbox 360 slim we have to try a little bit. But if you read everything carefully, then there is nothing complicated here and everything will turn out as it should.
And so, let's start))
We will need:
One of the following hard drives:
- WD Scorpio Series BEVS / BEAS
- WD Scorpio Blue Series BEVS / BEVT / BPVT
- WD Scorpio Black Series BEKT / BJKT
- WD VelociRaptor Series
- WD AV-25 Series BUDT
As for the choice of hard, I will immediately retreat and explain:
You can put a hard disk of any size, but the prefix will see the volume that you “sew” in Hddhackr, and you can sew only 20, 60, 120 and 250 gigs. Why so, I think it is not worth explaining.
Accordingly, I advise you to choose between two options:
Western Digital WD2500BPVT 250 Gb 1200 rubles.
Western Digital WD5000BPVT 500 Gb - The price across Moscow in the Internet shops approximately 1500 rubles.
The difference of 300 rubles, it seems to me is not significant. Therefore, I would recommend to buy hard 500 gigs. Why? There are two arguments:
1. You can always pull it out and use it, for example, via a mabye case like usb hard, or put it into a laptop. In general, a larger volume I think is preferable.
2. Possible with exit Xbox 360 Slim 500 Gb, there will be sectors for hard drive firmware and you can already have hard disk by reflashing the sector to use it to the full!
In the meantime, 500 gigabyte hard will only be used in half.
The first thing you need to do is create a bootable floppy or flash drive. This is needed to download Hddhackr.
If you want to hack a smaller hard disk? for example 120 GB, download other sectors:
Unpack the archives. Files from archive Hddhackr We throw on the boot drive. Next file from the archive Xbox 360 250GB Hard Drive Security Sector rename to HDDSS.BIN. Called it HDDSS_250GB.BIN
You should be like on the screen:
If everything is ok, then you will see a list of detected hard drives. In this case, the hard drive is defined as number 5. You may have it defined by a different number, and also if you have not disabled the other hard drives, do not confuse by entering an incorrect number!
After you have chosen a screw, you will be offered a choice: make a backup copy or flash a disk. we choose the firmware.
1. Press F on the keyboard.
2. Next, enter the name of the security sector file. In our case, the file name HDDSS.BIN.
3. Next, you will receive a message stating that this firmware does not match the firmware of your hard drive. Just click YES.
4. You will be prompted to create partitions 0 \\ 2 \\ 3 \\. Push YES.
Then we see green labels and a message that you can now turn off your computer. Everything, your disk haknut.
Open the lid, under it we see a hole for hard. 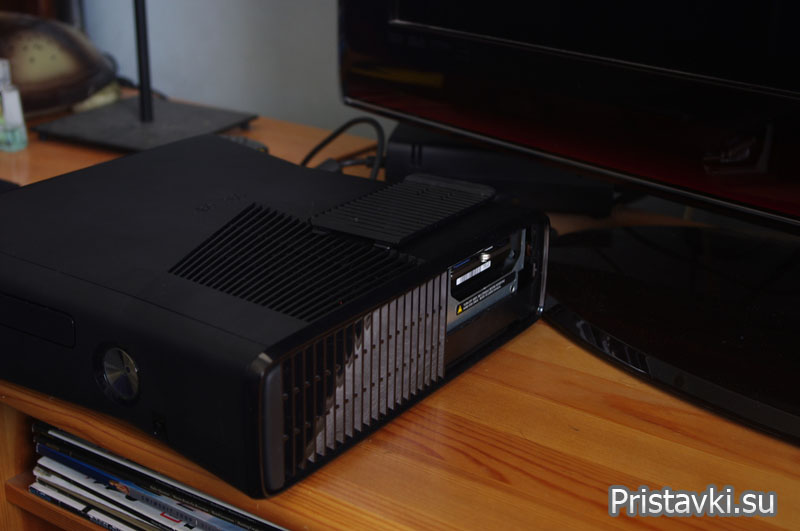
Take a good look at the screen. You will see the SATA connector for connecting the hard and power for it. 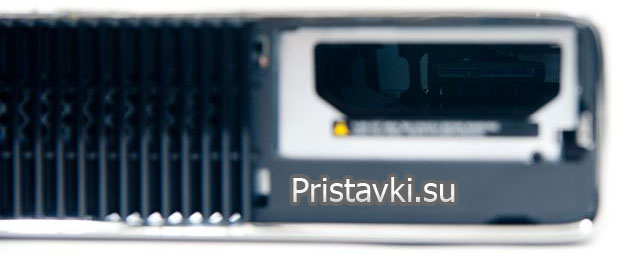
Hard set sticker up! Do not confuse and do not try to crush the wrong side. 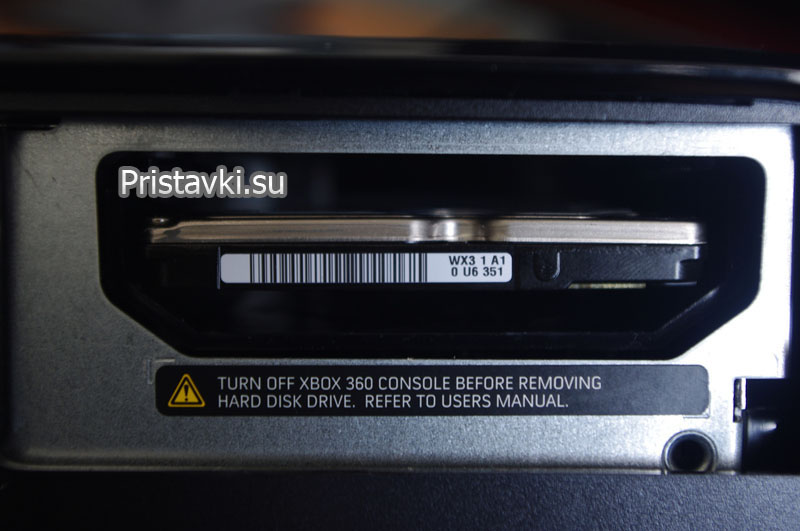
Well and all Enjoy! 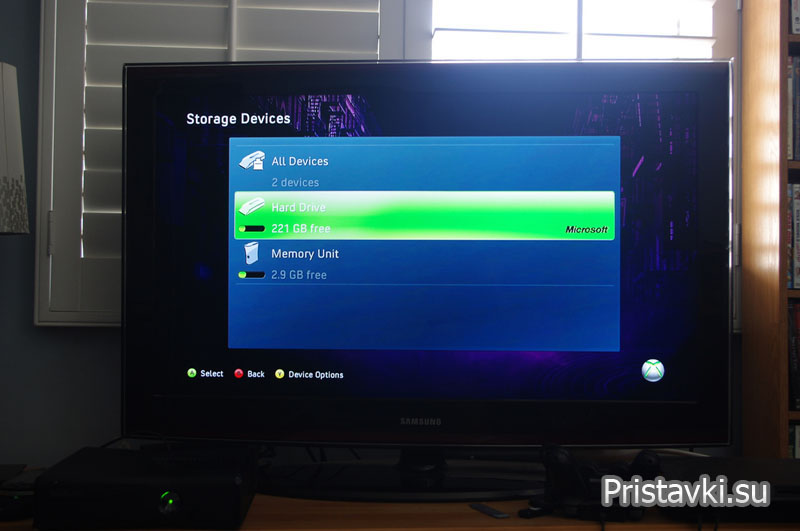
In order not to spend about 5-6 tons. on a hard drive for the Xbox 360, you can purchase a regular 2.5 ″ hard drive (for laptops). Do not rush to run after the first disk, only firms are suitable. Wd, namely such series as:
- WD Scorpio Series BEVS / BEAS
- WD Scorpio Blue Series BEVS / BEVT / BPVT
- WD Scorpio Black Series BEKT / BJKT
- WD VelociRaptor Series
- WD AV-25 Series BUDT
- WD Series BMVS
The volume of the purchased disk may not be more than 320GB at the moment, this is a limitation of the firmware of the console itself, but suddenly you have a larger disk, do not worry, you can also flash it onto 320GB and use it.
And so, personally, I only had disks from other manufacturers, so I purchased a 2.5 ″ WD Scorpio Blue WD3200BPVT hard drive in Citylink, with a discount of 1100 rubles.
Now you need to reflash it on the Xbox 'disk ... we will need:
- Straight arms and a working brain.
- Archive with firmware and all software ()
- Computer with SATA connectors
- Empty flash drive, memory card or floppy disk
Stage 1. Preparation for firmware.
We need to boot under MS-DOS, for this we need to create a bootable USB flash drive.
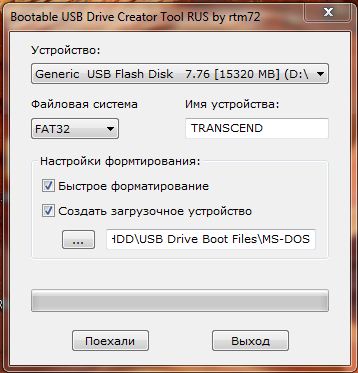
To do this, insert the USB flash drive (note that all data will be lost, I did it at one o'clock tired after work and stores .. there were several flash drives in the laptop, formatted the worker with a bunch of necessary information and projects) from the downloaded archive you need to run from the folder " Creating a bootable flash drive"Program" Bootable USB Drive Creator Tool»With administrator rights (right mouse button on the program, Run as administrator).
We select the desired flash drive, and the best at this moment to pull out everything except the desired start up.
File system expose FAT32, or Fatthat does not matter to us.
Put a tick " Fast formatting"And" Create boot device«.
Click on the button with three dots (Browse), select the folder from the archive " Creating a bootable flash drive \\ USB Drive Boot Files \\ MS-DOS «.
Click "Go!" 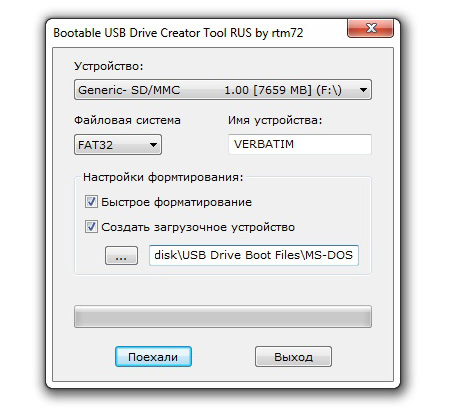
We are asked whether we really want to delete everything to hell on a flash drive, we answer "Yes." 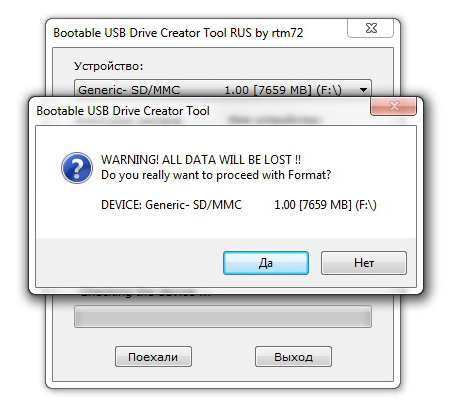
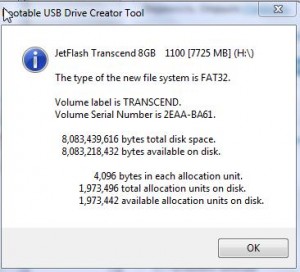
At the end, a window pops up with the summary information, after that we close everything, the bootable USB flash drive itself has been created. 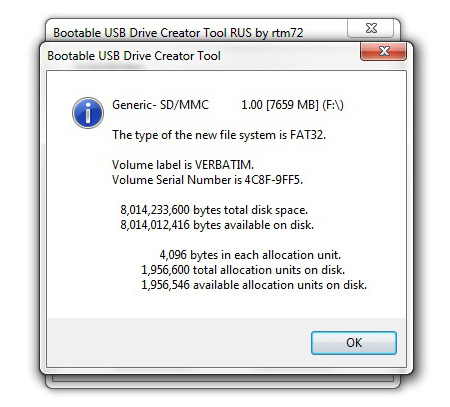
Now we need to also write to the flash drive a program from the archive “hddhackr.exe” and the file of the firmware itself. I chose 320GB - this is the file in the Firmware folder, “HDDSS320.BIN”. The archive also has firmware for 20, 60, 120 and 250GB.
As a result, on the flash drive we have about such a set of files. 
Stage 2. Disk firmware.
Turn off the computer, remove the power and SATA cable from the main hard drive, connect it to our experimental one.
(I personally didn’t manage to do this at home, the old computer didn’t start up from the flash drive, and I didn’t see the disk in the hddhackr laptop, I only managed to flash it on a desktop computer).
Boot from a flash drive (this feature is not supported on all old computers). 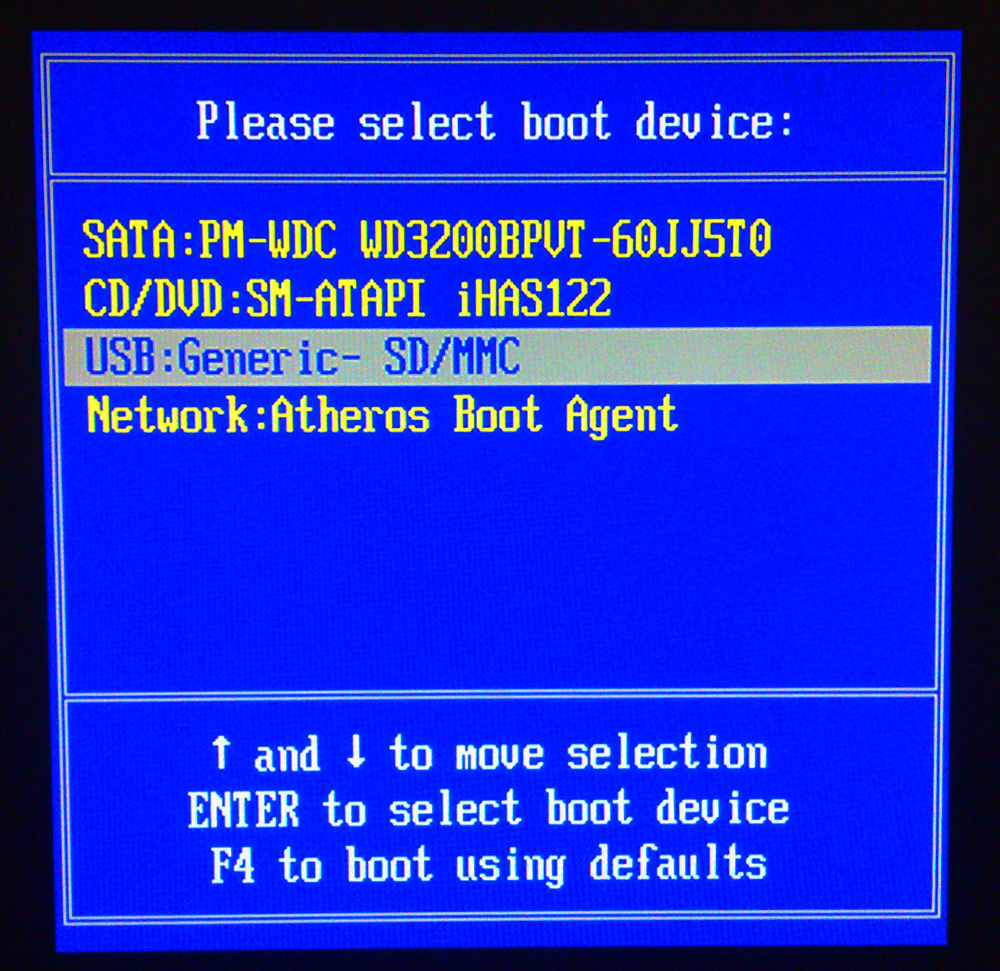
We see in front of the command line MS-DOS ...
Enter the name of the program required for the firmware, hddhackr and push ENTER.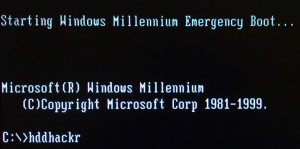
Before us opens the program HDDHACKR v1.30, if everything is done correctly and your computer supports all the necessary functions, you will see a list of connected hard drives.
Select the desired disk, in my case it is disk number 4. Enter the number and press ENTER. 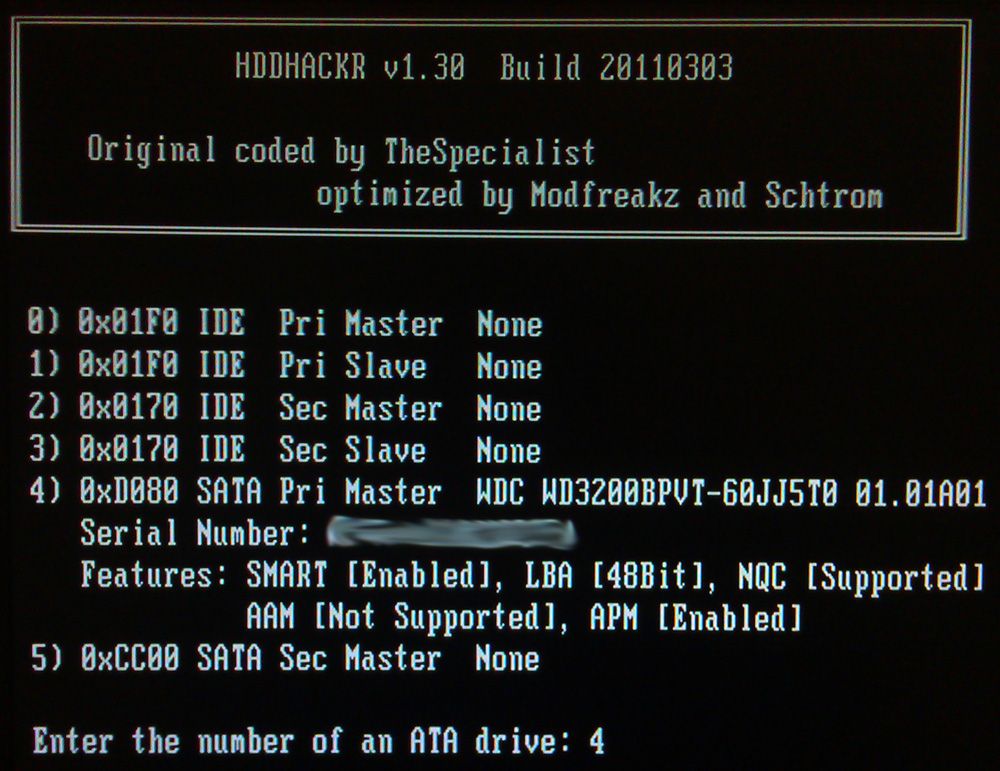
It will be offered to make a backup (D), create a partition 0/2/3 (C), flash the hard disk (F), restore the firmware (R). We select “F”, press ENTER. 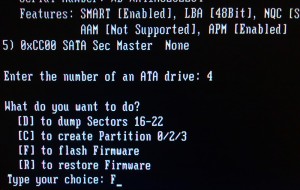
After choosing F, we are prompted to enter the name of the firmware that will be loaded into the hard disk, in my case it was “HDDSS320.BIN” and press ENTER. 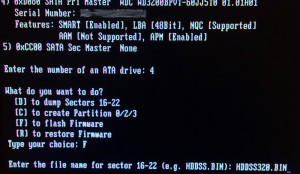
Then we are offered to make a backup copy of the hard drive firmware, here you have free will, I entered “UNDO.BIN” by default and ENTER once again. 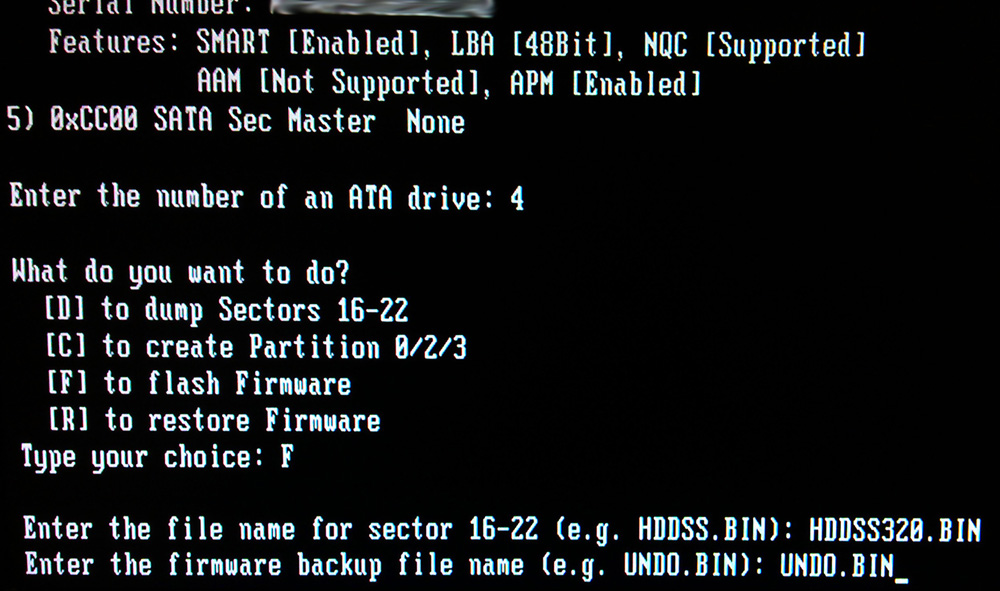
We are asked whether we really want to change the firmware, we certainly answer yes, "Y" and ENTER. 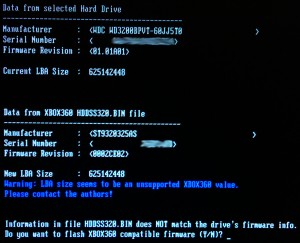
And finally, we see this on the screen and after that we can turn everything off and out of the computer. ![]()
Stage 3. Installing the drive in Xbox 360 Slim.
After a successful flashing of the disk, we will definitely have to insert it into the console and finish everything started so that we can finally play without a spare.
Here there are several options, you can install a hard drive in a box bought anywhere, on Chinese sites and everyone Ibei knew them for dime and for a penny, I also ordered it, but for now I inserted the disc in another way, directly, without boxing with a small collective farm.
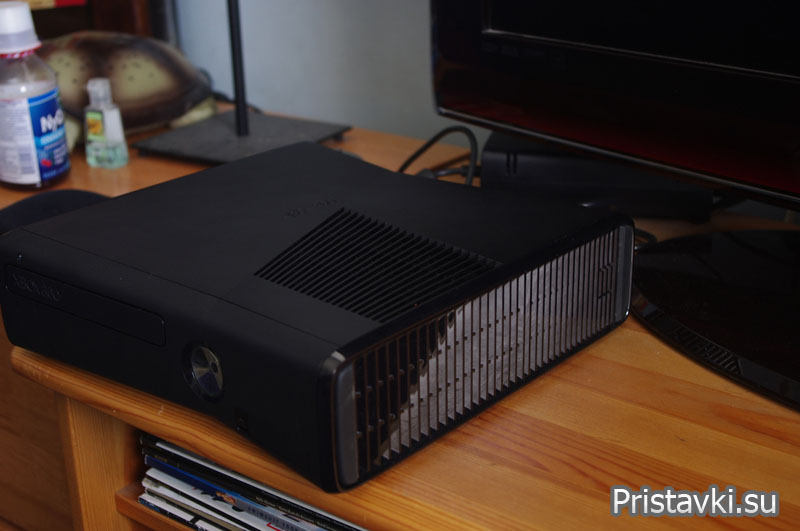
In both cases, it is necessary to open the hard disk compartment cover, it is located at the bottom (if the console is installed), or from the right side (if it is facing you and on the special legs). 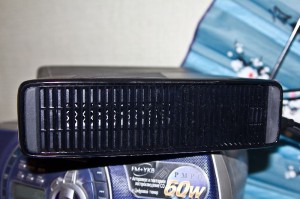
There you will see a button to open the flap. 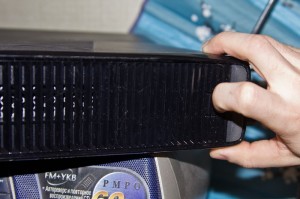
We move it aside and take it out. 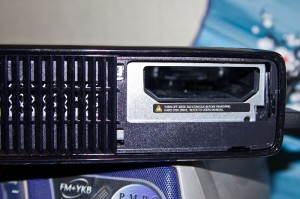
We see the connectors for the drive. 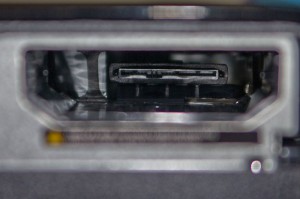
Insert the disc as in the photo until it stops. 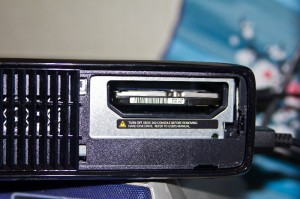
In order for the hard drive not to vibrate and last longer, I put foam on the edges. DO NOT SOUND THERE A LOT OF MORE SOMETHING, THE DISK IS GREAT WHEN YOU WORK AND YOU HAVE A CHANCE TO RELEASE THE EXTENSION !!! 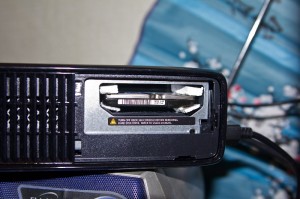
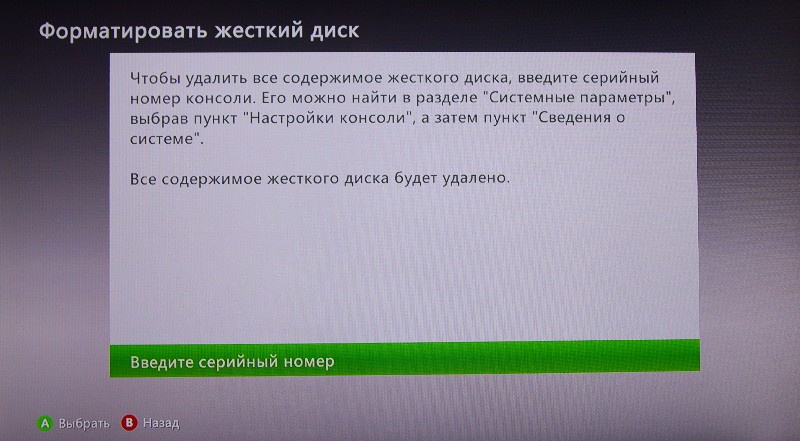
Then we close everything back, connect and turn on the console. We will need the serial number of the console, if you do not know it, it is in “System Settings - Console Settings - System Information”.
We go into the memory settings, we see that something seems to have changed, but not completely. It is necessary to format the disk.
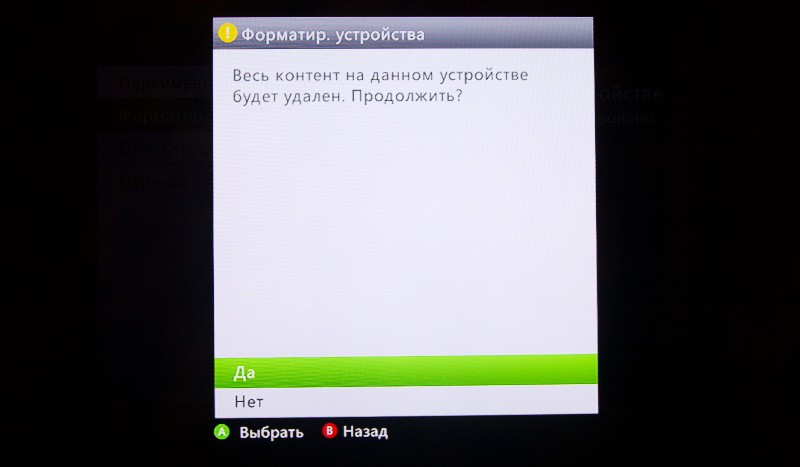
Choose our disk, click formatted on the joystick "Y". 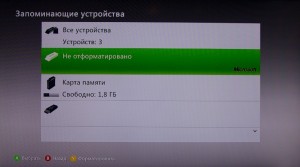
Choose format and click "A" 
Upon completion, we will see that the hard drive now shows volume. 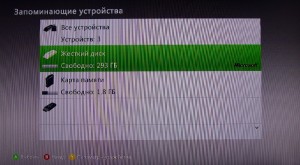
That's it, now you can relax and play.