Outlook comes auto-answer after disabling the deputy feature. Add information about your absence in the Outlook calendars of colleagues
Thanks to the standard tools, in the Outlook email application, which is part of the office suite, you can configure automatic forwarding.
If you are faced with the need to set up redirects, but do not know how to do this, then read this instruction, where we will discuss in detail how the redirection is configured in Outlook 2010.
For the implementation of the redirection of letters to another address, Outlook offers two methods. The first is simpler and consists in small settings of the account, the second will require deeper knowledge from users of the mail client.
Let's start setting up forwarding using the example of a simple and clearer method for most users.
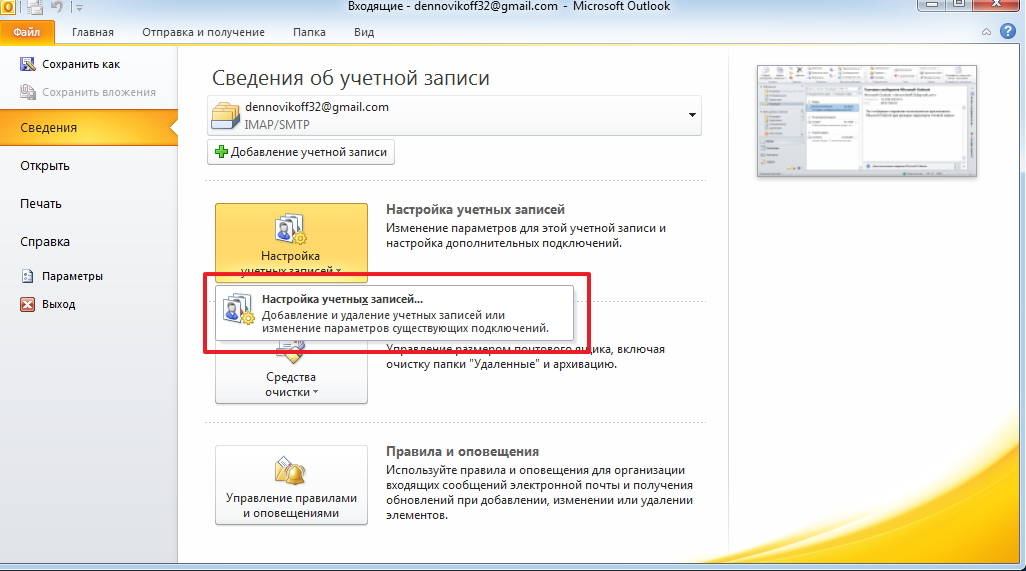
So, go to the “File” menu and click on the “Account Settings” button. In the list, select the item with the same name.
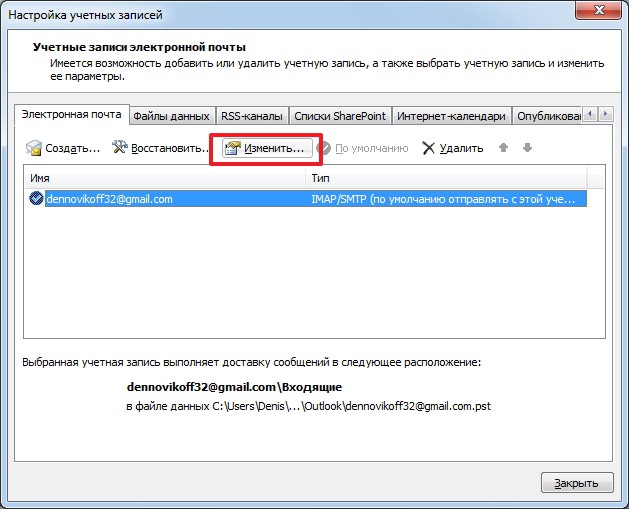
Before us will open a window with a list of accounts.
Here you need to select the desired entry and click on the "Edit" button.
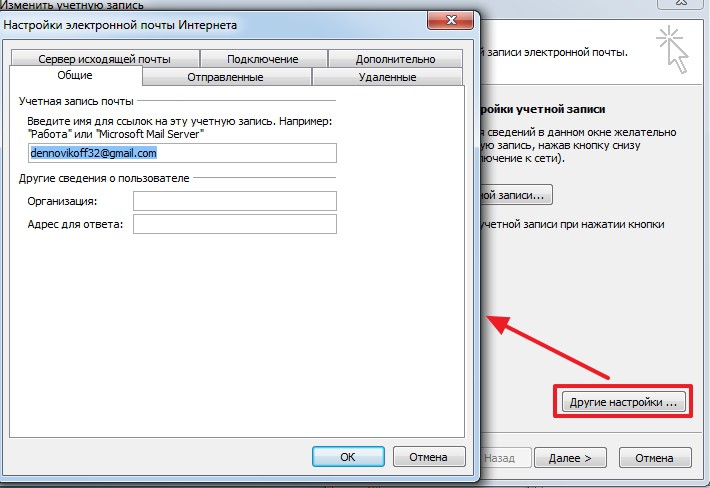
Now, in a new window, we find the “Other Settings” button and click on it.
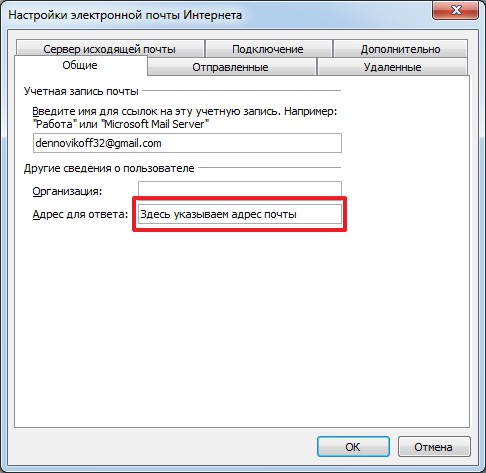
The final step will be to specify the email address that will be used for replies. It is indicated in the “Address for Response” field on the “General” tab.
Alternative way
A more complicated way to set up forwarding is to create the appropriate rule.
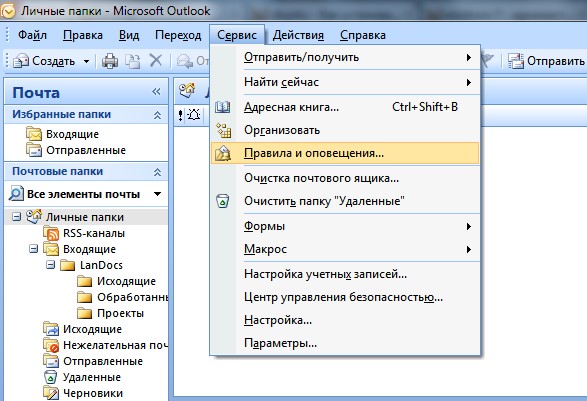
To create a new rule, go to the “File” menu and click on the “Manage rules and notifications” button.
![]()
Now we create a new rule by clicking on the “New” button.

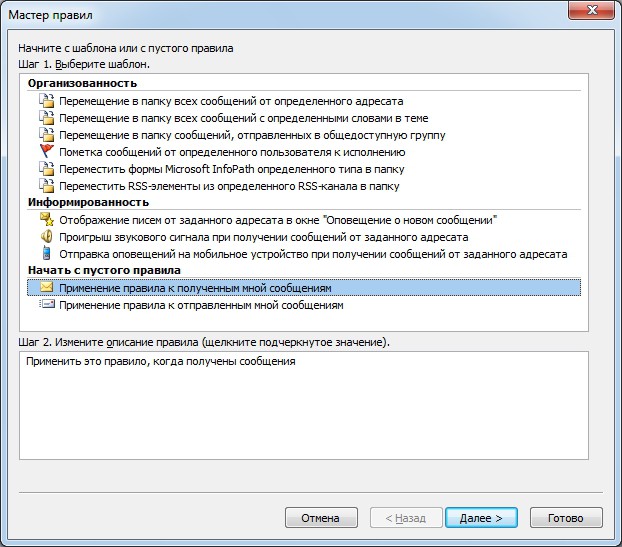
In this horse, it is necessary to note the conditions under which the created rule will work.
The list of conditions is quite large, so carefully read all and note the ones you need.
For example, if you want to redirect letters from specific recipients, then in this case the “from” clause should be noted. Further, in the lower part of the window, you need to click on the link of the same name and select the required recipients from the address book.
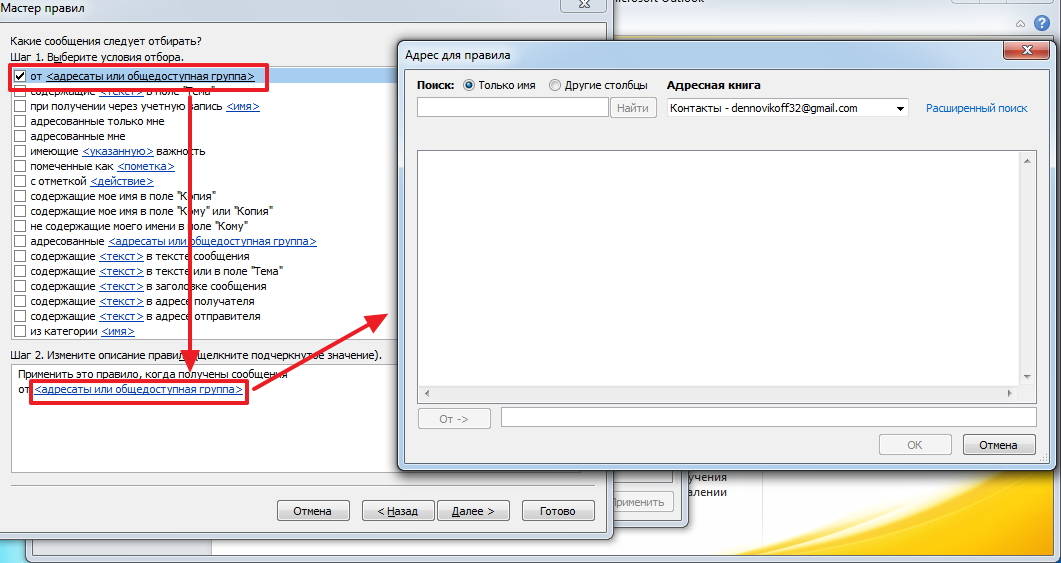
Once all the necessary conditions are checked and configured, proceed to the next step by clicking on the "Next" button.

Here you must select an action. Since we are setting up a rule for forwarding messages, the appropriate action will be “forward to”.
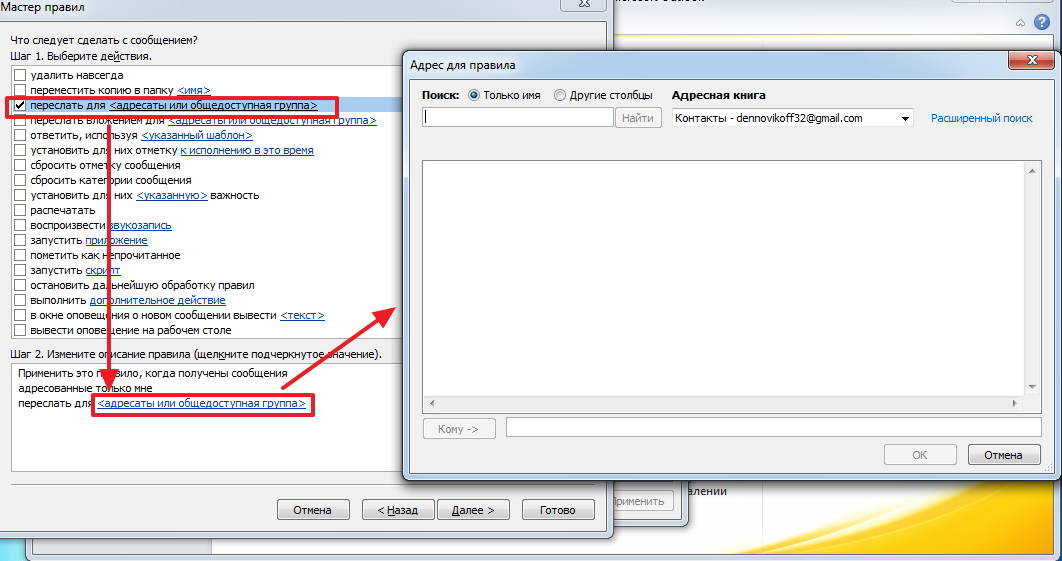
Actually, this is where you can finish setting up the rule by clicking on the “Finish” button.
As in other cases, here it is necessary to select the conditions for exclusion from the proposed list.
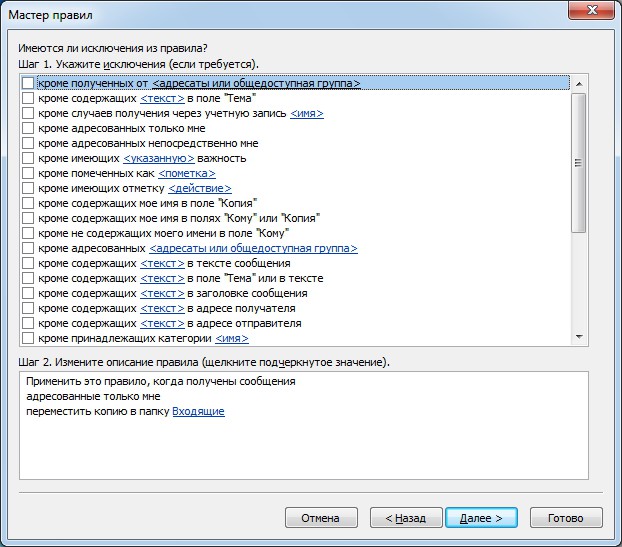
By clicking on the "Next" button, we proceed to the final configuration step. Here you must enter the name of the rule. You can check the box “Run this rule for messages that are already in the Inbox”, if you want to send letters that are already received.
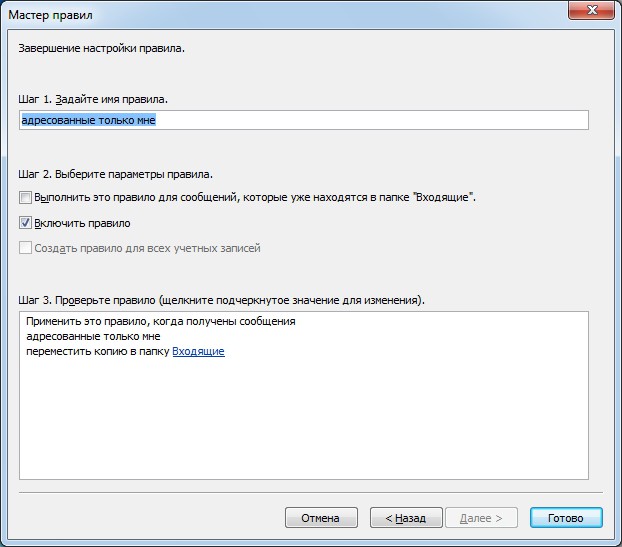
Now you can click "Finish".
Summing up, we once again note that setting up redirects in Outlook 2010 can be done in two different ways. You also need to determine more understandable and suitable for yourself.
If you are a more experienced user, then use the rule settings, because in this case you can more flexibly adjust the forwarding to your needs.
2. Select “I'm not at work”
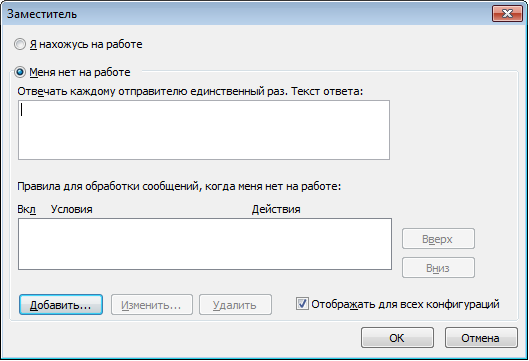
If you want to disable this feature, select “I'm at work”
Outlook2010:
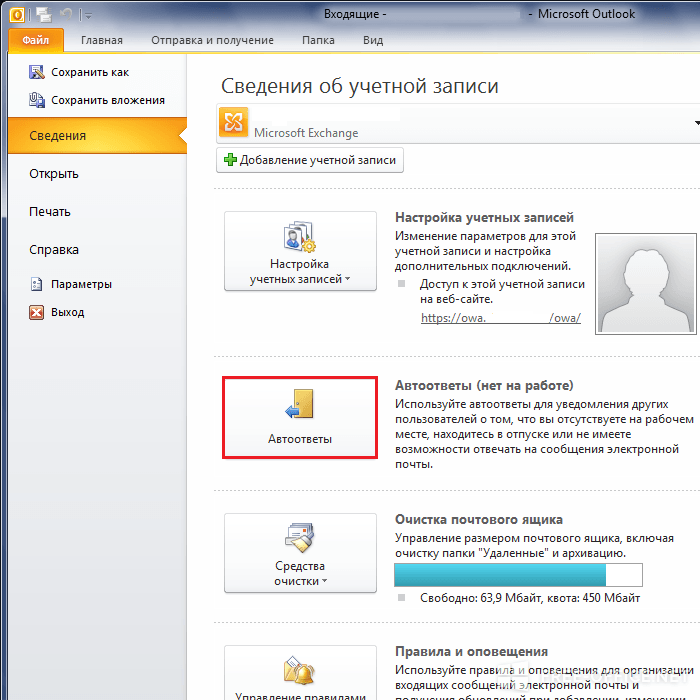
1. Start Outlook, go to the menu "File" and select "Auto Answers".

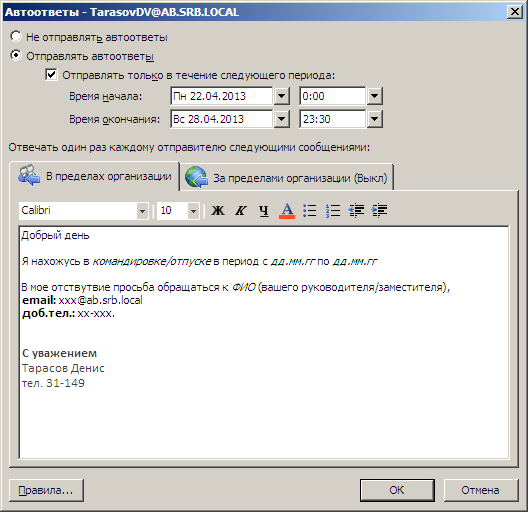
2. Select "Send Auto Answers" and enter the text of the automatic message.
To disable auto answer, you need to select "Do not send auto-answers"
Note: Here you can also set specific dates and times of your departure, after which the answering machine will turn off.
I used the following auto reply template:
good day
I am in business trip / vacation since dd.mm.yy by dd.mm.yy
In my address, please contact Full name (your supervisor / deputy)
email: This email address is protected from spam bots. You must have javascript enabled to view.
ext. tel.: xx-xxx.
respectfully
Ivanov Ivan
How to set up forwarding and other advanced features.
If you want your mail to be forwarded to your manager / colleague or set up another response template for the sender, or move the letters to another folder or delete the incoming letter, you need to do the following.
Outlook 2007 / Outlook 2010
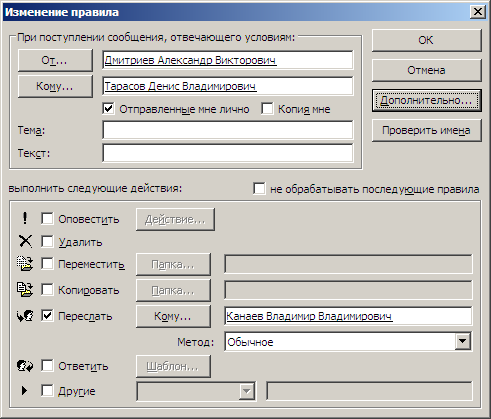
1. In the auto answer window, add a rule by clicking the corresponding button.
2. In the field "From…" select the desired sender (or senders)
3. In the field “To ...” specify your mailbox
4. Select the desired action below.
5. Click OKby completing the rule setup.

To enable or disable rules for auto replies, check or uncheck the box of the desired rule in the dialog box.
Hello everyone again. Today we will touch on a topic that is relevant, most likely, during business correspondence. It may be interesting for ordinary users, friendly communication through mail. Suppose you receive a letter from a respected person, your business partner. You opened it, read it, but you cannot answer it right now. A partner is very important to find out whether his letter reached you, read it. And of course, he will be waiting for your answer. Moreover, the letter is very important for him. How can the sender be notified that the letter has reached the addressee? Or, for example, you went on a business trip or vacation and you will not have the opportunity to check your mail and respond to incoming emails. For such purposes, and provided an answering machine. We will analyze it today. Let's consider how to enable this feature in the Yandex, Mail, Gmail mail service.
Let's start with Yandex.
How to enable the answering machine on Yandex mail?
The process of turning on the answering machine on this service is a bit complicated, but not as scary as it may seem. So, go to your mailbox.
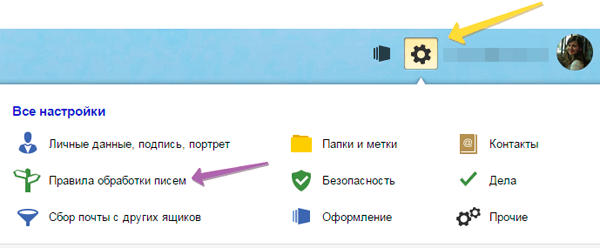
At the top of the right corner, click on the gear and in the menu select “ Rules for processing letters»
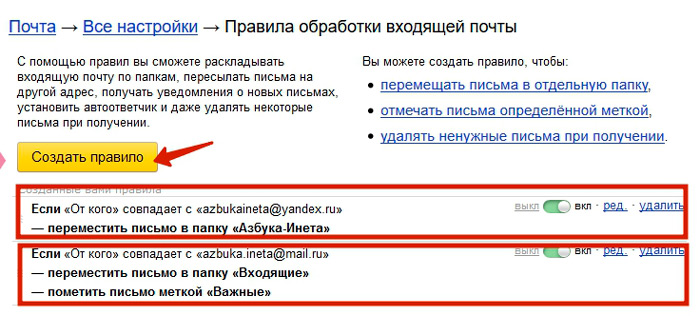
As we see, we have two rules that we created in the actions described in the article "".
In order for the sender to receive our autoresponder message, you need to create a new rule. Therefore, click on the button " Create a rule».
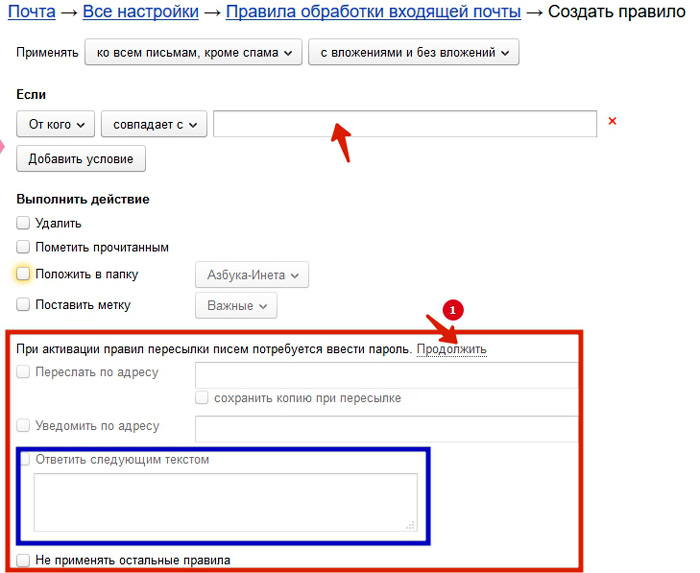
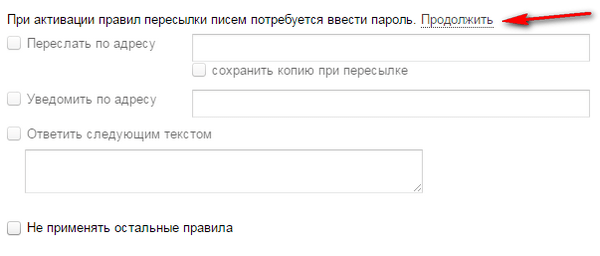
Here you are given to specify the condition under which a particular action will be performed. So, if you want an answering machine message to receive specific recipients, specify a comma separated them in the " From whom does it coincide with". We do not need the proposed actions here. We need to automatically send messages of certain content. But for this we are asked to enter the password from this mailbox. Click the link " Continue»
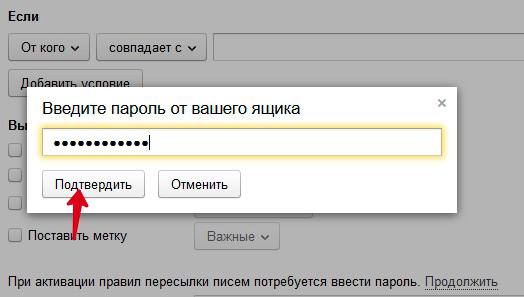
And in the modal window, enter the password, then click " Confirm».
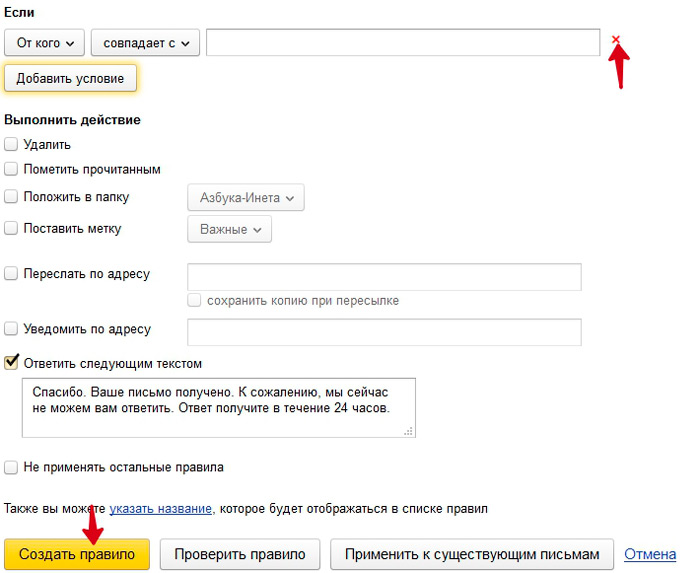
Now the lower block has become active, and we can specify the text that will be sent to the above recipients. If you want the answering machine to be for all incoming emails, then the input field “ matches with" need to remove. To do this, click on the small cross to the right of this field. There will be no conditions.
Try to create truthful text answering machine. Indicate in how many hours or minutes the sender will receive your reply. And by all means execute it in the specified time. This will increase your confidence. In order for the rule to take effect, click " Create a rule". Now an autoresponder message will be sent to all addresses of incoming emails. If you specified specific addresses, then the answering machine will send the message only to these addresses.
How to enable the answering machine in Mail.ru
In this mail service, enabling the answering machine is much easier.
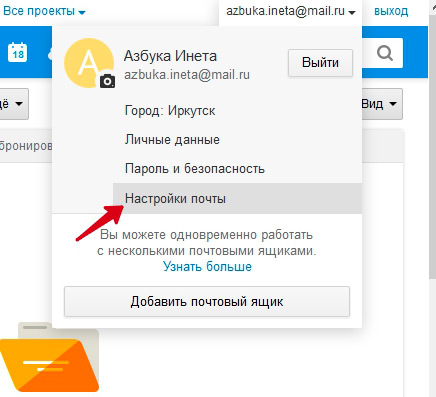
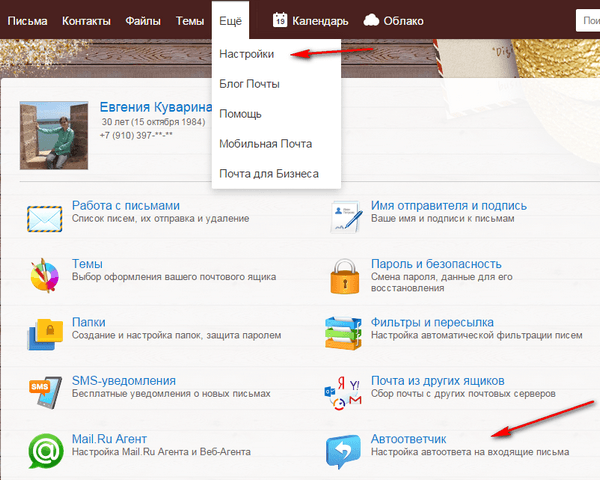
As always, go to your box, click on your address in the upper right corner and select " Mail settings».
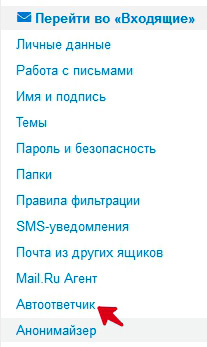
In the left settings, select the item " Answering machine»

Here we turn on the answering machine function, you can specify from which day and time this function starts and for which day if you need to set up an answering machine for certain days. If you uncheck " around the clock"Then the time setting fields will become active. Just specify the time interval in which the answering machine messages will be sent. The text of the message you specify below. After that click " Save»
This answering machine feature will apply to all incoming emails. If you need to set up an answering machine for specific addresses,.
Turning on an answering machine in GMAIL
Go back to your inbox (account) from Google.
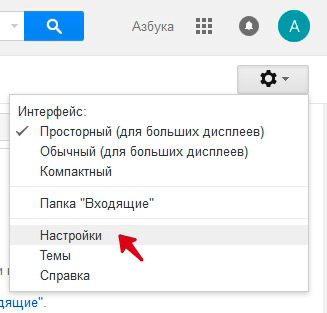
On the top right, click on the gear icon and select " Settings»

Go to the tab " Are common", Go down to the bottom and turn on the setting of the answering machine. We set the subject of the letter and the text itself. If necessary, check the box " Answer only from my contact list". In this case, recipients outside your contact list will not receive such messages.
That's so easy and simple, we installed an answering machine on popular mail services. See you again!
It is necessary to listen, but not to eavesdrop.
2014-11-19 Evgenia Kuvarin
Hello! Tell me, do you use the autoresponder service in the mail? If not, then it's time to change it, especially since it is easy to make it in a couple of minutes.
But first, let's figure out what an answering machine is for mail and why it is needed.
So, the answering machine is when the user sends you a letter, and in response he receives a message that is sent automatically and informs, for example, that you received the letter and will be happy to answer it.
Why install an answering machine in the mail? There are several reasons:
- Imagine that you went on vacation and do not plan to respond to letters within a couple of weeks. So that the sender is not nervous, without receiving a quick response, it should be warned. Send all the letters yourself too time consuming. And just then an answering machine will help you out.
- But this service does not necessarily use only during the holidays. Answering machine is a free method of attracting new subscribers and customers. Of course, it is not as effective as paid methods, but you should not write it off.
In the message you can specify a link to your blog, free or book or insert. I think you get enough purchase offers for various courses. At the same time you didn’t even subscribe to some mailings Turning on the answering machine, you can unobtrusively make your offer to all those who send you letters.
And besides this, the person who will send you a letter, having received an answer about its delivery, will be sure that the letter reached, and did not become a victim of various spam filters. 😉
How to set up an answering machine in the mail
So, how to set up an answering machine in the mail. All of you use different email clients. I will review the main ones and explain how to set up an answering machine Yandex, Google and Mail. Getting started!
Answering machine Yandex
Yandex mail, I think, is one of the most popular among Russian-speaking users. Let's start with it. In general, Yandex created many useful tools:, photo editor, mail for the domain. I'm not talking about tools for webmasters.
To enable the answering machine for Yandex mail, go to it, in the upper right corner click on the gear and select "Rules for processing letters."
And click on the "Create a rule" button.

But first, notice the black and white list. If you do not want to receive more emails from some addressee even to the spam folder, then add it to the black list. And in white, enter the verified and important addresses for you.
Now create a rule. First we choose which letters to use. Choose all.

The string with the condition is deleted.
Then we go down, we will be interested in the last line: “reply with the following text”.
First you need to activate it by entering the password from the mailbox:
By the way, to never forget passwords and keep them in a safe place, I advise the extension.
Now the field we need is activated, put a check mark and write the text for the answering machine. Finally, click save the rule. You can delete or change it at any time.
Send yourself an email from another mailbox to check how the answering machine works.
If you use mail for a domain from, for it the auto answer is configured in the same way.
Answering Machine for Mail Mail
Then turn on the answering machine and write a message.
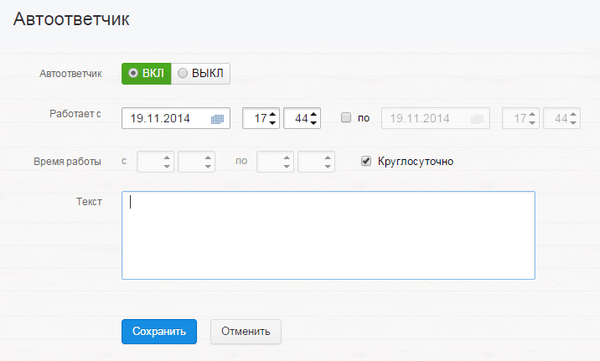
If you want to enable the option only for a certain period, for example, during the holidays, check the box and specify the end date for the service.
Gmail Answering Machine
For Google Mail, the configuration script is the same. Click on the gear in the upper right corner and in the general settings you go down to the bottom. Turn on the answering machine and specify the text of the letter. And, of course, save.

Setting up an answering machine will take you a few minutes, but may bring additional profits on the machine. Share in the comments, do you use this feature?
Sincerely, Evgeniya Kuvarin
Liked? Tell your friends!
Business correspondence on the Internet in our time has become commonplace. Through e-mails, the mass of necessary and important information is transmitted, documents are sent and even deals are concluded. What to do if your work is directly related to e-mail, but for some reason (vacation, business trip) you will not be able to access your email account? Outlook allows you to keep in touch with recipients even at a distance.
How to make an automatic answer in Outlook: patterns and rules
For the Outlook user, there are two options for automatic actions on incoming and outgoing messages: templates and rules.
Templates simplify the process of creating and sending messages, the text of which is often repeated, differing only in a few data (literally a couple of words or numbers). At their core, templates are stored messages into which new data is inserted just before sending.
Rules in Microsoft Outlook are actions that are automatically executed over messages, created on the basis of an existing template or specified conditions.
Let us analyze step by step the process of creating both templates and rules, as well as differences for different versions of Outlook.
Creating a template for Outlook 2003 and 2007 versions
It is unlikely that someone else uses these "dinosaurs" of the email world, but if you are lucky enough to get the workplace with this kind of software, then this instruction is for you.
Creating a template for Outlook 2010–2016 versions
The action algorithm in later versions is much simpler, but at the same time a new functionality has been added in the settings.
Creating a rule for versions of Outlook 2007 and 2003
To create a rule in Outlook versions 2003 and 2007, do the following:
What are the differences in settings for versions 2010, 2013, 2016
There is no fundamental difference in the settings. There are minor improvements in the process.